Easy Tech Tuts
How to Verify Identity on Stripe & Go Live & Activate Payments Account Fully 2026
By Impran M N
A brand-new Stripe account can generate test API keys and simulate charges right away, but nothing collected in test mode turns into real money until the account is activated. That activation is its own guided flow — Verify your business, Add your bank, Add extras, Review and submit — and skipping details in any of those four steps is what stalls a Stripe account in limbo. This guide follows that flow screen by screen, from the dashboard prompt that starts it to the tax-category setting that trips up a lot of first-time sellers.
01Find the activation prompt on your dashboard
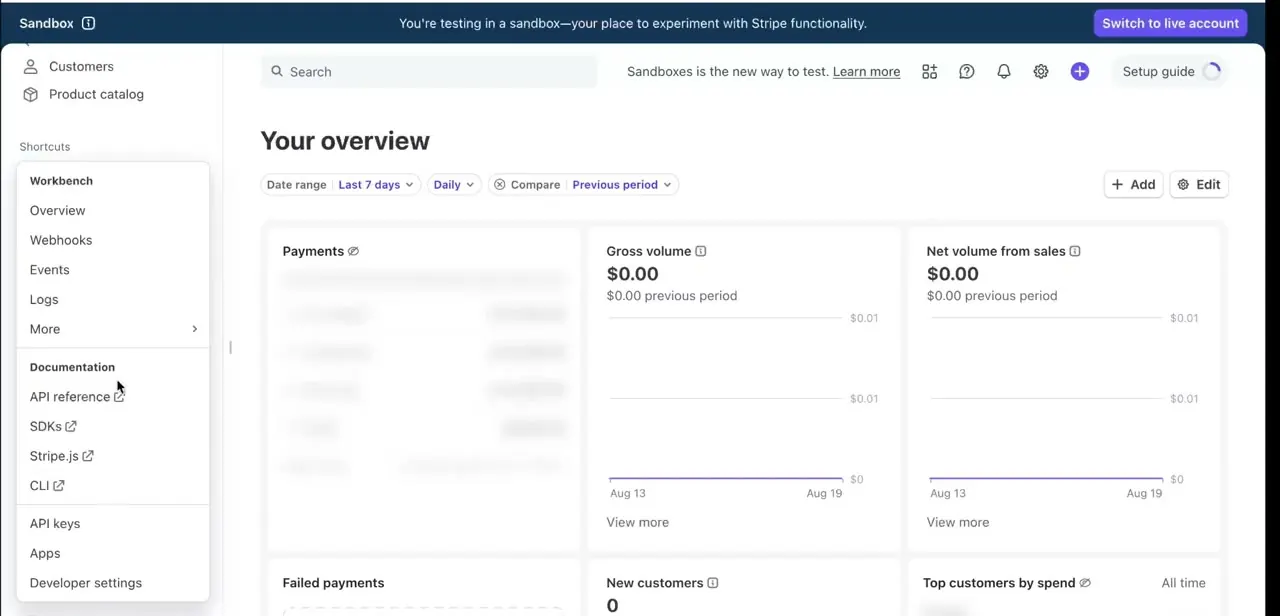
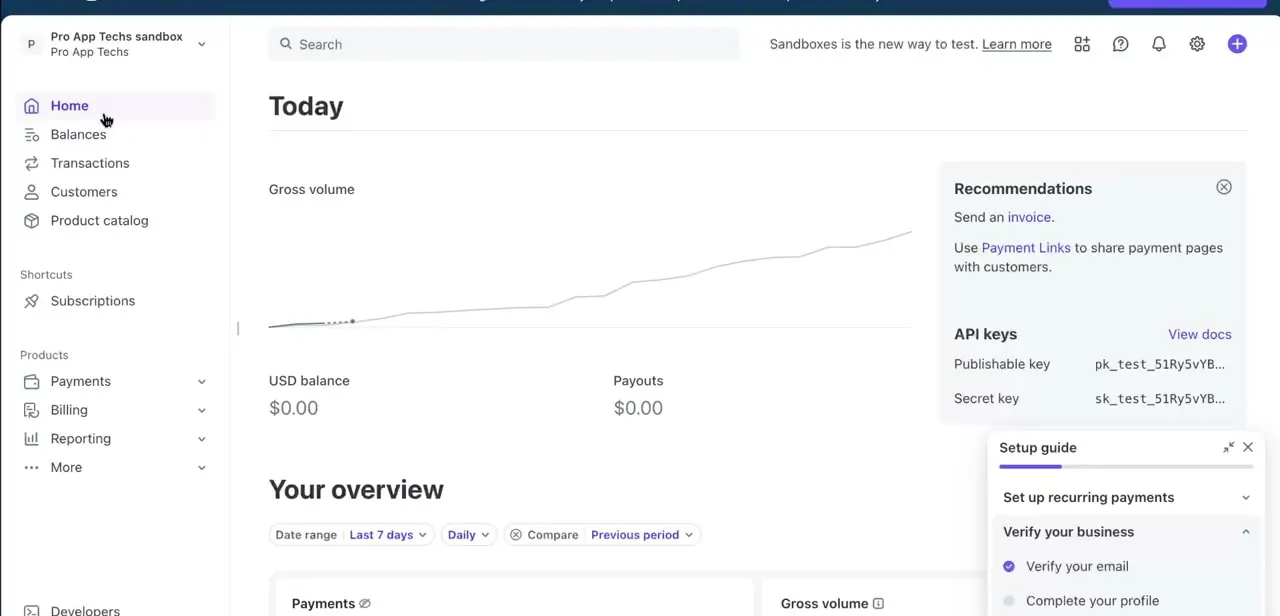
Your Stripe dashboard Home shows Gross volume, USD balance, and Payouts at a glance, but the piece that matters before you can accept real money is the Recommendations panel and the Setup guide in the corner, which lists Verify your business, Complete your profile, and similar unchecked items. Until those are done, the account stays capable of test transactions only — the API keys shown in Recommendations are prefixed pk_test_ and sk_test_ specifically because live keys don't exist until activation is finished.
02Start Activate your account and link or create a business
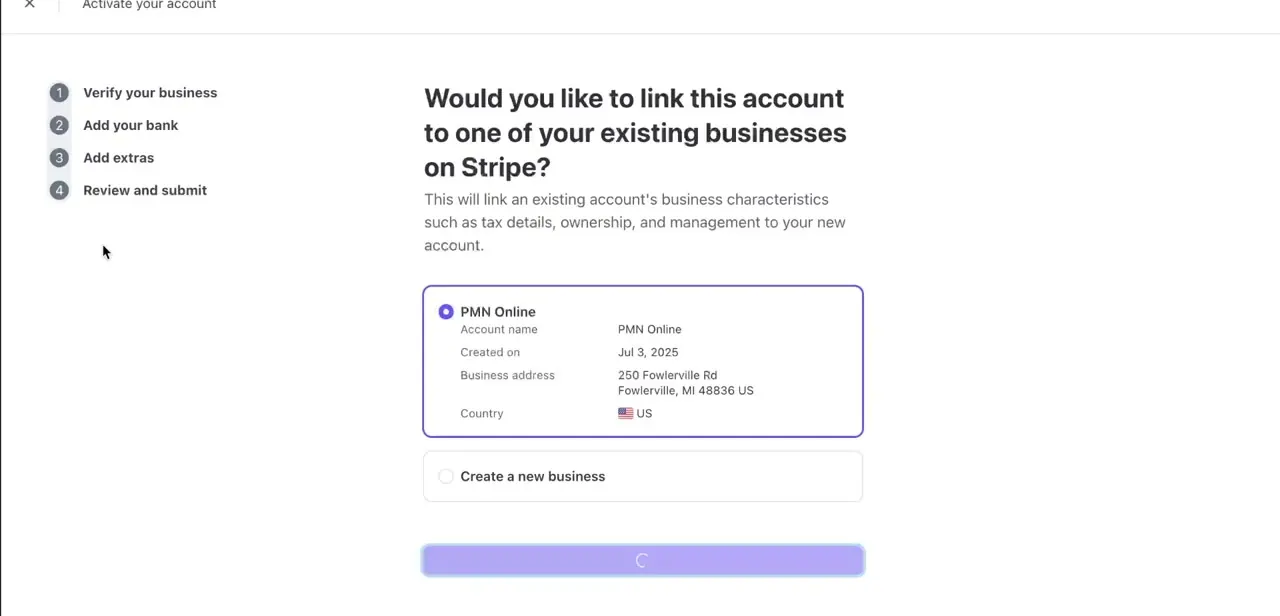
Clicking into activation opens a dedicated flow with four numbered steps on the left: Verify your business, Add your bank, Add extras, and Review and submit. The first real question it asks is whether to link the new account to an existing business already on your Stripe profile — shown as a card with the business name, creation date, and registered address — or start fresh with Create a new business. Linking an existing business carries over tax details, ownership, and management information automatically, which saves re-entering everything if you're opening a second Stripe account for the same company.
03Complete your business and banking details accurately
Once you've selected or created the business, Stripe walks through the specific identity and business details it needs — legal name, address, and the information tied to whichever KYC requirements apply in your country. The single biggest source of delay here is a mismatch: if the name or address you type doesn't exactly match what's on your official documents, Stripe's automated checks can't confirm the match and the review takes longer or gets kicked to manual review. Add your bank comes right after, since that's the account payouts will eventually land in once you're live.
04Set your tax category during Add extras
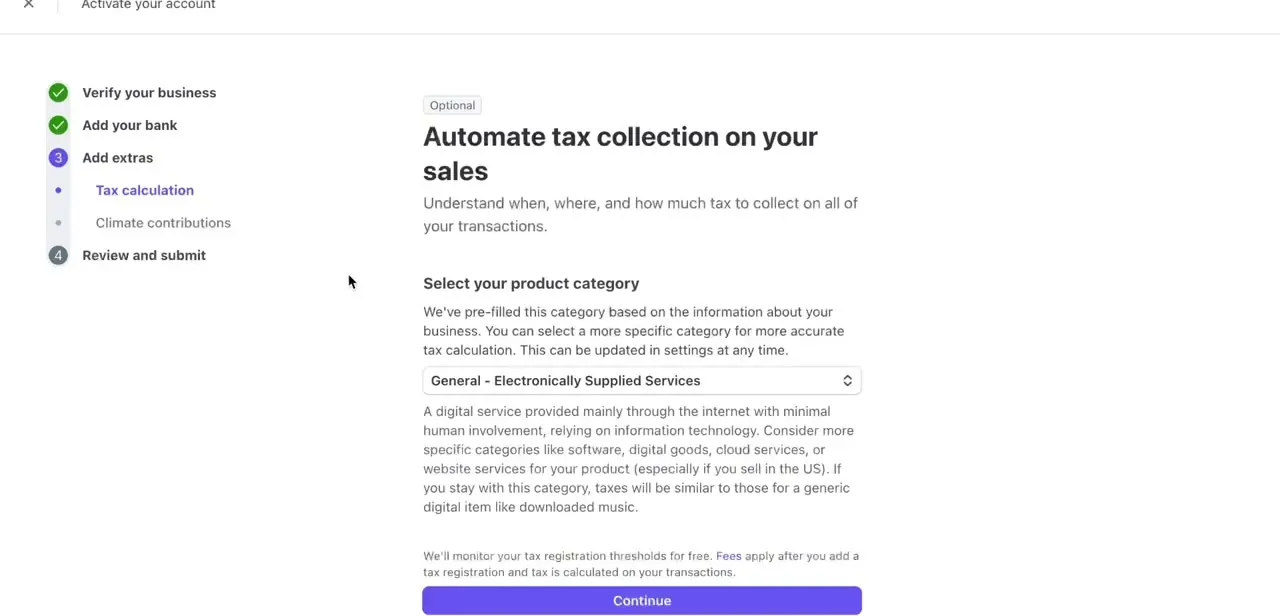
The Add extras step includes an optional but easy-to-get-wrong screen: Automate tax collection on your sales, where Stripe pre-fills a product category like "General - Electronically Supplied Services" based on what it knows about your business. That default description explicitly covers a generic digital item like downloaded music, but the screen recommends picking something more specific — software, digital goods, cloud services, or website services — if that better describes what you actually sell, since the category affects how tax gets calculated on every transaction going forward.
05Review everything before submitting
The final step, Review and submit, is the last chance to catch a typo in a business address or a mismatched name before it goes to Stripe for verification. Go through each section methodically rather than skimming — business details, bank account, and the tax category you just set — since resubmitting after a rejection takes longer than getting it right the first time.
06Wait for approval, then confirm you're in live mode
Verification times vary by country and account type, from a few minutes to a few business days, and Stripe emails you once it's resolved either way. Once approved, check the dashboard for the toggle between test and live mode — real transactions only process in live mode, and it's worth doing a small real payment yourself to confirm money actually reaches your bank account before pointing customers at a live checkout.
Frequently asked questions
What documents does Stripe require for verification?
Requirements vary by account type and country, but individuals and businesses are generally asked for identification and business registration details as part of the Verify your business step.
How long does Stripe identity verification take?
Verification times vary, but it can range from a few minutes to a few business days depending on your documents and account type.
Can I accept payments before verification is complete?
You can test your integration in test mode using the pk_test_/sk_test_ API keys, but real payments require completed verification and an activated account in live mode.
What happens if my verification is rejected?
Stripe will usually explain the reason for rejection, and you can resubmit corrected or clearer documents to try again.
Do I need to set a tax category during activation?
It's optional but recommended — the Add extras step pre-fills a general category, and picking a more specific one that matches what you sell improves how accurately tax gets calculated on your transactions.
About the author

Impran M N
I've been hooked on technology for as long as I can remember — especially the new tools and AI apps that seem to land every other week. Easy Tech Tuts is where I write up whatever I've just worked out: I do the task in the real product, record the screen, and turn it into the guide I wish I'd found first.