Easy Tech Tuts
How to Get Webhook Secret in Stripe Easily 2026
By Impran M N
Stripe webhooks let your app receive real-time updates on payments, subscriptions, and refunds, but none of that works until you've created a webhook endpoint and grabbed its Signing Secret. That secret is what proves an incoming request came from Stripe, not someone spoofing your endpoint, so skipping it isn't really an option for anything handling real payments. This guide covers where the webhook tools live in the Stripe dashboard, how the endpoint-creation wizard works, and what to do with the secret once you have it, including how Stripe actually wants you to rotate it if it ever leaks.
Before you start
- A Stripe account with dashboard access
- An HTTPS URL your app can receive POST requests on, or the Stripe CLI if you're testing locally without one yet
01Understand why the Webhook Secret matters
Every webhook event Stripe sends to your endpoint is signed with this secret. Your app recomputes that signature and compares it against the one in the request header.
If they match, the event came from Stripe; if not, it's rejected. Without this check, anyone who knows your endpoint URL could send fake payment or subscription events, and your app would have no way to tell the difference. Stripe's own guidance recommends pairing this with IP allowlisting too, since Stripe sends webhook traffic from a published set of addresses.
02Find Webhooks in your Stripe dashboard
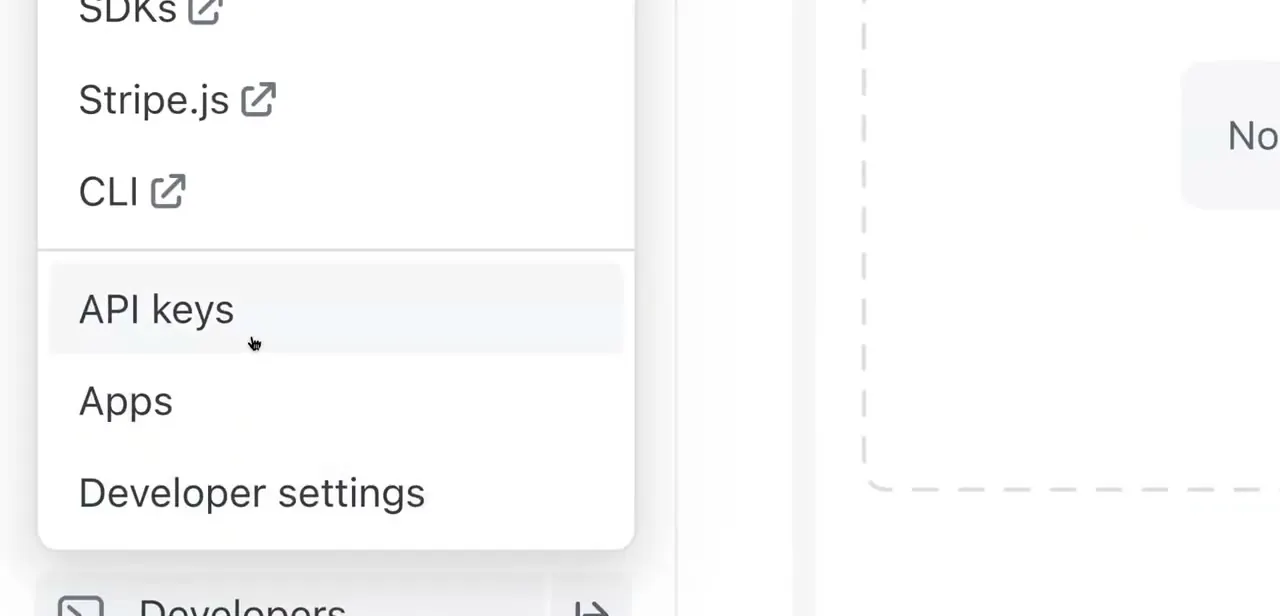
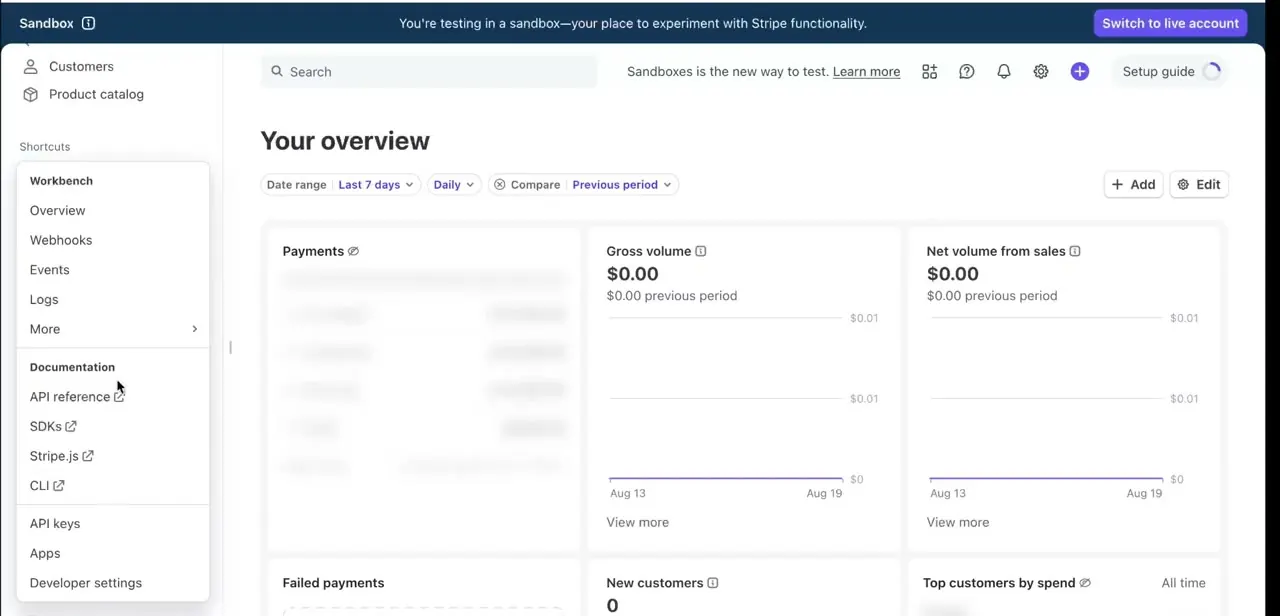
From the dashboard's Overview screen, the left-hand Shortcuts panel under Workbench lists Overview, Webhooks, Events, Logs, and more, with a separate Documentation section below for API reference, SDKs, and Developer settings. Webhooks sits next to Events and Logs because the three are related: Events is the full history of what happened in your account, and Webhooks is where you configure which of those events get pushed to your app automatically. If you're working in a sandbox, a banner across the top confirms you're testing, not touching live data, which is the safer place to build this out first.
03Start creating an event destination and choose your events
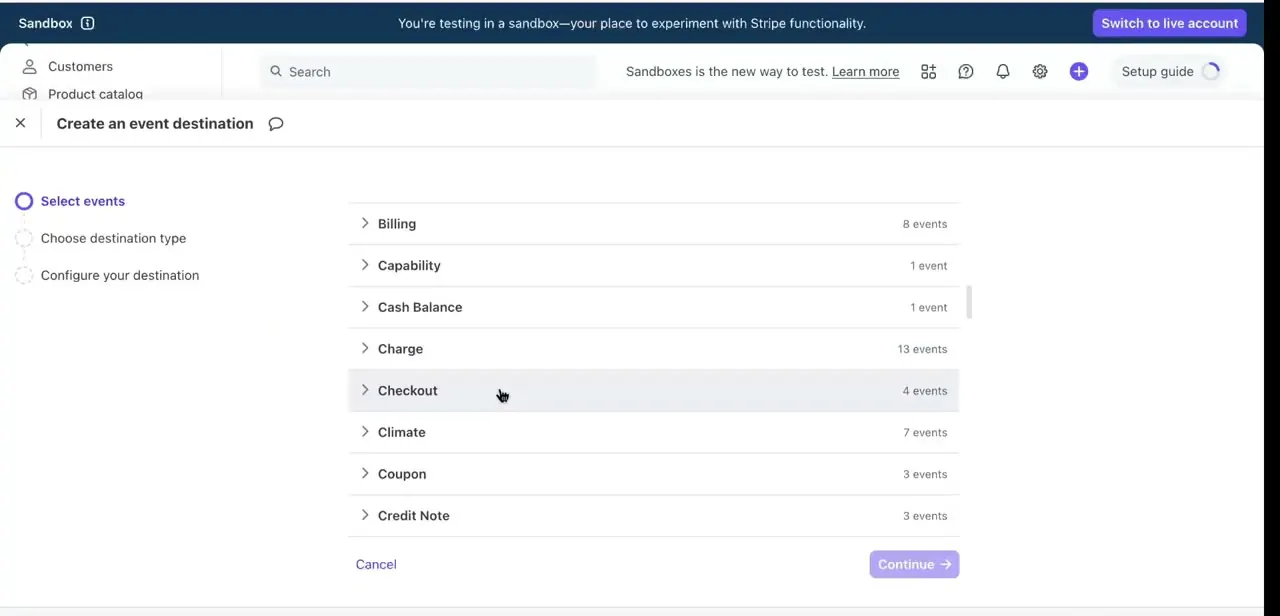
Clicking Create an event destination opens a multi-step wizard. The first step asks which account scope to listen to (Your account, unless you're building a Connect platform), which API version to use, and which event types to send.
Events are grouped by category: Billing, Capability, Cash Balance, Charge, Checkout, Climate, Coupon, Credit Note, and more, each showing how many distinct event types fall under it. Select only what your app needs to react to.
A checkout flow generally cares about Checkout and Charge events, while a subscription business will also want most of Billing. Fewer, targeted events keep your endpoint's logic simpler and cut the traffic it has to filter through.
04Choose a destination type
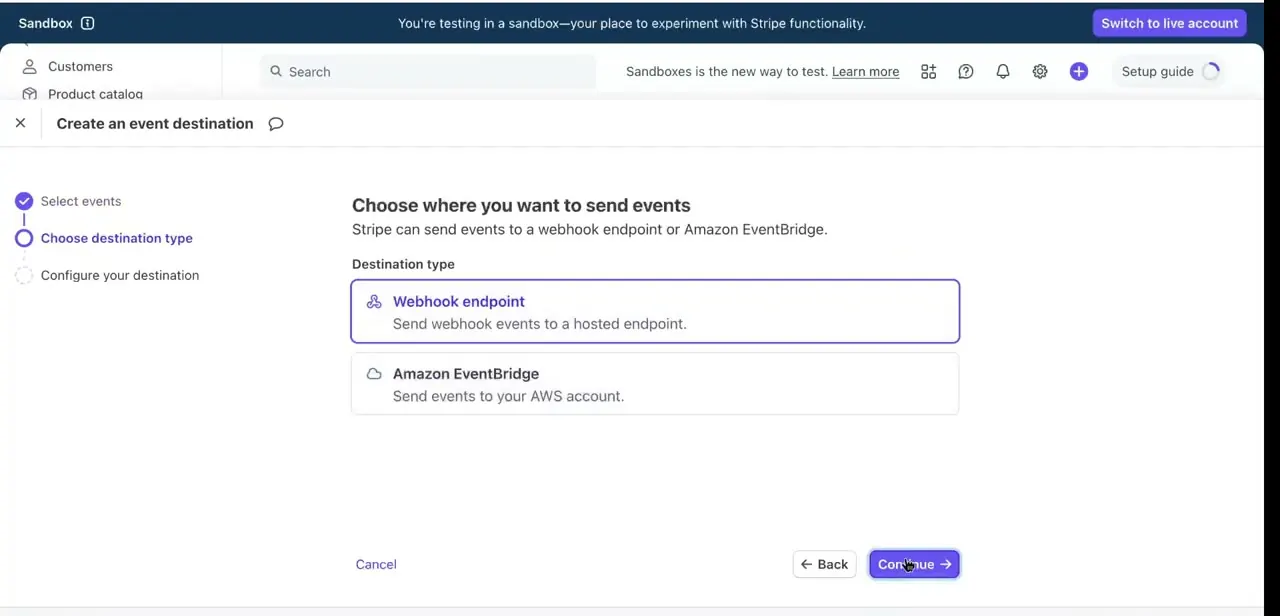
The next step asks where Stripe should send these events. There are three options: a Webhook endpoint (a URL you host that receives the events directly), Amazon EventBridge (routes events into your AWS account), or Azure Event Grid (routes events into Azure).
For most standard integrations, a Node, Python, or Ruby backend receiving and processing Stripe events, Webhook endpoint is the right choice. EventBridge and Event Grid only make sense if your infrastructure is already built around AWS or Azure event routing.
05Enter your endpoint URL and finish creation
The final step asks for the actual URL your app exposes to receive these events, something like https://yourapp.com/api/stripe/webhook, along with an optional description to tell endpoints apart later if you create more than one. Once you confirm, Stripe generates the endpoint and a unique Signing Secret tied to it.
Each endpoint gets its own separate secret, so a test endpoint and a live endpoint end up with two different values. Stripe also caps accounts at 16 registered webhook endpoints in total, so it's worth pointing several event types at one endpoint instead of creating a new one per feature.
06Copy the secret and store it safely
The Signing Secret appears on the endpoint's detail page behind a Reveal action, not shown in plain text by default. That friction is intentional: anyone with this value can forge valid-looking webhook events.
Copy it into your app's environment variables, a .env file locally or your host's secret manager in production, never directly into source code, and keep it out of version control entirely. If the secret is ever exposed, don't delete and recreate the endpoint. Stripe's documented way to rotate a secret is the Roll secret option in the endpoint's overflow menu, which keeps the old and new secret both valid for up to 24 hours while you update your server.
| Destination type | Where events go | Best for |
|---|---|---|
| Webhook endpoint | An HTTPS URL you host | Most standard integrations: Node, Python, Ruby, or similar backends |
| Amazon EventBridge | Your AWS account | Infrastructure already built around AWS event routing |
| Azure Event Grid | Your Azure account | Infrastructure already built around Azure event routing |
From Stripe's official webhooks documentation, checked September 2026.
When it doesn't work
No public URL yet to register an endpoint
Why: The app is still running on localhost, and Stripe only delivers events to publicly accessible HTTPS URLs.
Fix: Run the Stripe CLI's stripe listen --forward-to localhost:4242/webhook command instead of creating a dashboard endpoint. It prints its own temporary signing secret in the terminal, separate from any secret shown in the dashboard.
Stripe won't let you create another endpoint
Why: Accounts are capped at 16 registered webhook endpoints in total.
Fix: Delete unused test endpoints from Workbench, or point several event types at one existing endpoint instead of creating a new one per feature.
You suspect the secret has leaked
Why: It was pasted somewhere public: a repo, a support ticket, a client-side log.
Fix: Open the endpoint in Workbench, use the overflow menu's Roll secret option, and update your server with the new value before the old one expires, up to 24 hours later depending on the delay you choose.
Frequently asked questions
Where do I find my Webhook Signing Secret in Stripe?
On the details page of the specific webhook endpoint you created, inside the Webhooks tab in Workbench. Click Reveal to see it.
Is the Webhook Secret the same as my Stripe API key?
No. The Webhook Signing Secret verifies that incoming webhook events came from Stripe, while your Publishable and Secret API keys make outbound calls to Stripe's API. They're separate credentials with separate purposes.
What happens if I don't verify webhook events?
Your endpoint has no way to confirm a request really came from Stripe, leaving it open to spoofed payloads pretending to be real payment or subscription events. Stripe recommends pairing signature verification with IP allowlisting, since Stripe sends webhook traffic from a published set of addresses, as a second layer of defense.
Can I have a different Webhook Secret for each endpoint?
Yes. Every endpoint you create gets its own unique Signing Secret, and if you register the same URL for both test and live mode, each mode gets a different secret too.
What are my options besides a webhook endpoint?
Amazon EventBridge and Azure Event Grid, which route events into your own AWS or Azure account instead of an HTTPS URL you host. Most integrations don't need either; a webhook endpoint is the standard choice.
What do I do if my Webhook Secret leaks?
Don't delete the endpoint. Use the Roll secret option in the endpoint's overflow menu instead. Stripe keeps the old secret valid for up to 24 hours so you can update your server before it expires.
Sources and last check
Dashboard screens and the wizard steps come from a walkthrough recorded in 2025. The destination-type options, the endpoint limit, and secret-rotation guidance were re-checked against Stripe's official webhooks documentation in September 2026. That check found two corrections: Stripe now offers Azure Event Grid as a third destination type alongside Webhook endpoint and Amazon EventBridge, and Stripe's documented way to rotate a leaked secret is the endpoint's Roll secret option, not deleting and recreating the endpoint as this guide previously said.
About the author

Impran M N
I've been hooked on technology for as long as I can remember — especially the new tools and AI apps that seem to land every other week. Easy Tech Tuts is where I write up whatever I've just worked out: I do the task in the real product, record the screen, and turn it into the guide I wish I'd found first.