Easy Tech Tuts
How To Automate Stripe Payment Notifications With Zapier Easily 2026
By Impran M N
Checking a Stripe dashboard repeatedly to catch new sales is a habit worth automating away. Zapier can watch your Stripe account for payment events and immediately fire off a notification through another app the moment one happens, so your team hears about revenue in real time instead of on a refresh cycle. This guide walks through building that Zap from scratch — choosing Stripe as the trigger, connecting the account, and wiring up an action step that sends the alert.
01Start a new Zap and choose Stripe as the trigger
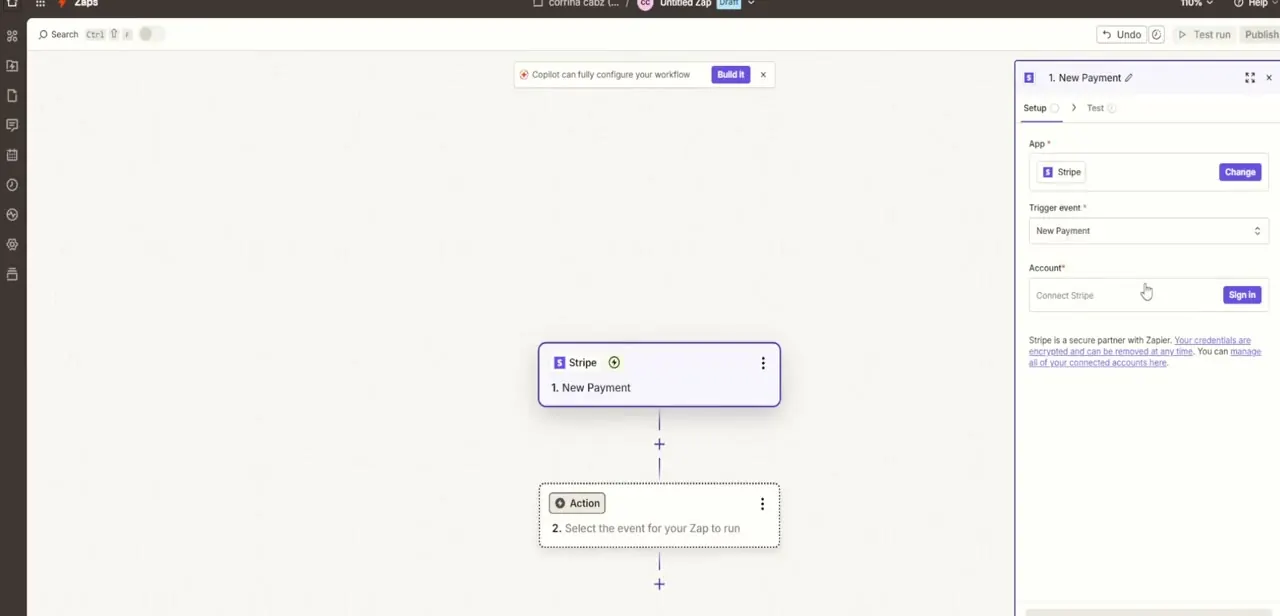
From the Zaps builder, the first step block is labeled "1. New Payment" once you've selected Stripe as the App and New Payment as the Trigger event.
The setup panel on the right lists the App, Trigger event, and Account fields in order — each one has to be filled before you can move to testing. This is also where Zapier offers a Copilot option to configure the whole workflow automatically, but working through each step manually gives you more control over exactly what triggers the automation.
02Connect your Stripe account
Click Sign In next to the Account field to authenticate. Zapier explains right on the panel that Stripe is a secure partner — your credentials are encrypted, can be removed at any time, and all connected accounts are manageable from one place. Once connected, this Stripe account becomes the source Zapier watches for the New Payment event you selected, and you won't need to reauthenticate it for other Zaps built on the same account.
03Add an action step and pick the app
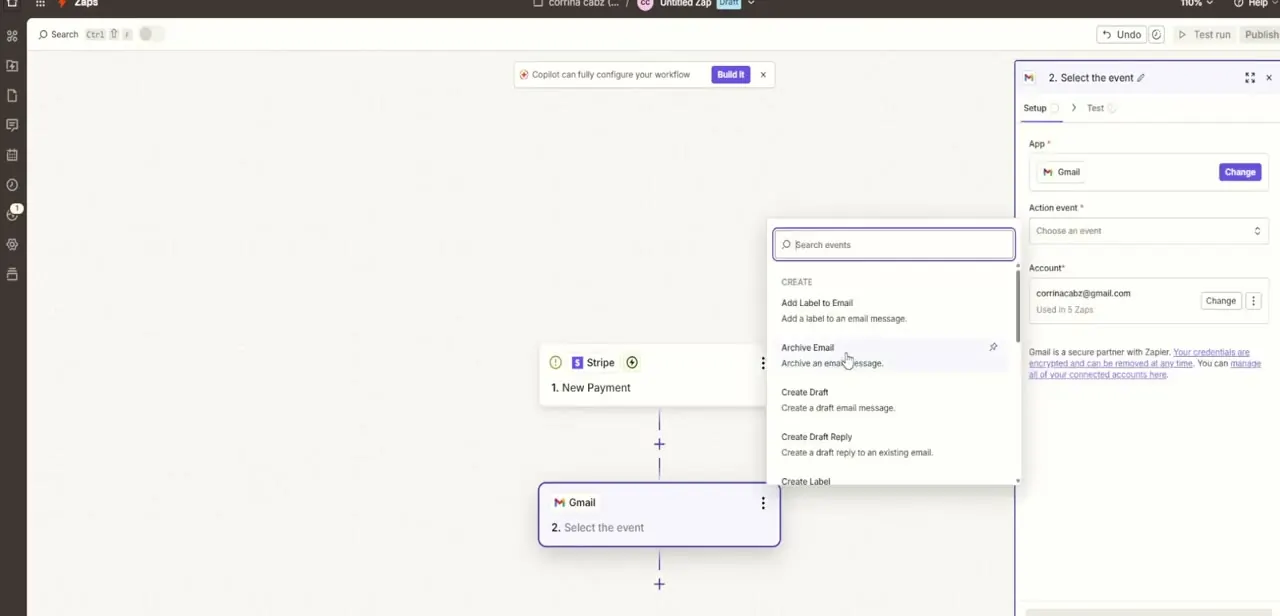
Below the Stripe trigger, click the action block to choose what happens next. In this build, Gmail is selected as the action app, and clicking into the Action event field opens a searchable list of everything Gmail can do — Add Label to Email, Archive Email, Create Draft, Create Draft Reply, Create Label, and more, scrollable in a dropdown. The Stripe payment event supplies the data; the action step decides where that data goes and in what form.
04Configure Send Email as the action
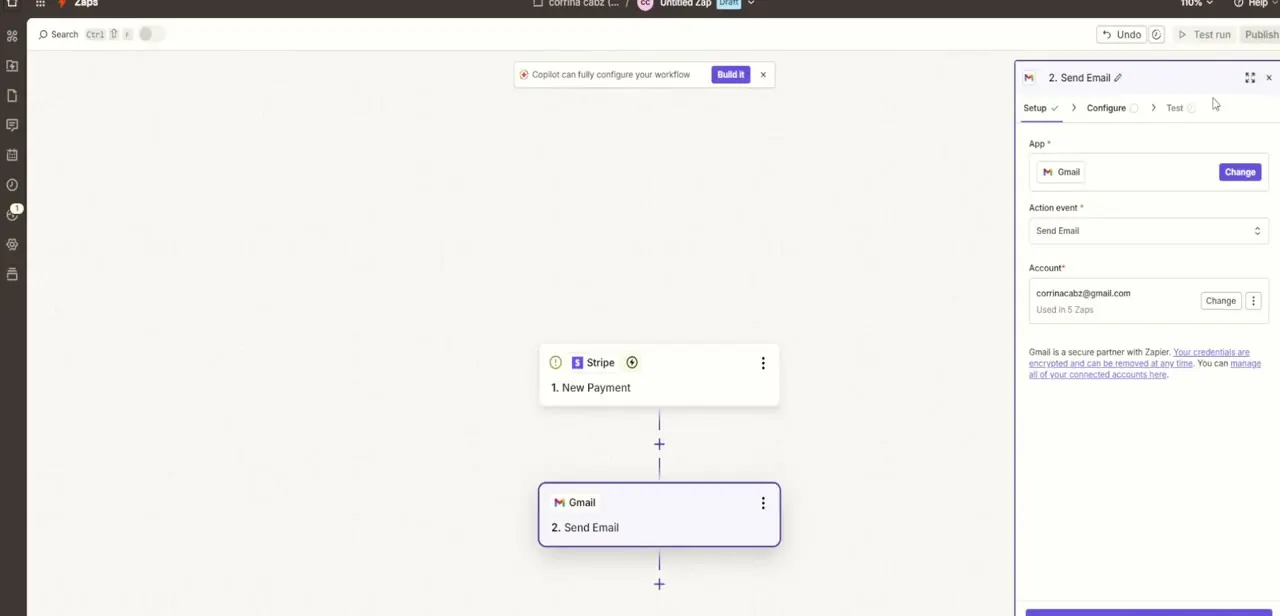
Selecting Send Email from that list sets Gmail's action event and moves the step into a Configure stage, visible in the tab row above the setup panel: Setup, Configure, Test. The account shown is already connected — the same Gmail credentials Zapier uses across other Zaps tied to that inbox — so there's no separate sign-in needed here if you've authenticated Gmail before. From this point the Configure tab is where you'd build the actual message using data pulled from the Stripe trigger.
05Map Stripe's payment data into the message
The Configure stage is where the notification actually takes shape — you pull fields from the Stripe trigger's test data, such as the customer's name, the charge amount, and the currency, and drop them into the email's subject and body as dynamic tokens. Because these are live references back to the trigger step rather than typed-in text, every new payment event fills in its own values automatically when the Zap runs for real. Keep the subject line short and specific, like a customer name and amount, since that's what someone will see first in a notification.
06Test the trigger with real Stripe data before publishing
Before publishing, run a test on the Stripe trigger step to fetch a genuine payload from your account — Zapier needs at least one real or recent payment event to pull sample data from, which is also what lets you confirm the field names you're mapping actually match what Stripe sends. Testing the full Zap end to end, not just the trigger, catches formatting problems — like a currency showing as a raw number instead of a formatted amount — before a live customer payment triggers a broken-looking alert.
Frequently asked questions
Does this only work with Slack or Teams for notifications?
No — the action step can be any app Zapier supports. This build uses Gmail's Send Email action, but the same Stripe trigger works with Slack, Teams, SMS, or any other notification app you connect as the action step.
How do I include the payment amount in the notification?
Map the amount field from the Stripe trigger's test data into your action step as a dynamic token, so each new payment fills in its own value automatically rather than showing static text.
Do I need to test the Zap before turning it on?
Yes. Testing the Stripe trigger pulls a real payload so you can confirm your field mappings are correct, and testing the full Zap catches formatting issues before a live payment triggers a broken alert.
Is my Stripe account data secure when connected to Zapier?
Zapier states that credentials are encrypted, can be removed at any time, and connected accounts can be managed centrally from your Zapier account settings.
Can I trigger notifications for failed payments instead of successful ones?
Yes, Stripe exposes different trigger events beyond New Payment, including failed payment events, which you can select from the same Trigger event dropdown when setting up the first step.
About the author

Impran M N
I've been hooked on technology for as long as I can remember — especially the new tools and AI apps that seem to land every other week. Easy Tech Tuts is where I write up whatever I've just worked out: I do the task in the real product, record the screen, and turn it into the guide I wish I'd found first.