Easy Tech Tuts
How to Integrate Square with Squarespace as Payment Option Easily 2026
By Impran M N
Connecting Square to Squarespace lets you accept payments securely while keeping your online and in-person sales in the same system — useful if you already run a physical till on Square and want your website checkout to match. This guide walks through the exact settings screens involved, from logging in to finding the Payments section buried inside Selling settings, so you know where to click before you get there.
01Log into your Squarespace account
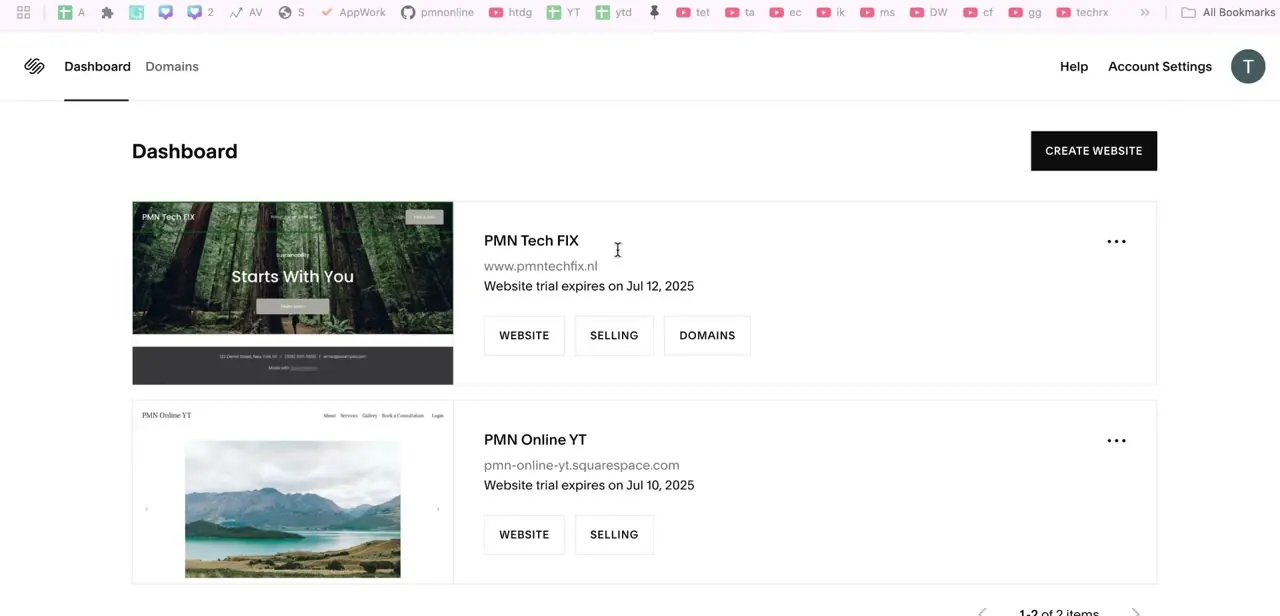
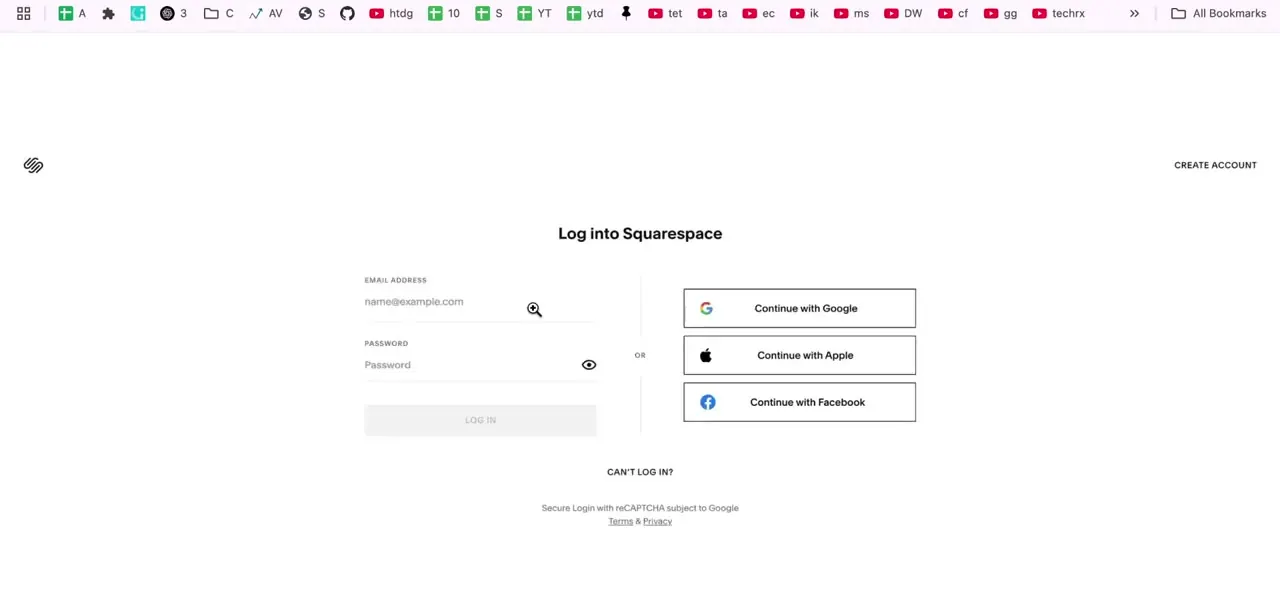
Head to the Squarespace login screen and sign in with your email and password, or use one of the Continue with Google, Apple, or Facebook options if that's how your account was originally set up. Once you're in, Squarespace takes you to your dashboard, where you'll pick the specific site you want to connect Square to if you manage more than one.
02Open your site dashboard and find Settings
From your site's home panel — which shows a Get started checklist, your site preview, and links like Manage Domain and Publish Your Site — look at the left-hand navigation. Website, Products & Services, Scheduling, and Invoicing all sit here, but the setting you need is reached through the gear icon at the bottom of the sidebar, labeled Settings.
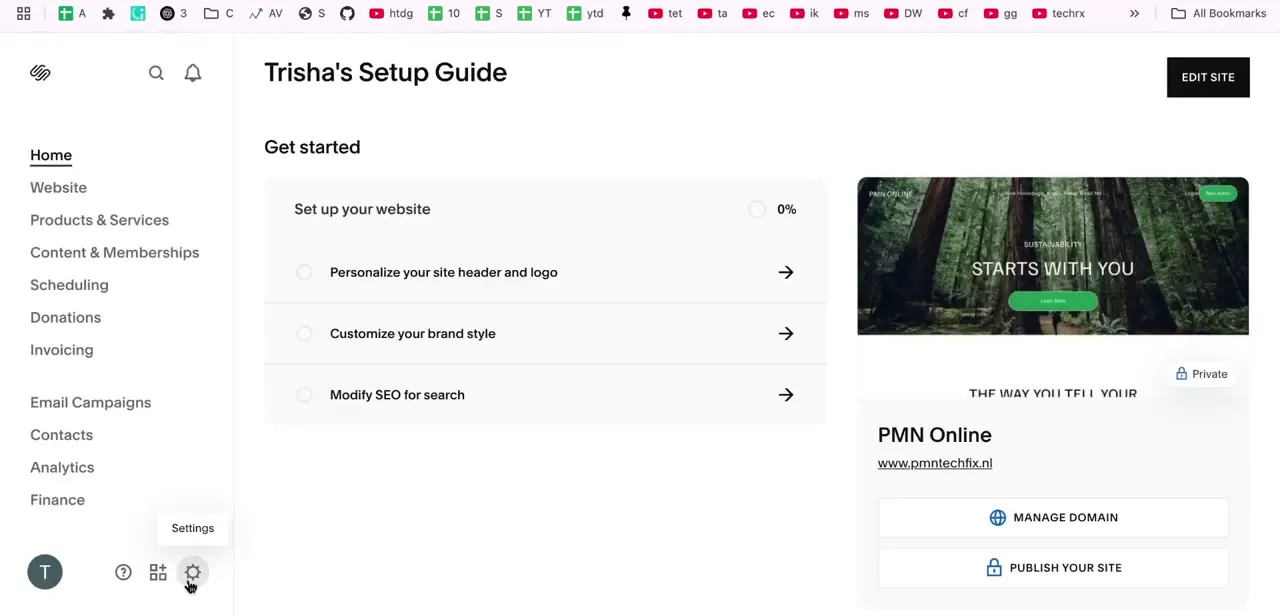
03Go to Selling, then Payments
Inside Settings, the left column lists categories including Website, Domains & Email, Customer Notifications, Selling, Brand, Marketing, Third Party Tools, and Billing. Click Selling, and you'll see a grid of cards: Business Information, Payments ("Add ways to receive payments"), Customer Accounts, Low Stock Alerts, Cart, and Checkout. Payments is the one you want — it's specifically where every payment processor your store can accept gets added and configured.
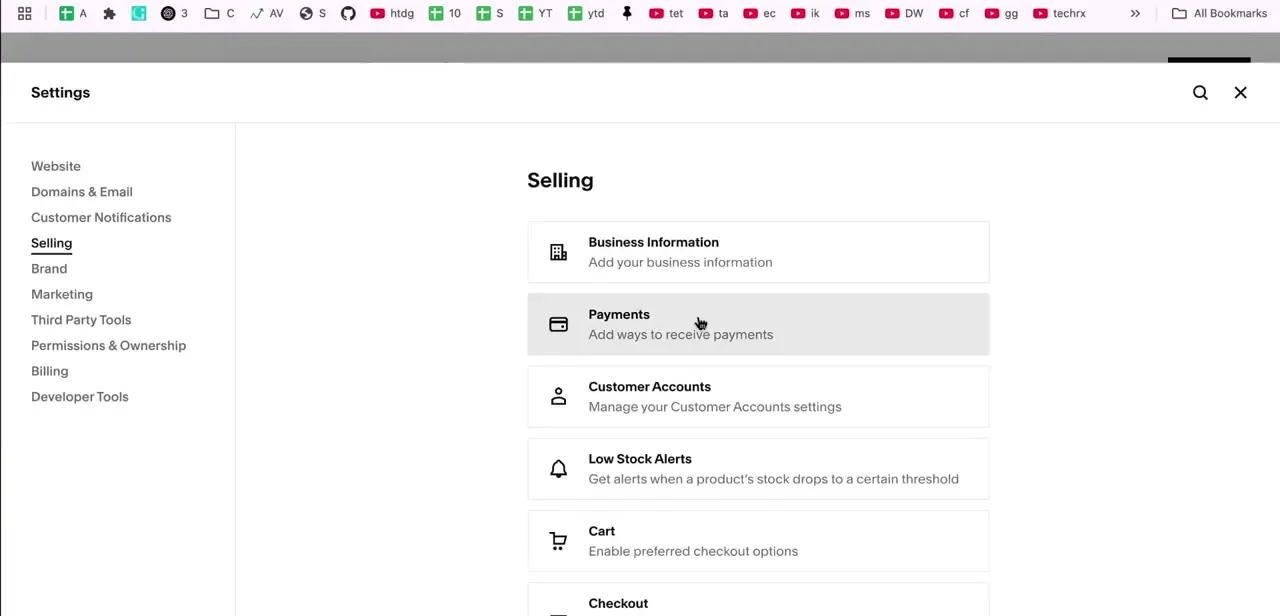
04Select Square from the list of payment providers
On the Payments page, Squarespace lists the processors available to connect, and Square appears as one of the options alongside Squarespace's own native payments and others depending on your region. Click Square to start the connection flow rather than trying to configure it as a generic card processor — the dedicated Square option is what triggers the account-linking step.
05Sign in to Square and authorize the connection
You'll be prompted to log into Square using the credentials tied to your actual business account — the same one used for your Square POS or dashboard if you already sell in person. Signing in here isn't just verification; it's what authorizes Squarespace to talk to your Square account and pull in payment processing on your behalf, so double-check you're using your business account rather than a personal or test one.
06Let Squarespace complete the sync
After authorization, Squarespace automatically finishes linking the two accounts — there's no manual API key or token to copy over. Once the sync completes, Square shows up as an active, connected payment method back on the Payments settings page, ready to be offered at checkout alongside anything else you've enabled.
07Test the connection before customers see it
Go to your storefront's checkout page and either place a small test order or simply confirm Square appears as a selectable payment option. This is worth doing before announcing the change anywhere, since payment integrations are exactly the kind of setting where a small misconfiguration only becomes obvious the moment a real customer tries to check out.
Frequently asked questions
Why connect Square to Squarespace instead of using just one platform?
Square adds real-time sales tracking, easy refunds, and POS integration, which matters most if you sell both online through Squarespace and in person through a Square terminal — both channels stay in sync.
Do I need a Square account before starting?
Yes. You'll need an existing Square business account to sign in with when Squarespace prompts you to authorize the connection during setup.
Will my existing Squarespace payment methods still work?
Yes. Square is added as an additional option in the Payments settings alongside whatever you already have enabled, so customers choose from all active methods at checkout.
Where exactly do I find the Square option in Squarespace?
Go to Settings → Selling → Payments. That page lists every payment processor available to connect, including Square, separate from Business Information, Customer Accounts, and Checkout settings on the same Selling screen.
How do I know the integration is working?
After connecting, visit your site's checkout page and either run a test order or check that Square appears as an active payment method in the list customers see.
About the author

Impran M N
I've been hooked on technology for as long as I can remember — especially the new tools and AI apps that seem to land every other week. Easy Tech Tuts is where I write up whatever I've just worked out: I do the task in the real product, record the screen, and turn it into the guide I wish I'd found first.