Easy Tech Tuts
How to Go Live with Squarespace Website, Can I Publish My Squarespace Website for free in 2026?
By Impran M N
Once a Squarespace site is designed and full of content, the only thing standing between it and the public is one settings toggle and a plan selection — but that toggle is buried a couple of menus deep, which trips people up more than the actual design work does. A common source of confusion is also the free-publishing question: Squarespace lets you build and preview a site on a free trial, but taking it live to the public requires an active paid plan. This guide shows exactly where that setting lives and walks through picking a plan so your site is visible at your domain within a few minutes.
01Log into your Squarespace account
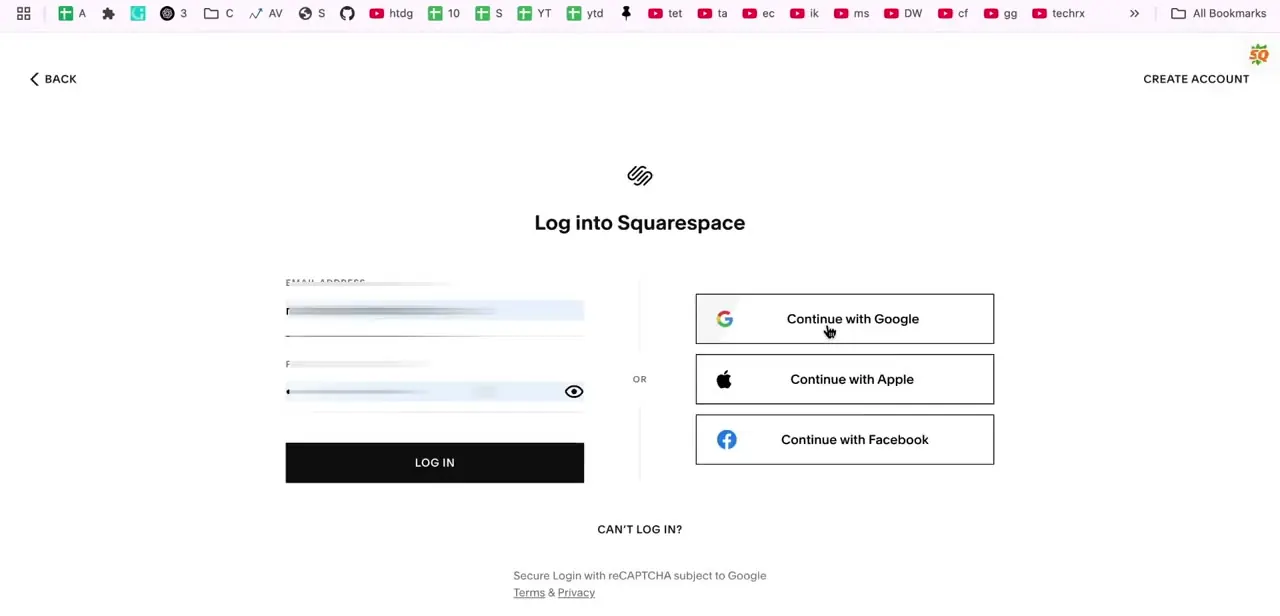
Go to squarespace.com and click Login in the top right. On the sign-in screen, enter your account email and password, or use one of the faster options — Continue with Google, Apple, or Facebook — if your account is linked to one of those. The login screen also has a Can't log in? link if you've forgotten your credentials, and a reCAPTCHA-backed secure login notice, which is normal and just Squarespace's standard account protection.
02Open your site from the Dashboard
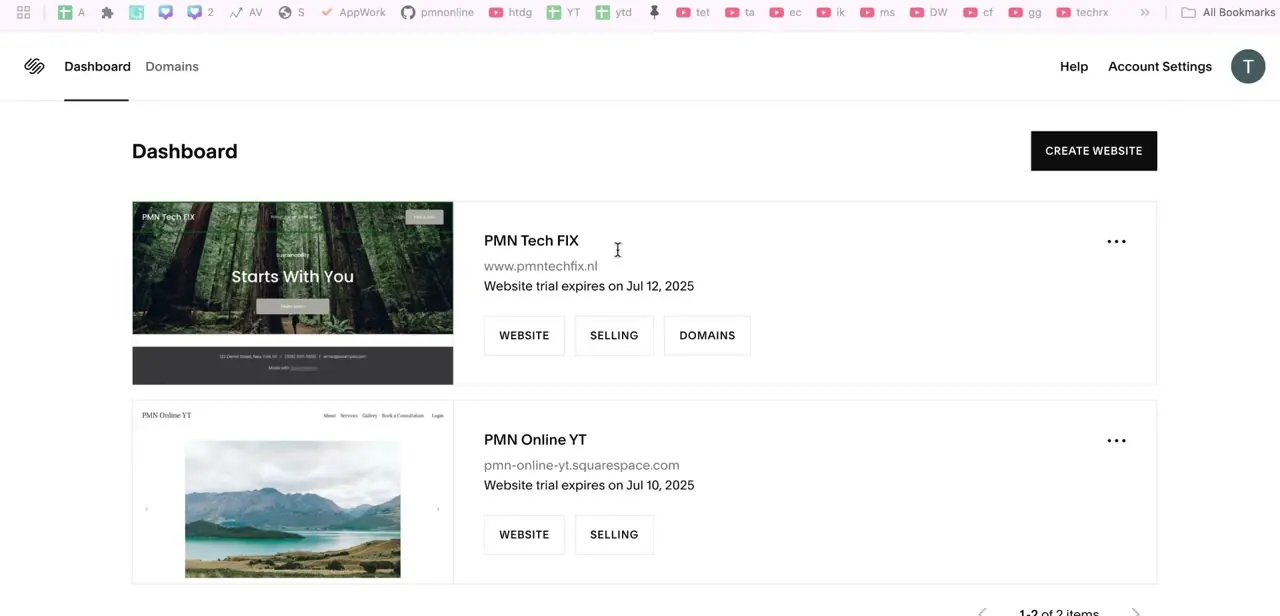
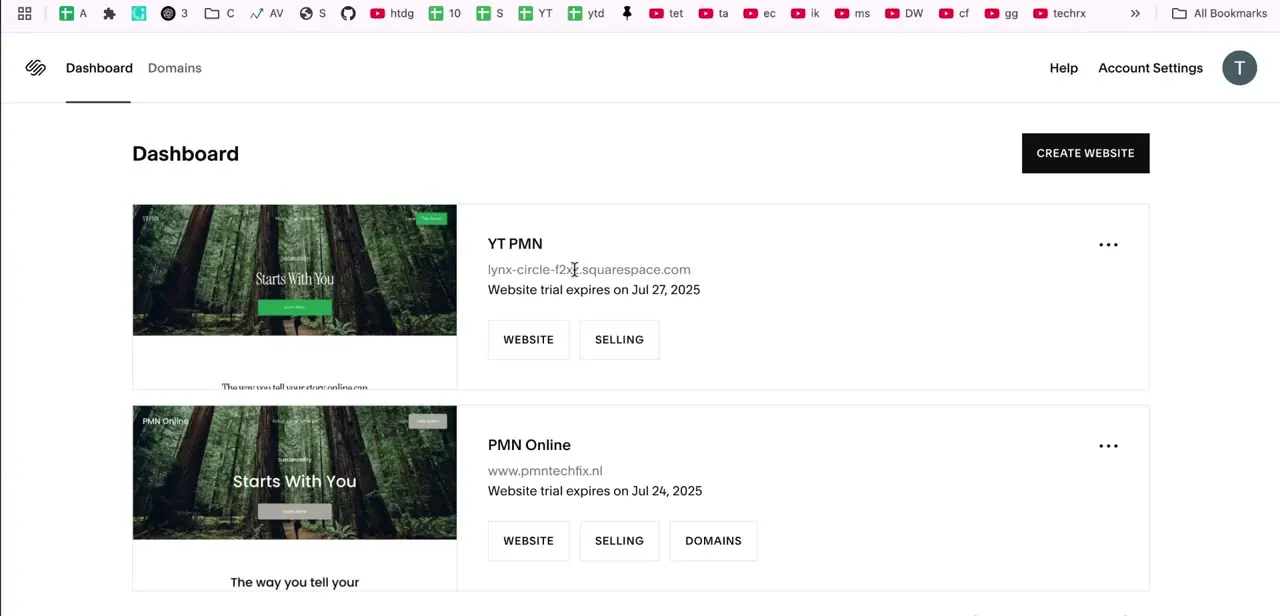
After logging in, you land on the Dashboard, which lists every site tied to your account as a card with its name, current domain (often a placeholder squarespace.com address before launch), and trial status — including the exact date the trial expires if you haven't upgraded yet. Click into the site you're ready to publish; each card has Website and Selling buttons, and if you already own a custom domain, a Domains button appears too. If you manage more than one project, double-check you're opening the right card before continuing, since the settings you change next apply only to that site.
03Open Settings and go to Website
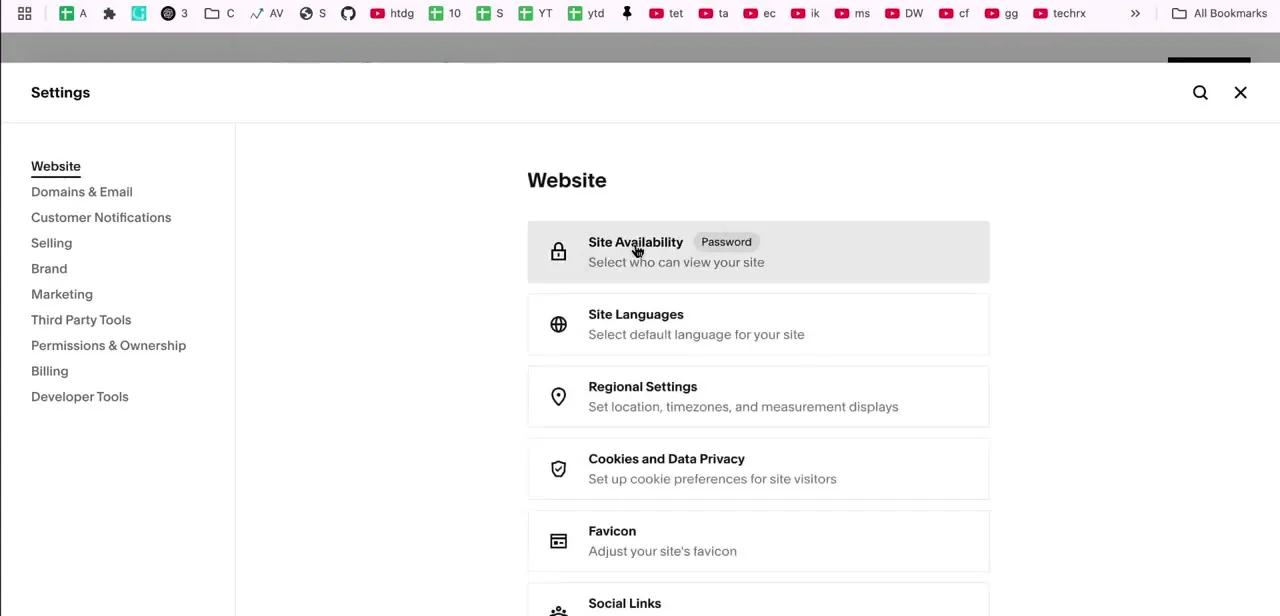
Inside your site's editor, open Settings from the main menu. The Website section is the default landing view and lists a column of options — Site Availability, Site Languages, Regional Settings, Cookies and Data Privacy, Favicon, Social Links, and more further down. Site Availability is the one that controls whether your site is public, private, or password-protected, and it currently shows a Password tag here, meaning the site is restricted to only visitors with the password until that's changed.
04Open Site Availability and upgrade to publish
Clicking into Site Availability shows your current visibility setting and, if you're still on a free trial, a button labeled something like Upgrade to Publish rather than a simple toggle. That's Squarespace's way of confirming your site is otherwise ready — the only thing missing is a paid plan attached to the account, which is required before the site becomes visible to the public at large. Click that button to move into the plan selection flow.
05Select a plan and complete checkout
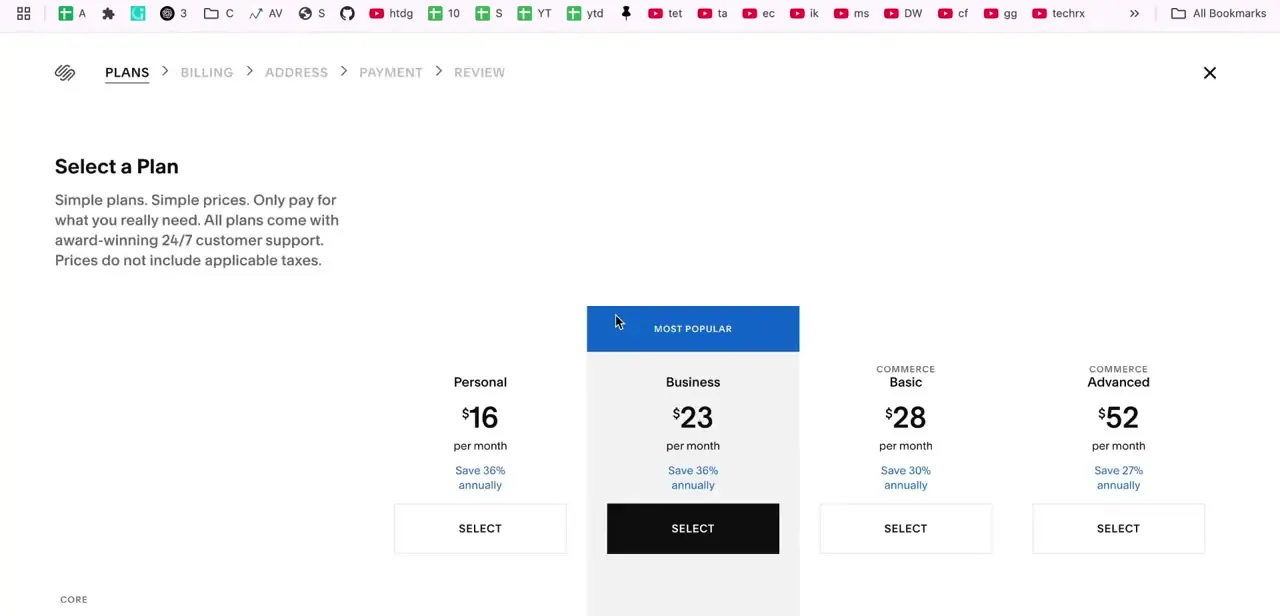
The plan screen lays out Personal, Business, and two Commerce tiers side by side, each with a monthly price and an annual-billing discount clearly marked — the Business plan is typically flagged Most Popular. Pick based on what your site actually needs: Personal covers a straightforward content site, while the Commerce tiers add store and selling features if you plan to sell products. After selecting a plan, the checkout flow moves through Billing, Address, Payment, and Review before finalizing — complete each step with accurate billing details, since this is what activates the paid subscription your site needs to go public.
06Do a final check before publishing
Before you confirm the upgrade, scroll through your site one more time looking for typos, placeholder text like "Lorem ipsum," broken links, or images that never got swapped out. This is also a good moment to check that your navigation menu, footer links, and contact forms all work as expected, since a live site gets real visitors immediately and first impressions on a freshly launched page are hard to walk back.
07Confirm you're live and connect your domain
Once payment completes, your site publishes immediately and Site Availability updates to reflect that it's public. If you're using a free squarespace.com subdomain for now, you can add and connect a custom domain later from the same Settings area without taking the site offline again. Visit your site's URL in a private browser window to confirm it loads the way you expect for a first-time visitor, not just how it looks while you're logged in as the owner.
Frequently asked questions
Can I publish a Squarespace website for free?
You can build and preview a site for free during the trial period, but making it visible to the public requires an active paid plan — Squarespace shows an "Upgrade to Publish" prompt in Site Availability until you subscribe.
Where do I find the setting to make my Squarespace site public?
Go to Settings, then Website, then Site Availability. This controls whether your site is public, private, or password-protected, and is where you'll see the upgrade prompt if you're still on a trial.
How long does it take for a Squarespace site to go live after upgrading?
Publishing itself is immediate once payment completes. If you're connecting a new custom domain rather than using the default squarespace.com address, DNS changes can take longer to fully propagate.
Which Squarespace plan do I need just to publish a basic site?
The Personal plan is enough for a standard content site with no selling features. If you plan to sell products, choose one of the Commerce tiers instead.
Can I switch plans after my site is already live?
Yes — Squarespace lets you upgrade or downgrade your plan at any time from Billing in Settings without taking your site offline.
About the author

Impran M N
I've been hooked on technology for as long as I can remember — especially the new tools and AI apps that seem to land every other week. Easy Tech Tuts is where I write up whatever I've just worked out: I do the task in the real product, record the screen, and turn it into the guide I wish I'd found first.