Easy Tech Tuts
How To Connect Squarespace Domain To Google Sites 2026 Easily
By Impran M N
If you bought a domain through Squarespace but want to build your actual site in Google Sites, you don't need to move the domain anywhere — you just need to point it there and prove you own it. Google requires domain verification before it will let a custom domain go live on a Sites project, and that verification step is where most people get stuck, staring at a red "not verified" message with no idea what to do next. This guide walks through starting the connection in Google Sites, completing ownership verification through Search Console, and finishing the DNS side back in Squarespace, so the domain resolves cleanly to your new site.
01Open your Google Sites project
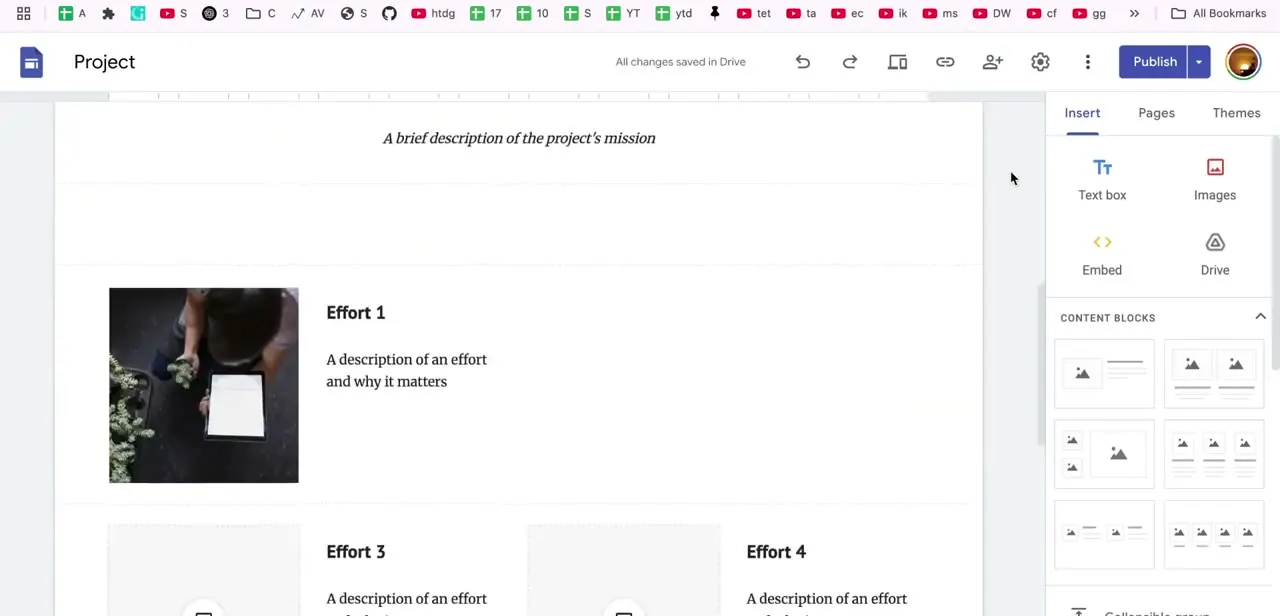
Start from the Sites project you want the domain attached to. The editor is where you'll build and publish the site itself, and it's also where the custom domain option lives, tucked into the settings menu next to Publish in the top right. Get the site into a publishable state first — even a basic homepage — since Google won't let you finish attaching a domain to a project that has nothing published yet.
02Enter your domain in Google Sites
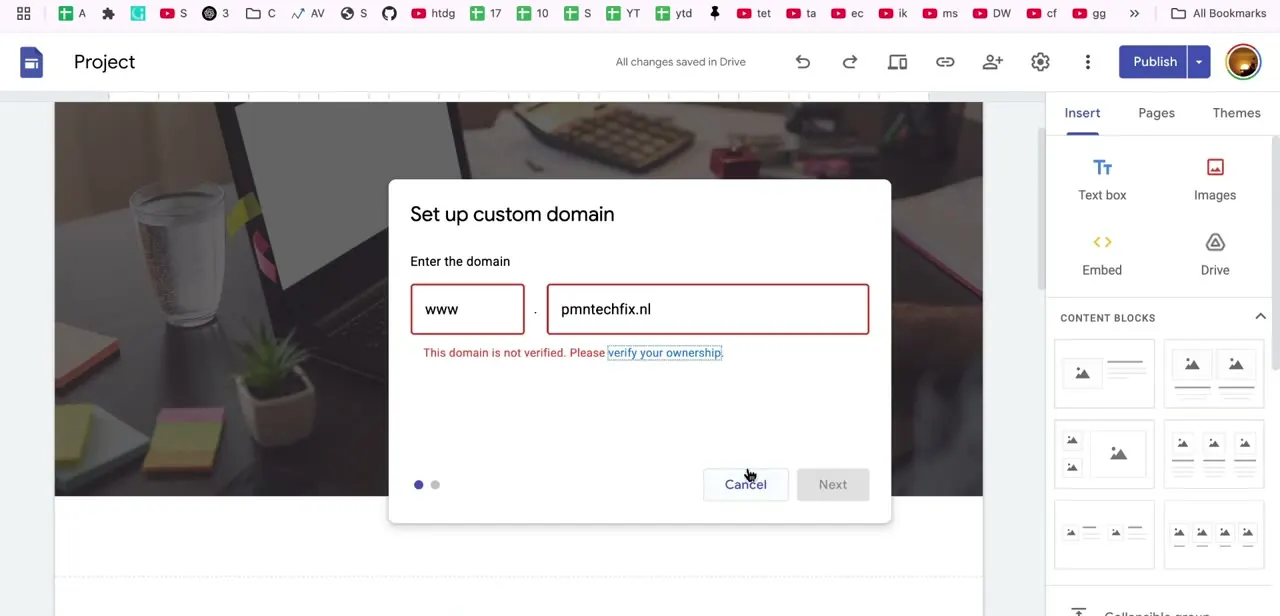
Open Set up custom domain and type your domain into the two fields — a subdomain prefix like www, and the root domain itself, for example pmntechfix.nl. Click through toward Next and Google immediately checks whether it can confirm you own that domain.
On a domain that hasn't been verified yet, you'll see a red message right under the fields reading "This domain is not verified. Please verify your ownership" with a link that kicks off the actual verification step — that's expected on a first attempt, not an error in what you typed.
03Verify ownership through Google Search Console
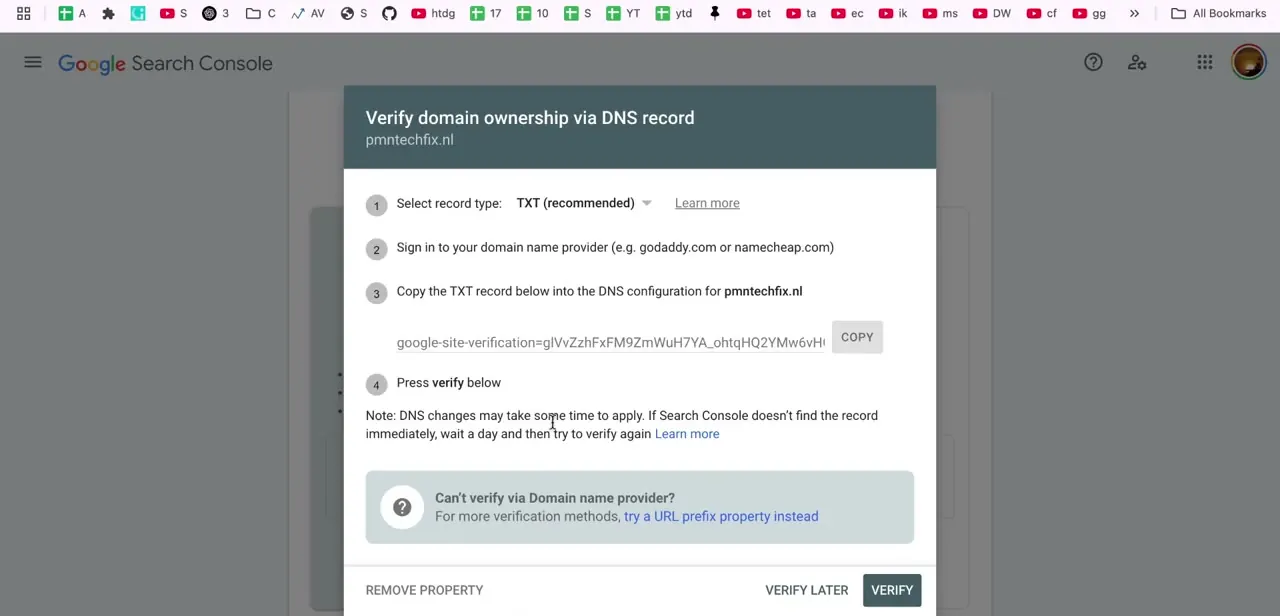
Clicking "verify your ownership" opens Search Console's verification flow for that exact domain. Google recommends the TXT record method by default: it generates a unique string starting with google-site-verification= that you copy, then paste into a new TXT record in your domain's DNS settings.
The dialog spells out the four steps in order — select the record type, sign in to your domain provider, add the record, then come back and press Verify. Leave this Search Console tab open while you make the DNS change, since you'll need to return to it to finish confirming.
04Add the TXT record in Squarespace's DNS settings
Back in your Squarespace account, go to the domain's DNS settings and add a new TXT record using the exact host and value Search Console gave you — paste the google-site-verification string precisely, since a trimmed or altered value won't verify. Save the record, then return to the Search Console tab you left open and click Verify. If it doesn't confirm right away, that's normal; DNS records don't propagate instantly, and Search Console itself warns that it may need a day before the record is visible.
05Point the domain at Google Sites with a CNAME or A record
Verification only proves ownership — it doesn't route traffic. Back in Google Sites, finishing the custom domain setup gives you the actual DNS records to route your domain's traffic to Sites, typically a CNAME for the www subdomain and A records for the root domain.
Add these in the same Squarespace DNS settings screen alongside the TXT record. Both changes can sit in DNS together; one proves ownership, the other does the actual pointing.
06Give it time to propagate, then confirm it's live
DNS changes spread across the internet gradually rather than instantly, so it's normal for the domain to keep resolving to its old destination for anywhere from a few minutes to a full day after you save the records. Once propagation catches up, load your domain directly in a browser and confirm it lands on your Google Sites content rather than a Squarespace placeholder page or a certificate warning. If it's still not resolving after a day, double-check the exact host and value on each DNS record against what Google Sites specified — a typo there is the most common reason this step drags on.
Frequently asked questions
Can I use a Squarespace-purchased domain with Google Sites?
Yes, you can point a Squarespace domain to a Google Sites website by verifying ownership through Search Console and then updating the domain's DNS records to route to Sites.
How long does it take for the domain to connect?
Verification can take up to a day if Search Console doesn't find the TXT record immediately, and the routing change can take additional time to propagate before the domain reliably loads your Sites content.
Why does Google Sites say my domain isn't verified?
That message appears the first time you enter a domain that Google hasn't confirmed you control yet — it's expected, and clicking through starts the Search Console verification flow rather than indicating a mistake.
Do I need to change my domain's nameservers?
No, you don't need to move the domain away from Squarespace. You add specific DNS records — a TXT record for verification and a CNAME or A records for routing — while the domain stays registered and managed at Squarespace.
Will my domain have SSL after connecting to Google Sites?
Google Sites provisions SSL automatically for verified custom domains once the routing records are in place, though the certificate can take a little time to activate after the domain first resolves.
About the author

Impran M N
I've been hooked on technology for as long as I can remember — especially the new tools and AI apps that seem to land every other week. Easy Tech Tuts is where I write up whatever I've just worked out: I do the task in the real product, record the screen, and turn it into the guide I wish I'd found first.