Easy Tech Tuts
How to Add the Meta Pixel to a Squarespace Website Easily 2026
By Impran M N
Understanding how visitors interact with your site is essential for running effective ad campaigns, and the Meta Pixel is the tool most Squarespace stores lean on for that job. The good news is that Squarespace builds Meta Pixel support directly into its Marketing settings, so there's no code editor or custom injection required for the basic setup — just a single field for your Pixel ID.
This guide walks through exactly where that field lives, what it looks like before and after you use it, and why the same page also matters if you ever run dynamic product ads. It's aimed at business owners and marketers who want their ad data flowing correctly before spending a dollar on Meta ads.
01Start from your Squarespace home dashboard
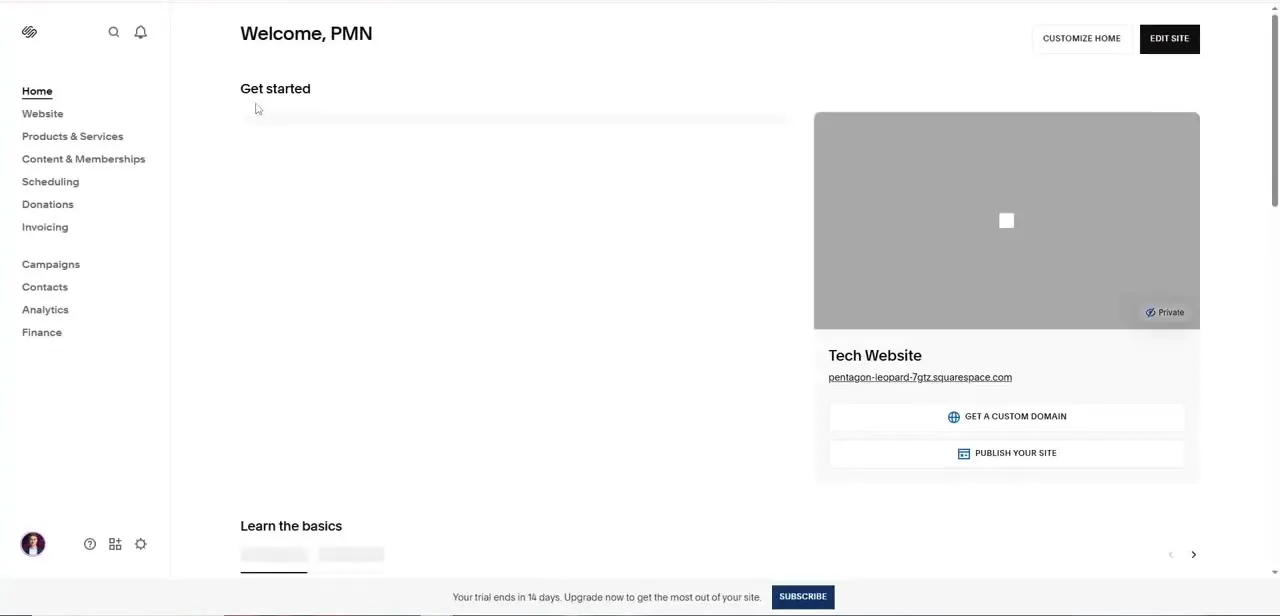
After logging in, you land on a "Welcome" home screen with the full site menu down the left: Website, Products & Services, Content & Memberships, Scheduling, Donations, Invoicing, and further down, Campaigns, Contacts, Analytics, and Finance. This is also where Squarespace shows your site's live status — a card displaying your site name, its current squarespace.com subdomain, whether it's marked Private, and buttons to get a custom domain or publish. None of that is required before adding the Pixel, but it's worth noting your site's domain here, since that's the domain you'll eventually connect to your Meta Business account for ad attribution.
02Open Marketing settings and find Meta Pixel & Ads
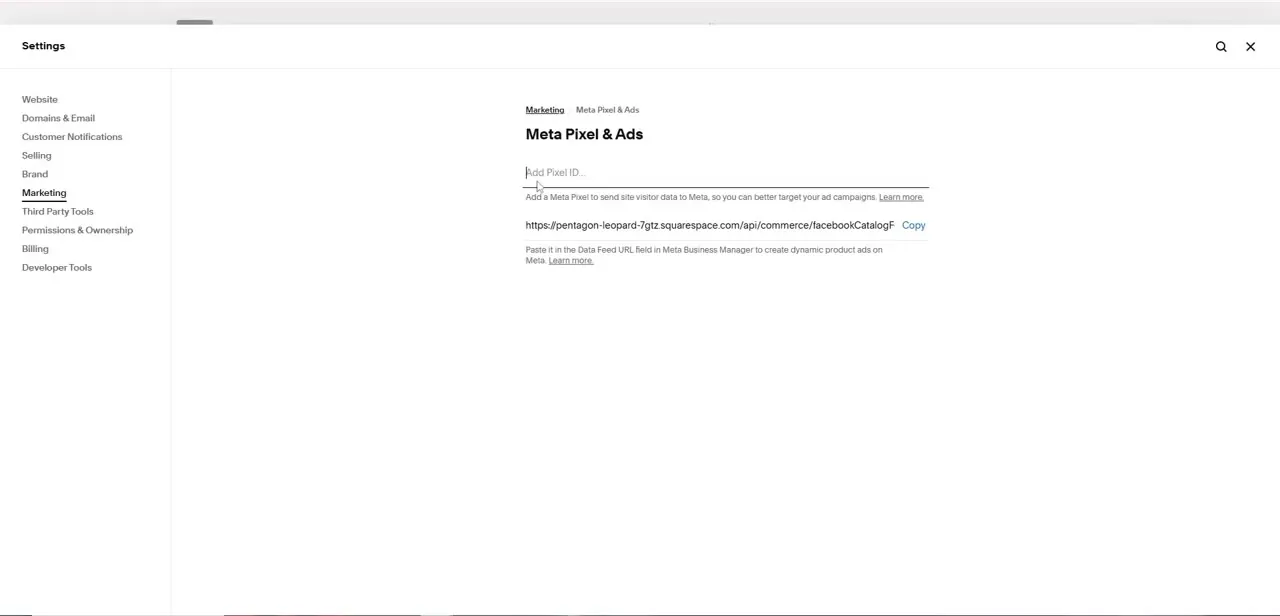
The Pixel setting doesn't live under Website or Third Party Tools where you might expect it — it's under Settings, then Marketing, then a page literally called "Meta Pixel & Ads." That page has exactly one input at the top, labeled "Add Pixel ID," with a line underneath explaining what it does: "Add a Meta Pixel to send site visitor data to Meta, so you can better target your ad campaigns." Below that sits a second, separate piece of infrastructure — a Data Feed URL unique to your store, meant to be pasted into the Data Feed URL field inside Meta Business Manager if you want to run dynamic product ads. It's easy to only notice the Pixel ID field and miss this URL, but if you sell products, both matter.
03Enter your Pixel ID and save
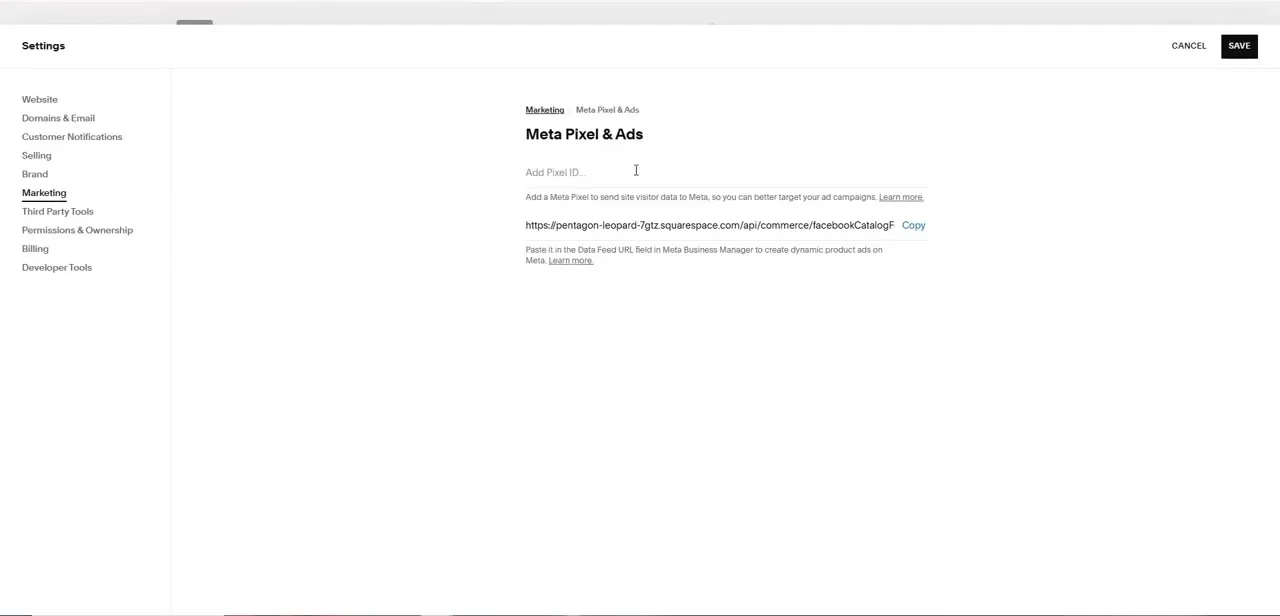
Get your Pixel ID from Meta Events Manager first — it's a numeric ID tied to your Meta Business account, not something Squarespace generates for you. Click into the "Add Pixel ID" field on the Meta Pixel & Ads page and paste it in; the moment you start typing, Cancel and Save buttons appear in the top right of the settings panel, which is Squarespace's way of confirming you're now in an active edit rather than just viewing the page. Click Save once the ID is in place, and Squarespace handles firing the Pixel across your site from that point on — there's no additional script tag or code injection step needed for standard page-view and purchase tracking.
04Confirm the Pixel is actually firing
Saving the ID in Squarespace only means the setting is stored — it doesn't guarantee Meta is receiving events correctly. Install the Meta Pixel Helper browser extension, visit your live site (not the editor), and check that it reports your Pixel ID as active with a PageView event firing. If it shows nothing, double-check that you saved the correct numeric ID and that you're testing the published site rather than a preview or draft, since the Pixel typically only fires on the live domain.
05Connect the Data Feed URL if you sell products
If your site sells products through Squarespace's built-in commerce tools, copy the Data Feed URL shown just below the Pixel ID field and paste it into the Data Feed URL field inside Meta Business Manager's catalog settings. This is what lets Meta build dynamic product ads — ads that automatically populate with the exact products a visitor viewed or added to cart, rather than a single static creative. Skipping this step still leaves standard Pixel tracking working fine; it just means you'll be limited to broader retargeting instead of per-product dynamic ads.
06Put the tracking data to work
Once the Pixel has been live for a few days and events are confirmed in Meta's Events Manager, build a Custom Audience from site visitors and layer retargeting ads on top of it — visitors who viewed a product but didn't buy are consistently the highest-converting audience available to most stores. Keep checking Pixel Helper periodically after any major site redesign, since template or page changes can occasionally strip the tracking setup if they touch page structure, even though the setting itself stays saved in Squarespace.
Frequently asked questions
Do I need coding experience to add the Meta Pixel to Squarespace?
No. Squarespace's Marketing settings include a dedicated Meta Pixel & Ads page with a single "Add Pixel ID" field — you paste in your numeric Pixel ID from Meta and save, with no code editor involved.
How do I know if my Meta Pixel is working correctly?
Install the Meta Pixel Helper browser extension and visit your published (not preview) site — it will confirm whether your Pixel ID is detected and firing a PageView event.
What's the Data Feed URL on the same settings page for?
It's a separate feature from the Pixel — paste it into Meta Business Manager's catalog Data Feed URL field to enable dynamic product ads that auto-populate with the products a visitor actually viewed.
Where exactly is the Meta Pixel setting in Squarespace?
Settings → Marketing → Meta Pixel & Ads. It's easy to look under Website or Third Party Tools first, but the field lives specifically under Marketing.
Is the Meta Pixel only useful for e-commerce sites?
No — any business running Meta ads benefits from Pixel-based retargeting, though the Data Feed URL for dynamic product ads only applies if you're selling products through the site.
About the author

Impran M N
I've been hooked on technology for as long as I can remember — especially the new tools and AI apps that seem to land every other week. Easy Tech Tuts is where I write up whatever I've just worked out: I do the task in the real product, record the screen, and turn it into the guide I wish I'd found first.