Easy Tech Tuts
How to Replace the Add to Cart or Buy Now Button on Shopify and Redirect it to an External Affiliate
By Impran M N
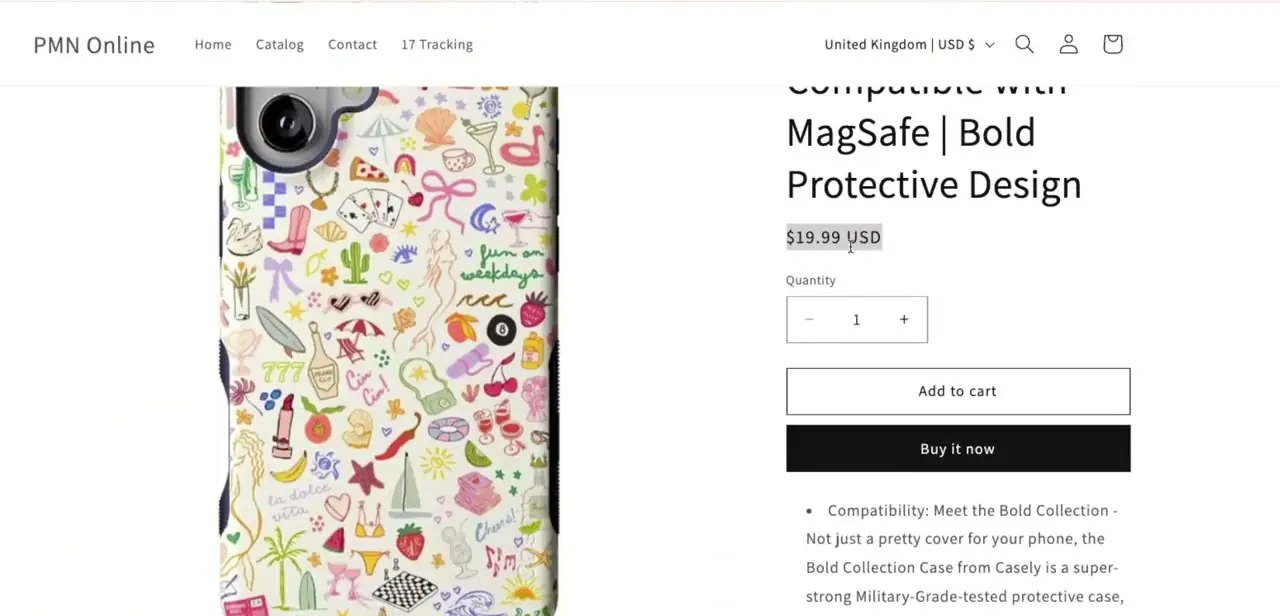
An affiliate storefront has one awkward problem: Shopify is built to take the sale, and every product page ends in an Add to cart button that leads to your own checkout. You want that button to send the shopper to Amazon, a supplier, or whichever marketplace pays you the commission.
The clean way to do it is not hacking product-form.liquid — it is adding a Custom Liquid block in the theme editor that renders your own link styled as a button, then hiding the native buy buttons. This guide walks that method end to end, including the small CSS that makes the new button sit flush and full-width like the theme's own, and finishes with the link attributes and disclosure details that keep the setup professional rather than sketchy.
01Pick the block approach over editing theme files
There are two ways to change what a product page's button does. You can open Edit code and rewrite the buy-buttons snippet, or you can add a Custom Liquid block through the theme editor's own interface.
The block approach wins for an affiliate store: it survives theme updates, it is undone by deleting one block instead of hunting for what you changed, and it never risks breaking the product form for the rest of the site. It also lets you keep the native buy buttons hidden rather than deleted, so switching a product back to real Shopify checkout later is a single toggle. Everything below uses that approach, and none of it requires touching a .liquid file.
02Open your theme in the customizer
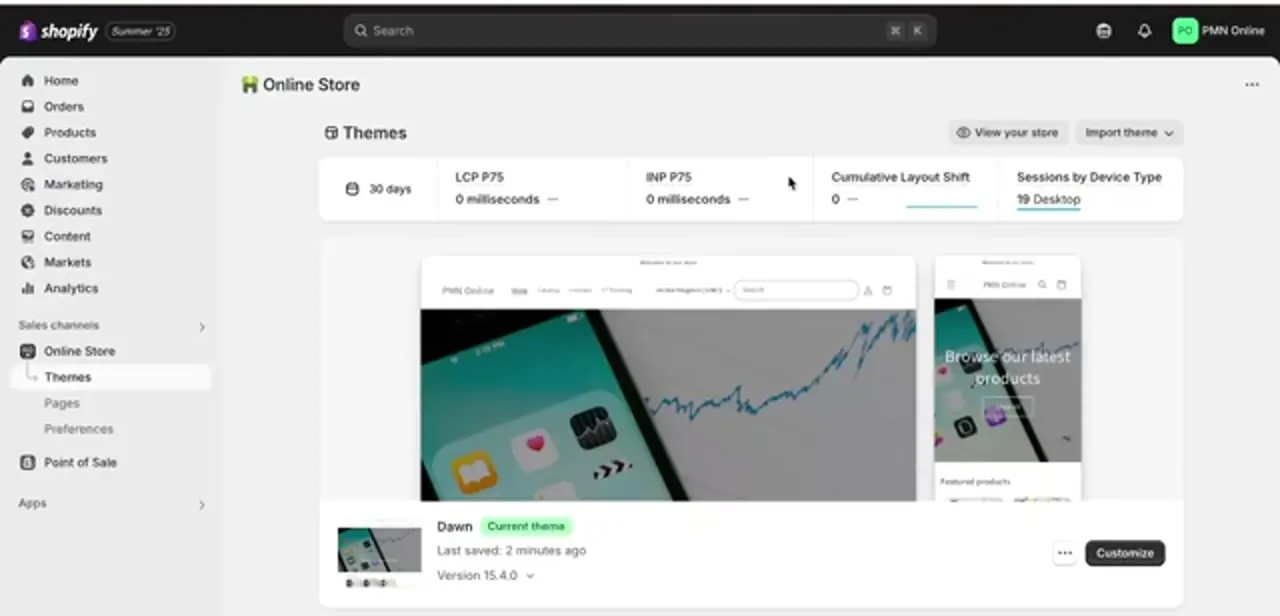
From the Shopify admin, go to Online Store, then Themes. Your live theme is the one marked Current theme — Dawn in the store shown here — with a Customize button on its row.
Before you click it, take the thirty seconds to duplicate the theme from the three-dot menu beside it. You are about to change how every product page converts, and a duplicate is the difference between an instant rollback and rebuilding from memory. Then hit Customize on the live copy to open the editor.
03Find the Buy buttons block on the product template
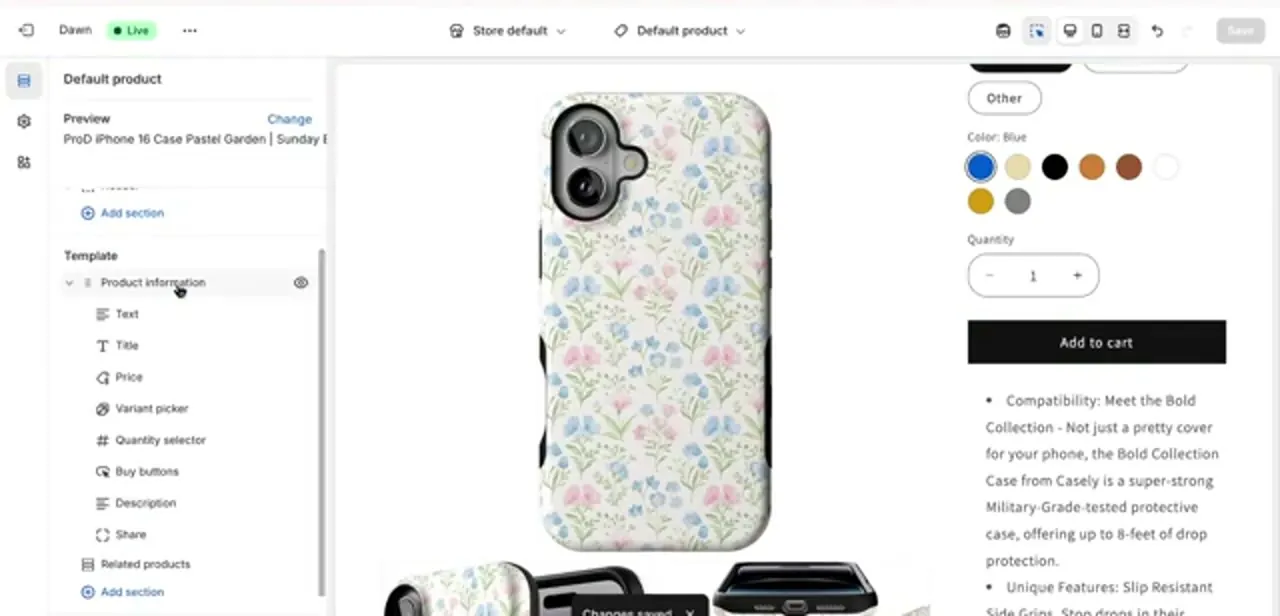
In the customizer, switch the template selector at the top from the home page to Default product so you are editing an actual product layout. The left panel then shows the template's sections, and under Product information you get the individual blocks that make up the right-hand column: Text, Title, Price, Variant picker, Quantity selector, Buy buttons, Description and Share.
Buy buttons is the one that renders Add to cart and, when it is switched on, the Buy now button beneath it. Click through them once so you understand the stacking order — the block you are about to add will sit wherever you drop it in this list, and you want your affiliate button in the same position the customer's eye already expects.
04Add a Custom Liquid block with your affiliate link
At the bottom of the Product information block list, click Add block and choose Custom Liquid. A Liquid code box opens in the left panel, and whatever you put there renders exactly where the block sits.
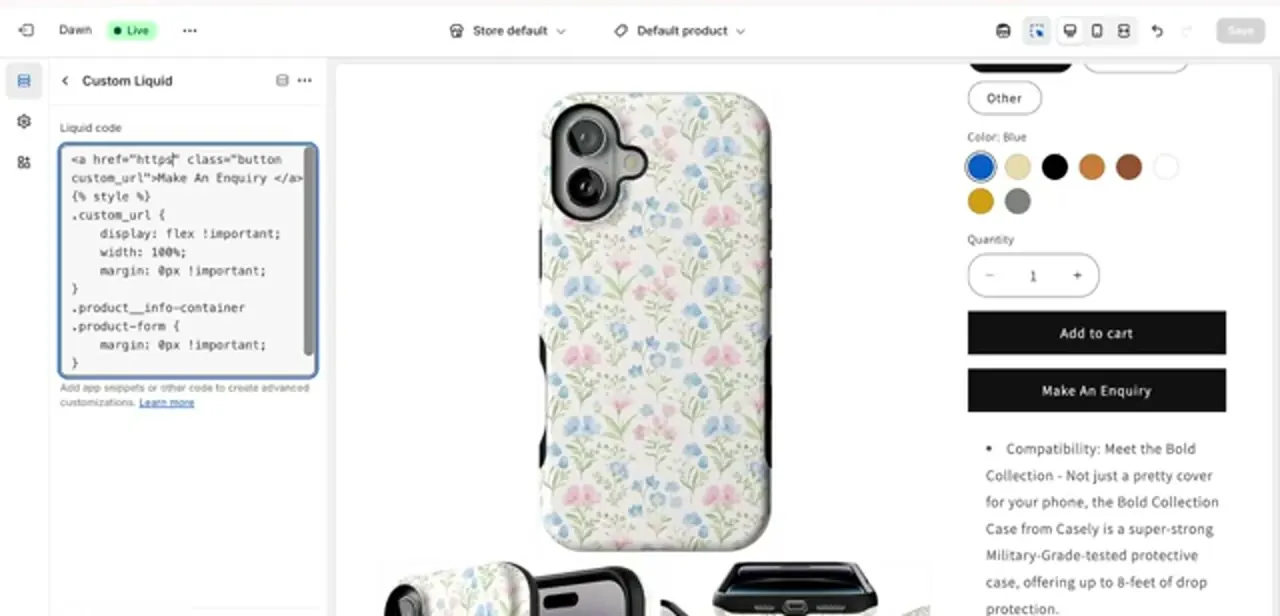
Paste an anchor tag pointing at your affiliate URL and give it the theme's own button class so it inherits the store's styling: <a href="https://your-affiliate-link" class="button custom_url">Make An Enquiry</a> — swapping the label for something that matches the destination, like Buy on Amazon or View on supplier site. The extra custom_url class does nothing on its own; it is there purely as a hook for the CSS in the next step. Drag the new block directly above or below Buy buttons so it lands where shoppers already look for the call to action.
05Style it to match the theme's own button
Out of the box the anchor will render as a shrink-to-fit link rather than a full-width button, which looks obviously bolted on. Add a small style block underneath the anchor in the same Custom Liquid box to fix the width and spacing — the version in use here sets .custom_url to display: flex, width: 100% and margin: 0 with !important, then zeroes the margin on .product-form so the new button sits tight against the block above instead of leaving a gap where the old one used to breathe.
The !important flags are doing real work: theme button styles are specific, and without them your rules lose. Watch the live preview as you type, since it re-renders on each change and you can see immediately whether the button spans the column properly.
06Hide the native Add to cart and Buy now buttons
With your link in place, the page now shows two calls to action, which is worse than either one alone. Hover the Buy buttons block in the left panel and click the eye icon to hide it — that removes Add to cart and Buy now from the storefront without deleting the block, so you can bring them back with the same click.
This is also the point to check the block's own settings if you keep it visible on some templates: the Buy now button is a separate checkbox inside it. If you want the affiliate redirect on only some products rather than all of them, don't hide it globally — duplicate the product template instead, apply the changes to the copy, and assign that template per product from the product page's Theme template dropdown.
07Test the redirect and tidy up the details
Click Save, open a product page on the live storefront, and click the new button — it should leave your store and land on the affiliate product page with your tracking parameters intact. Test on mobile too, since the product column stacks differently and a button with a forced width can overflow.
Two additions are worth making while you are in the code box: target="_blank" so the shopper keeps your tab open, and rel="nofollow sponsored noopener" on the anchor, which is what search engines expect on paid links and closes a small security gap that comes with _blank. Finally, add a short affiliate disclosure near the button or in the footer — most affiliate programmes require it, and it costs you nothing in conversion when the button itself is honest about where it leads.
Frequently asked questions
Do I have to edit theme code to redirect the Add to Cart button?
No. A Custom Liquid block added through the theme editor does the job — you paste an anchor tag pointing at your affiliate URL, style it, and hide the native Buy buttons block. Nothing in the theme's .liquid files changes.
How do I hide the original Add to cart and Buy now buttons?
In the customizer, hover the Buy buttons block under Product information and click the eye icon to hide it. That removes both buttons from the storefront and is reversible with the same click.
Can I apply this to only some products?
Yes. Duplicate the product template, make the changes on the copy, then assign that template to the specific products from the Theme template dropdown on each product's admin page. Products on the default template keep normal checkout.
Why does my new button look small or misaligned?
An anchor tag does not fill the column by default. Set the link's class to display: flex and width: 100% with !important in a style block inside the same Custom Liquid box, and zero the surrounding product-form margin so the spacing matches the rest of the page.
Should affiliate buttons use nofollow?
Yes — add rel="nofollow sponsored noopener" to the anchor. Sponsored marks it as a paid link for search engines, and noopener closes the security gap that comes with opening links in a new tab.
Is this reversible?
Completely. Delete the Custom Liquid block and unhide the Buy buttons block and the page returns to standard Shopify checkout. Duplicating the theme before you start makes the rollback even safer.
About the author

Impran M N
I've been hooked on technology for as long as I can remember — especially the new tools and AI apps that seem to land every other week. Easy Tech Tuts is where I write up whatever I've just worked out: I do the task in the real product, record the screen, and turn it into the guide I wish I'd found first.