Easy Tech Tuts
How to Add Payment Method on Shopify Without LLC or Registered Business 2026 Easily
By Impran M N
Not having an LLC or registered business doesn't stop you from accepting payments on Shopify. This guide covers where Shopify asks for that information, what changes when you set up Shopify Payments as an Individual instead of a Sole Proprietorship or LLC, and the alternative gateways sitting one click away if you'd prefer not to use Shopify Payments at all. You'll see the exact form fields involved, the one detail that decides whether you need an EIN, and the extra fee Shopify charges when you skip Shopify Payments for another gateway.
Before you start
- A US bank checking account in USD, eligible for ACH transfers, if you're setting up Shopify Payments in the United States
- A government-issued photo ID with a name that matches your bank account exactly
01Find the Payments settings in your Shopify admin
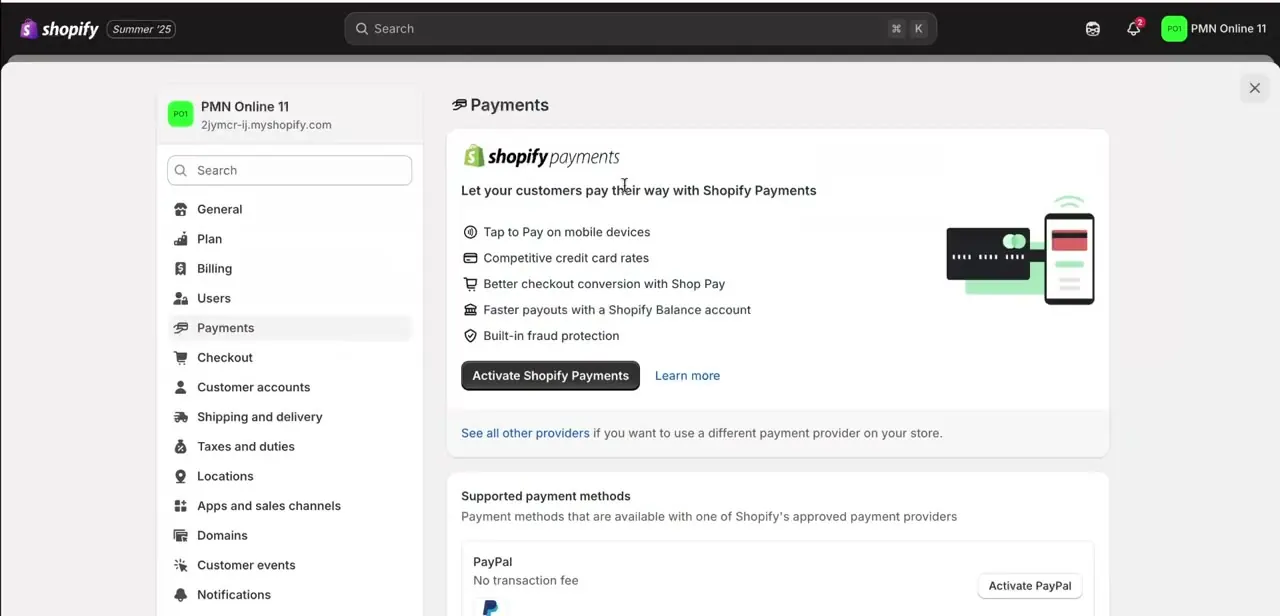
From your Shopify admin, go to Settings, then Payments. This is where every payment option for your store lives: Shopify Payments sits front and center with an Activate button, and a line underneath reads "See all other providers" for a different processor. The Payments page also lists supported methods that plug in alongside whichever gateway you choose, including PayPal Express Checkout, which Shopify exempts from its third-party transaction fee as long as Shopify Payments stays active too.
02Choose Individual as your business type
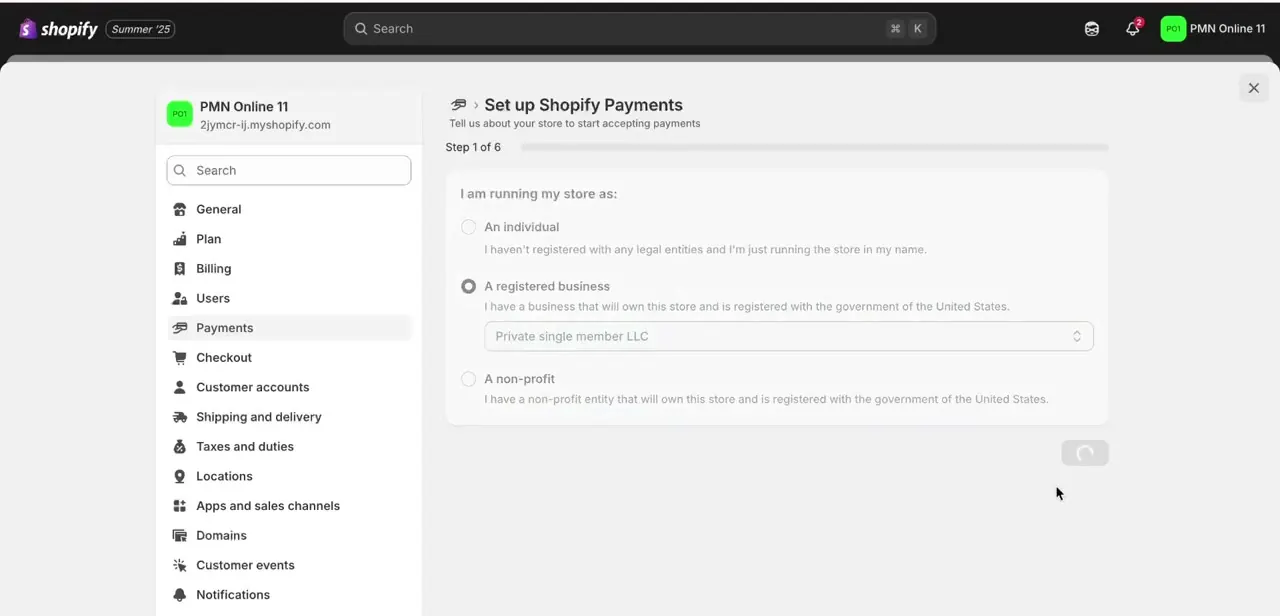
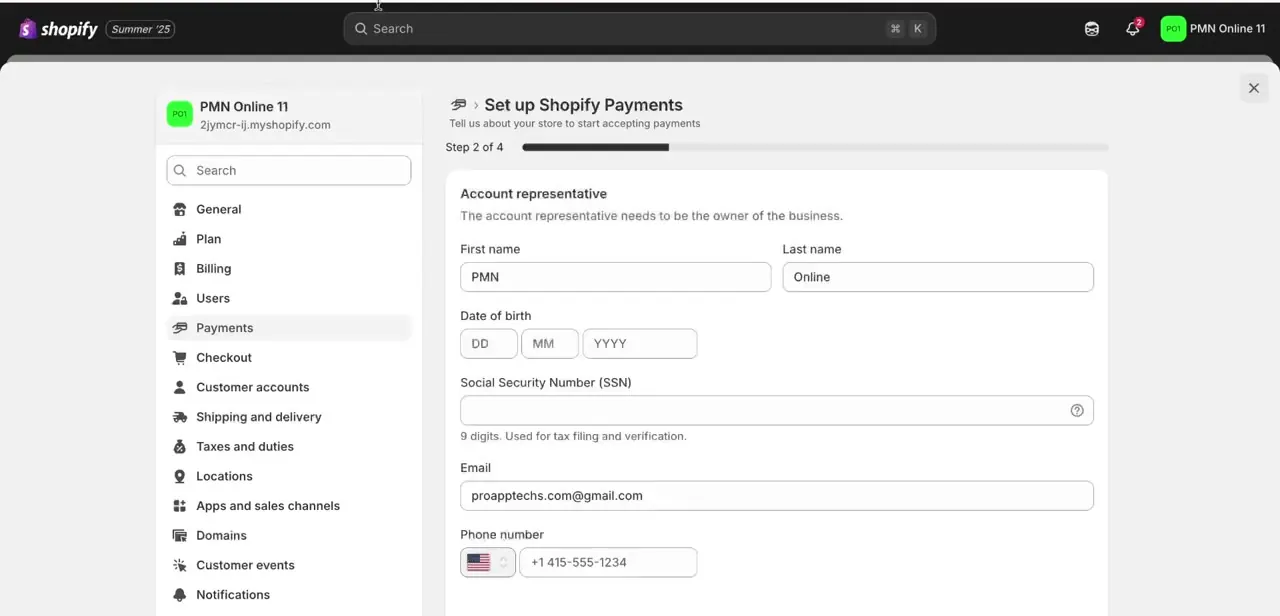
Click Activate on Shopify Payments and Shopify asks you to pick a business type before anything else: Individual, Sole Proprietorship, Partnership, LLC, Corporation, or Non-profit. Shopify's own documentation defines Individual as a single-person business that hasn't registered for an EIN, and that's the option that skips every business-registration field.
Choose Sole Proprietorship or LLC instead and the form adds a registered business name, an EIN, and a business address on top of your personal details. As an Individual, the Account representative step just asks for your legal first and last name, date of birth, residential address, and a Social Security Number or ITIN, used for tax reporting and identity verification, not a business's EIN.
03Browse alternative payment providers if you'd rather not use Shopify Payments
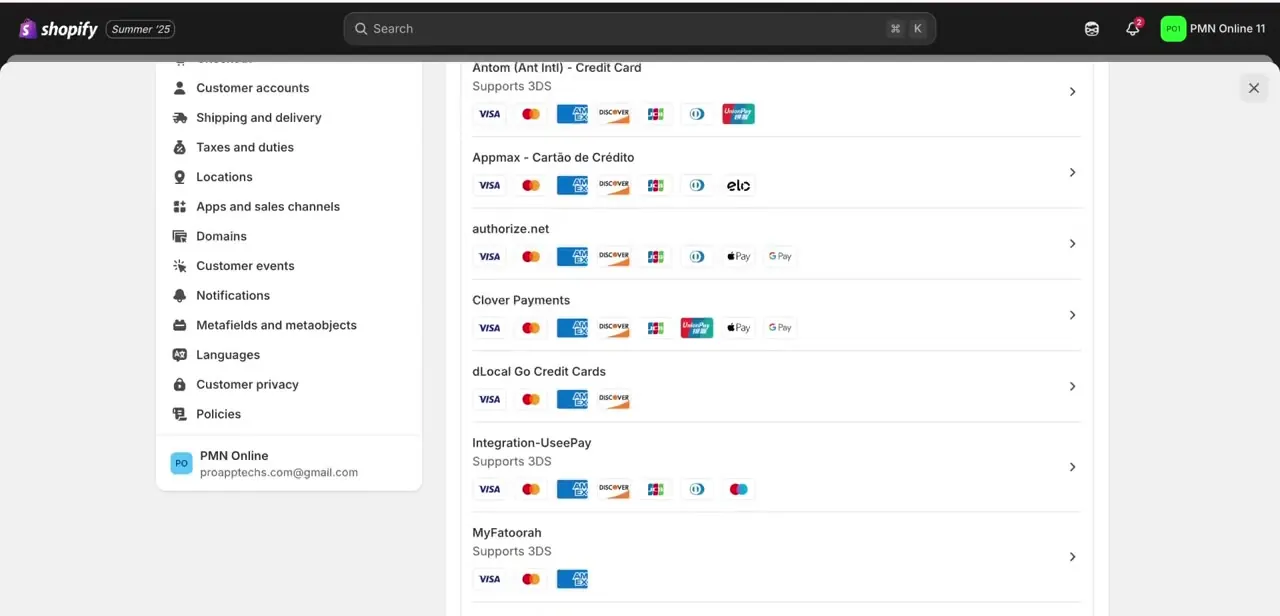
Back on the Payments page, "See all other providers" opens a long list of third-party gateways Shopify already supports, names like Antom, Appmax, authorize.net, Clover Payments, dLocal Go Credit Cards, and MyFatoorah, each showing which card networks and regional payment types it supports. These exist for sellers who can't or don't want to go through Shopify Payments' business verification, and several are built around individual or regional merchant accounts instead of a US-style LLC. Check two things before committing: that provider's own onboarding requirements, since verification rules vary by provider and country, and Shopify's third-party transaction fee, which applies on top of whatever that gateway charges once it replaces Shopify Payments as your processor.
04Gather your personal documents before applying
Whichever route you take, Shopify Payments as an Individual or a third-party gateway aimed at individuals, have a government-issued ID and bank account details ready before you start. For Shopify Payments in the US specifically, that account needs to be a full checking account in USD with a US bank, eligible for ACH transfers; a savings account or a non-US account won't clear verification.
Providers process applications faster when the name on your ID, the name on your bank account, and the name you type into the form all match exactly. A mismatch here, even a missing middle initial, is one of the most common reasons an application stalls in review.
05Avoid the mistakes that cause approval delays
Beyond matching names, double-check that your bank account accepts the currency and country the gateway expects, and that any address you enter matches your ID instead of a forwarding or virtual address, if the provider checks for that. Submitting an application with mismatched or incomplete information tends to trigger manual review, which can add days or weeks compared to one that clears automated checks. If a provider flags your account, most offer a support channel to resubmit documents instead of starting the application over.
| Plan | Extra fee on non-Shopify-Payments transactions |
|---|---|
| Basic | 2% |
| Grow | 1% |
| Advanced | 0.6% |
| Plus | 0.2% |
Applies only when a payment is processed through a gateway other than Shopify Payments. Shopify Payments transactions, PayPal Express Checkout (when Shopify Payments is also active), and manual payment methods are exempt. Figures from Shopify's official pricing page, checked September 2026.
When it doesn't work
The form still asks for an EIN and a registered business name
Why: Sole Proprietorship or LLC is selected as the business type instead of Individual; those two ask for a registered business name and EIN on top of personal details.
Fix: Go back to the business type selection and choose Individual, which Shopify defines as a single-person business that hasn't registered for an EIN.
A third-party gateway comes with an unexpected extra charge on your Shopify bill
Why: Shopify adds its own third-party transaction fee, 2% down to 0.2% depending on plan, on top of the gateway's processing fee whenever the primary payment provider isn't Shopify Payments.
Fix: Check your plan's rate on Shopify's pricing page before choosing a non-Shopify-Payments gateway, or keep Shopify Payments active and add the other gateway alongside it if the goal was more payment options rather than a full switch.
The application stalls in review
Why: The name, address, or account details entered don't exactly match the government ID or bank account, or the bank account isn't a US checking account eligible for ACH.
Fix: Recheck every field against your ID and bank statement, correct any mismatch, and resubmit through the provider's support channel instead of starting a new application.
Frequently asked questions
Can I really accept payments on Shopify without an LLC?
Yes. Selecting Individual as your business type in Shopify Payments skips every business-registration field. Shopify also supports a long list of third-party gateways built for individual and regional merchants if you'd prefer not to use Shopify Payments at all.
What documents do I need without a registered business?
You'll still need a government ID and US bank account details, plus a Social Security Number or ITIN if you go the Shopify Payments route as an Individual.
Where do I find alternative payment providers if Shopify Payments doesn't fit?
On the Payments page in Settings, click "See all other providers" beneath the Shopify Payments activation panel to see the full list, including options like authorize.net, Clover Payments, and dLocal.
Does skipping Shopify Payments cost extra?
Yes, on most plans. Shopify adds a third-party transaction fee, from 2% on the Basic plan down to 0.2% on Plus, to any payment processed through a gateway other than Shopify Payments. PayPal Express Checkout is exempt from that fee as long as Shopify Payments is still active alongside it.
Why does my Shopify payment application get delayed?
Delays usually happen when the name, address, or bank details you submit don't exactly match your ID, or when documents are incomplete. Double-checking details before applying helps you avoid manual review.
Sources and last check
Click path and screens come from a recorded walkthrough. The Individual vs Sole Proprietorship vs LLC business-type distinction, the US bank account requirements, and the third-party transaction fee by plan were checked against Shopify's official Help Center and pricing page in September 2026 - that check added the Individual business-type detail this guide previously left implicit, and the third-party transaction fee this guide didn't mention at all.
About the author

Impran M N
I've been hooked on technology for as long as I can remember — especially the new tools and AI apps that seem to land every other week. Easy Tech Tuts is where I write up whatever I've just worked out: I do the task in the real product, record the screen, and turn it into the guide I wish I'd found first.