Easy Tech Tuts
How to Create a Subdomain in Namecheap Domain 2026 Easily
By Impran M N
A subdomain like blog.yoursite.com is the standard way to run a separate section of your site — a blog, a staging environment, or an app — without buying a second domain. If your domain is registered through Namecheap but hosted elsewhere, the practical path usually runs through two places: Namecheap's Domain List, where the domain and its DNS ultimately live, and your hosting provider's control panel, where the subdomain actually gets created and connected to a website or folder. This guide covers both sides so the subdomain works end to end, using a real Namecheap-to-Hostinger setup as the example.
01Check your domain's settings in Namecheap
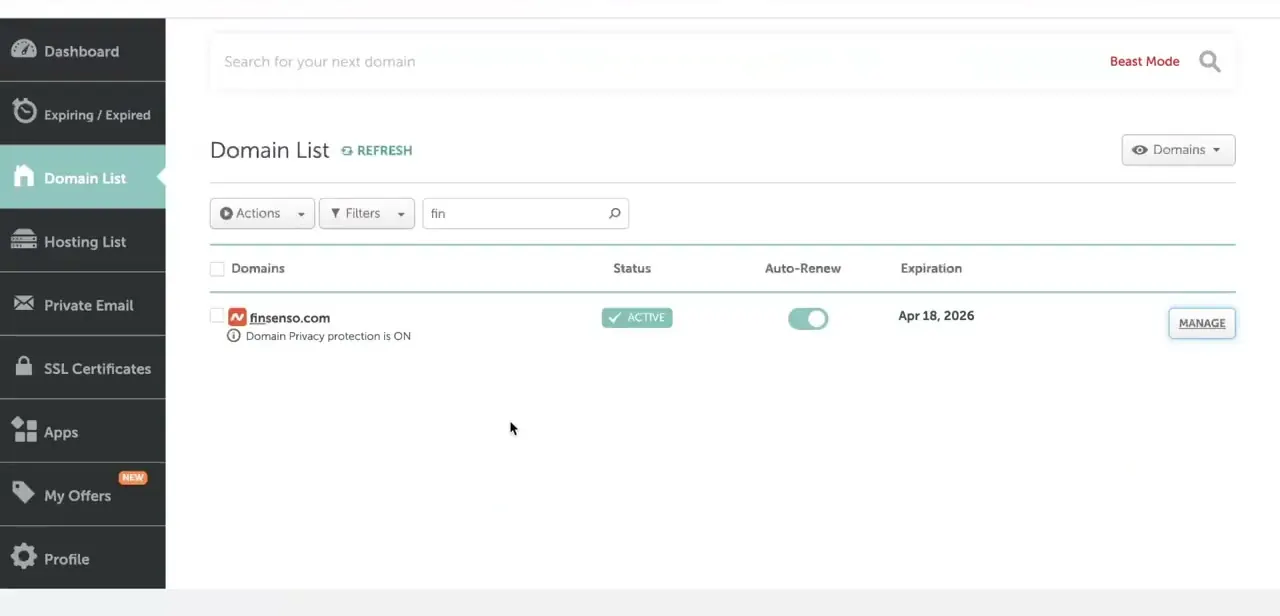
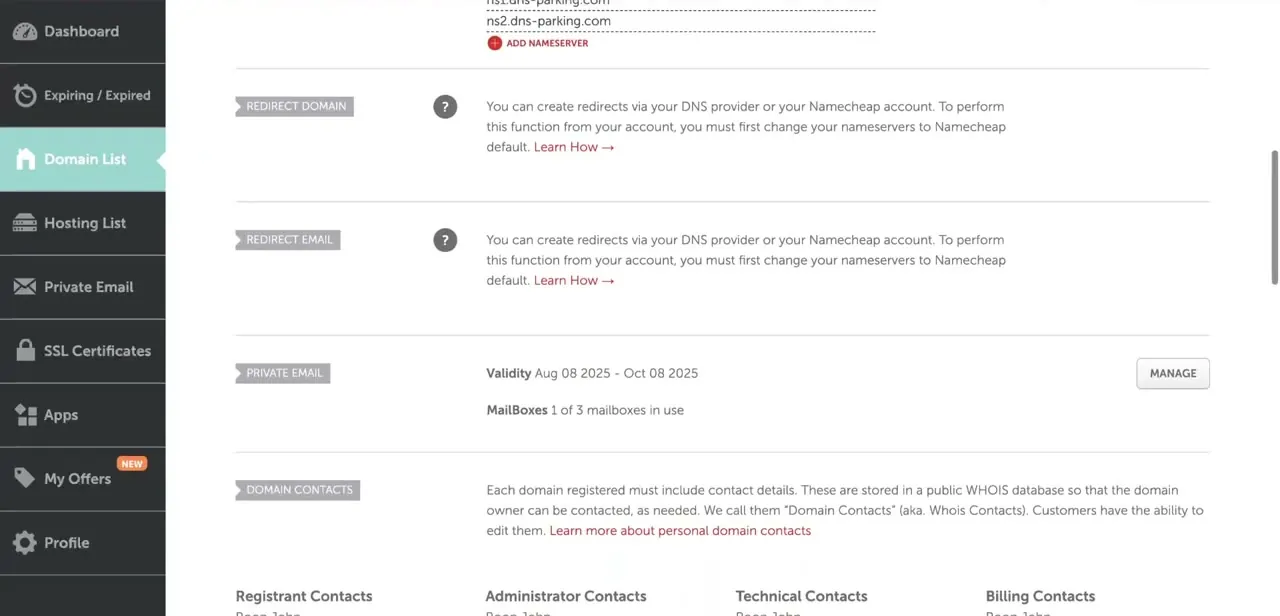
Log into your Namecheap account and open Domain List from the sidebar. Selecting your domain opens its management page, which covers nameservers, Redirect Domain, Redirect Email, Private Email, and Domain Contacts — the WHOIS information required for every registered domain. This page is also where you'd manage Advanced DNS records directly if you wanted to point a subdomain manually, but note that Redirect Domain and Redirect Email both require your nameservers to be set to Namecheap's default first, which the page flags explicitly.
02Decide where the subdomain should actually be created
If your domain's nameservers point to a hosting provider rather than staying on Namecheap's own DNS, that host is usually the better place to create the subdomain, since it can set up both the DNS record and the actual folder or website behind it in one step. Trying to do this purely from Namecheap's Advanced DNS means manually adding a CNAME or A record and then separately configuring the destination server, which is more error-prone. For a domain pointed at a host like Hostinger, the host's control panel is the faster and more reliable route.
03Open your website's dashboard on your host
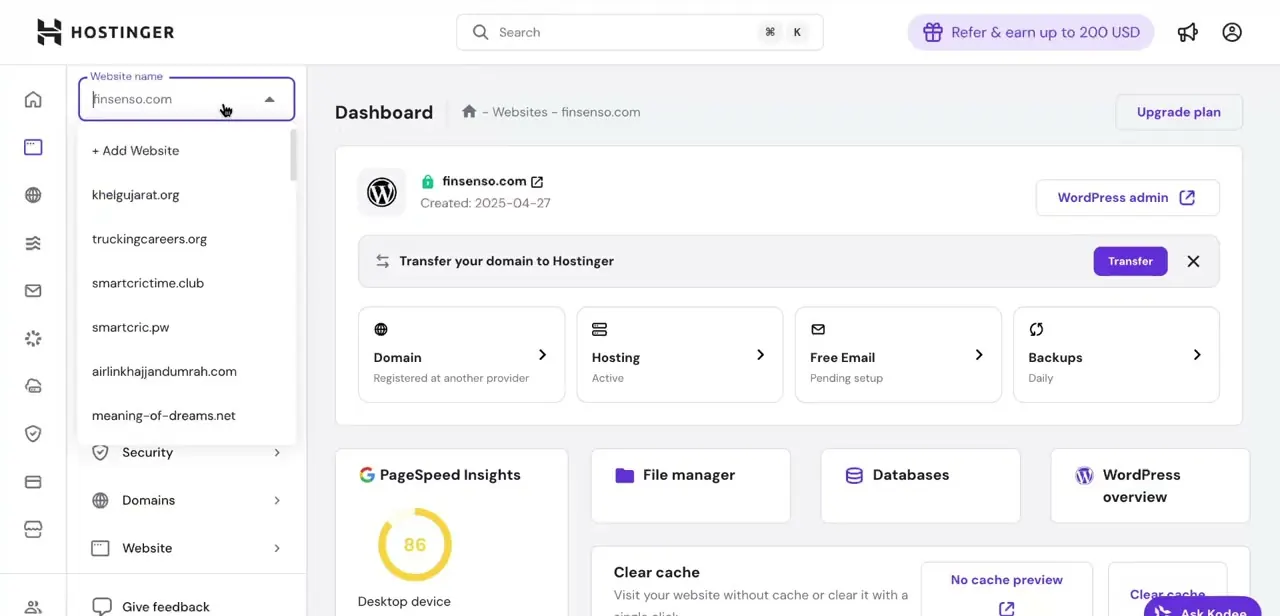
Log into your hosting account — Hostinger in this case — and select the website your subdomain will belong to from the Website name dropdown, which lists every site on the account. The dashboard summarizes the domain's status, hosting plan, email setup, and backups, and gives quick access to tools like File manager, Databases, and PageSpeed Insights. Confirm you've selected the correct site before continuing, since subdomains are created under a specific domain, not account-wide.
04Create the subdomain
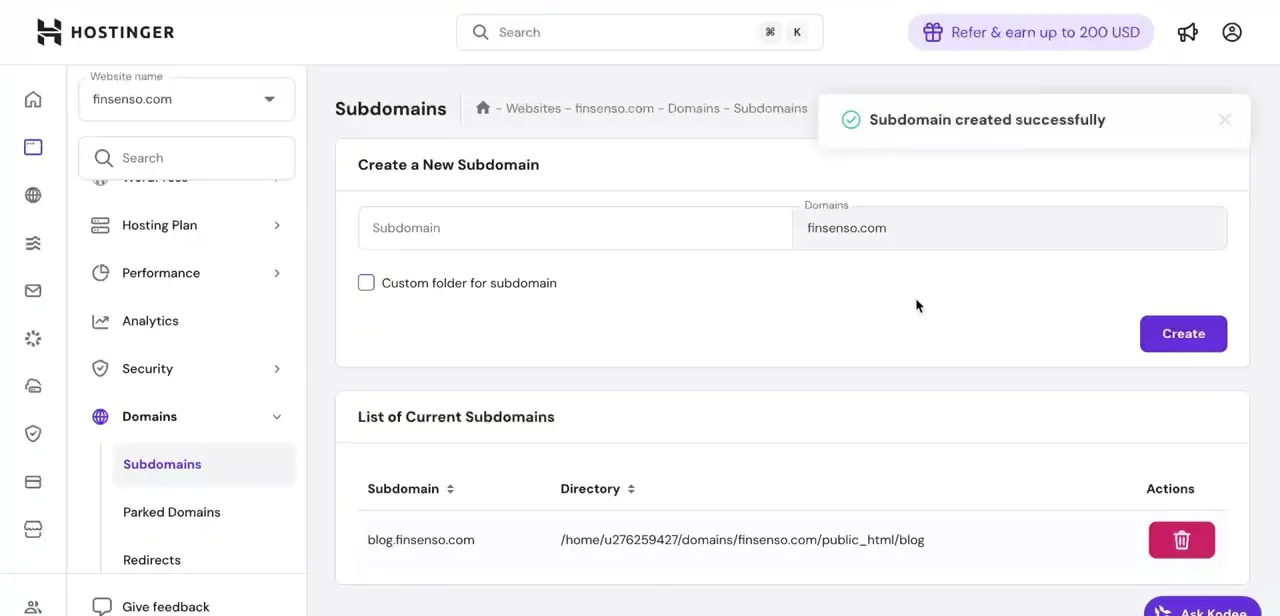
In the left menu, open Domains, then Subdomains. The Create a New Subdomain form asks for just the subdomain prefix — type something like "blog" — while the Domains field shows the root domain it'll attach to.
There's also a Custom folder for subdomain checkbox if you want it served from a specific existing directory rather than the default one Hostinger creates automatically. Click Create, and the new subdomain appears immediately in the List of Current Subdomains below, along with the server directory it now points to.
05Connect the subdomain to a website or WordPress install
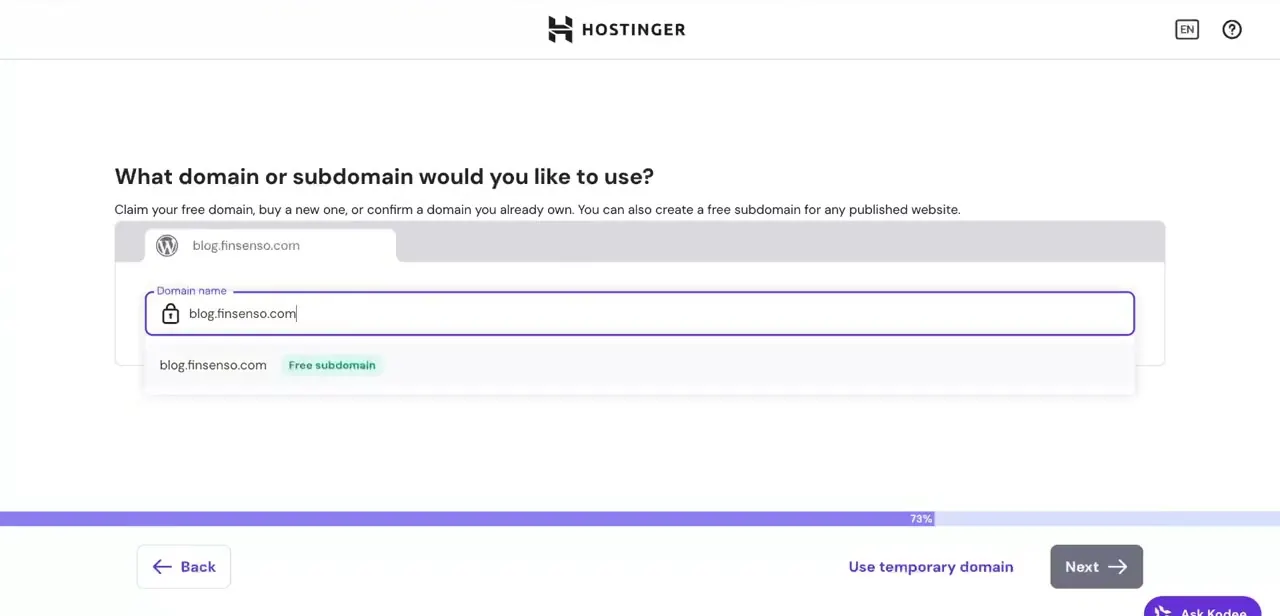
If the subdomain is meant to run its own site rather than just serve static files, use your host's website setup wizard to attach it. Hostinger's flow asks "What domain or subdomain would you like to use?" and lets you pick the subdomain you just created directly from a suggestions list, tagged as a free subdomain since it's already part of your existing domain. Selecting it and continuing through the wizard installs WordPress (or whichever platform you chose) specifically at that subdomain address.
06Test the subdomain once it's live
Because the subdomain and its DNS record were created directly in your host's panel rather than manually in Namecheap, propagation is usually fast — often working within minutes rather than the hours a manually added DNS record can take. Visit the subdomain in a browser to confirm it loads, and check that any linked WordPress install or app is reachable there rather than showing the host's default placeholder page. If it doesn't resolve after a reasonable wait, double-check that your domain's nameservers at Namecheap are still pointed correctly at your host.
Frequently asked questions
Can I create a subdomain directly in Namecheap?
Yes, through Advanced DNS on the domain's management page in your Domain List, by adding a CNAME or A record manually. But if your domain is hosted elsewhere, your host's control panel usually handles both the DNS record and the destination folder or site in one step, which is simpler.
Why does the Hostinger dashboard show my domain as a subdomain option automatically?
Once you create a subdomain in your host's Subdomains tool, it's immediately available to select when setting up a new website or WordPress install on the same account, tagged as a free subdomain.
How long does it take for a new subdomain to work?
Subdomains created directly through your hosting provider's panel typically resolve within minutes. Manually added DNS records in Namecheap's Advanced DNS can take longer, sometimes up to a few hours, to fully propagate.
Do I need to change my nameservers to create a subdomain through my host?
Yes — your domain's nameservers need to already point to your hosting provider for that host to manage subdomains and their DNS records for you.
Can I point a subdomain to a specific folder instead of a new install?
Yes — most host subdomain tools, including Hostinger's, include a custom folder option so the subdomain serves existing files rather than a freshly created directory.
About the author

Impran M N
I've been hooked on technology for as long as I can remember — especially the new tools and AI apps that seem to land every other week. Easy Tech Tuts is where I write up whatever I've just worked out: I do the task in the real product, record the screen, and turn it into the guide I wish I'd found first.