Easy Tech Tuts
How To Connect Namecheap Domain To Wix Website Easily 2026
By Impran M N
Buying a domain on Namecheap and building a site on Wix means those two platforms have to be told to talk to each other, and the easiest way to do that is by pointing Namecheap's nameservers at Wix's. Wix walks you through this with a short numbered wizard that hands you the exact values to swap, and Namecheap's domain panel is where you actually paste them in. This guide follows that real flow end to end — from Wix's nameserver instructions to the Namecheap domain list where the change gets made and confirmed.
01Open your Wix site dashboard
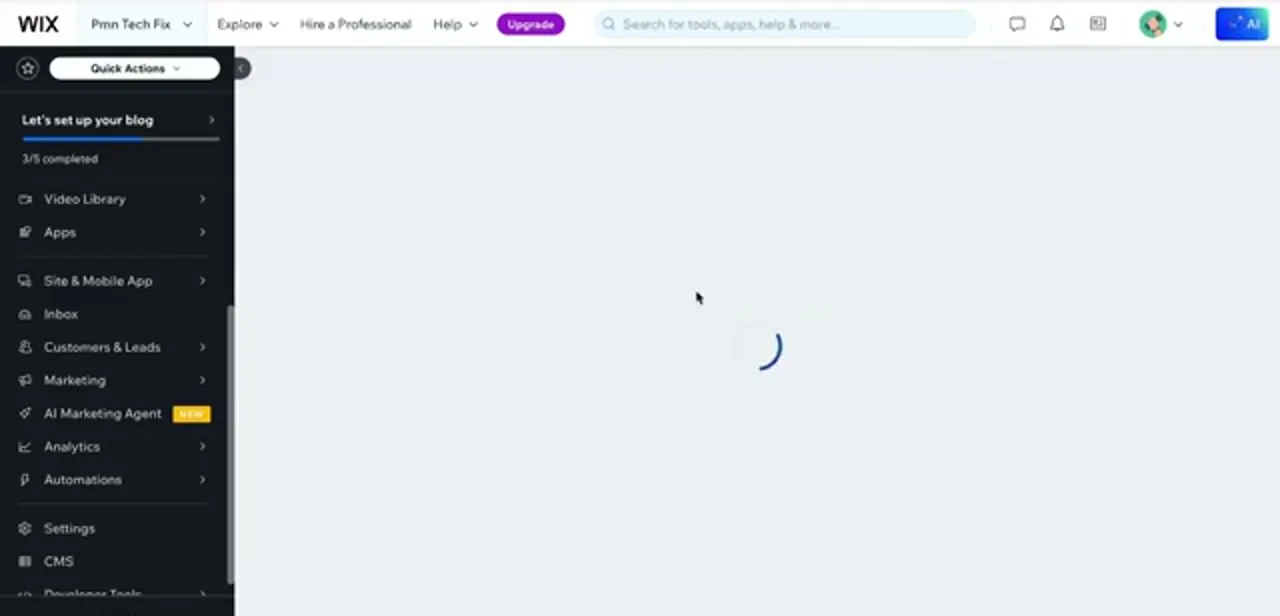
Log into Wix and open the dashboard for the site you want the domain attached to. The left sidebar is your control center here — Video Library, Apps, Site & Mobile App, Marketing, Analytics, Settings, and further down, Developer Tools — and it's the same dashboard you'll return to later to confirm the domain connected successfully. If you're partway through Wix's setup checklist, as shown by the "Let's set up your blog" progress tracker at the top, you can still jump into domain settings without finishing every item on that list first.
02Start the domain connection wizard in Wix
From Settings, find the domain connection option and choose to connect a domain you already own rather than buying a new one through Wix. Wix runs you through a short numbered wizard — in this flow it's a four-step process, with step 3 asking you to find your current nameservers on your registrar's site (confirmed with an "I found them" checkbox) before moving you into the actual swap in step 4.
03Copy the exact Wix nameservers
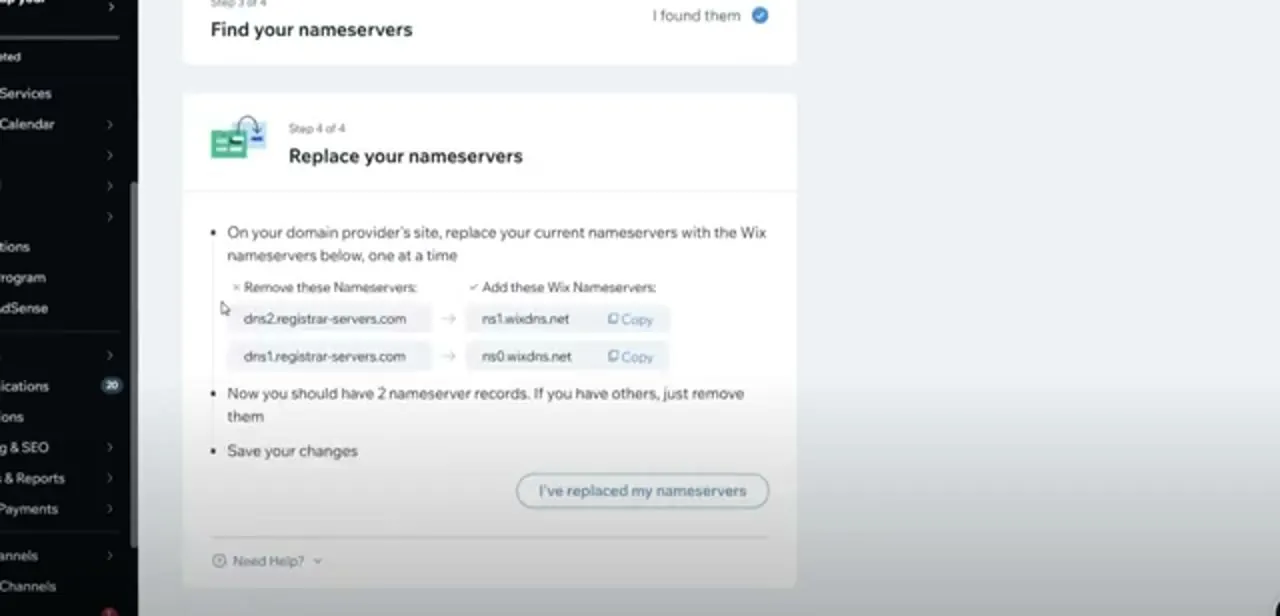
Step 4 of the wizard, "Replace your nameservers," lays out precisely what to remove and what to add, side by side, with copy buttons next to each value so you don't risk a typo. In this case the instructions call for removing dns2.registrar-servers.com and dns1.registrar-servers.com — Namecheap's default nameservers — and replacing them with ns1.wixdns.net and ns0.wixdns.net. The wizard is explicit that you should end up with exactly two nameserver records; if your domain has more than two listed, it tells you to remove the extras rather than leave them alongside Wix's.
04Update the nameservers in Namecheap
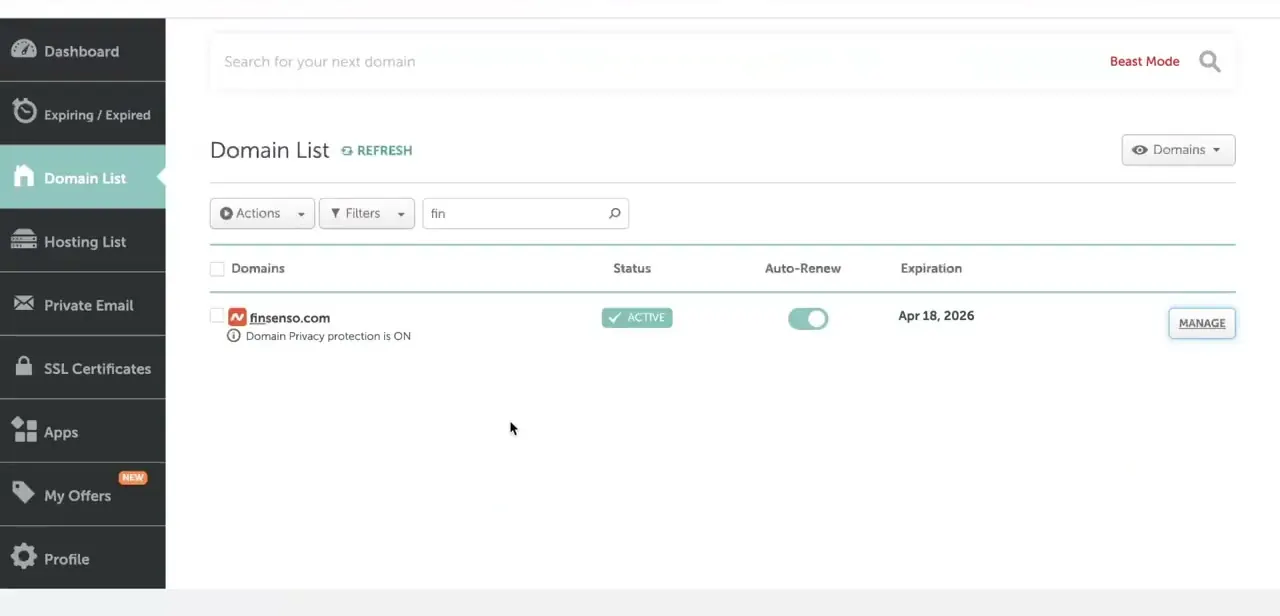
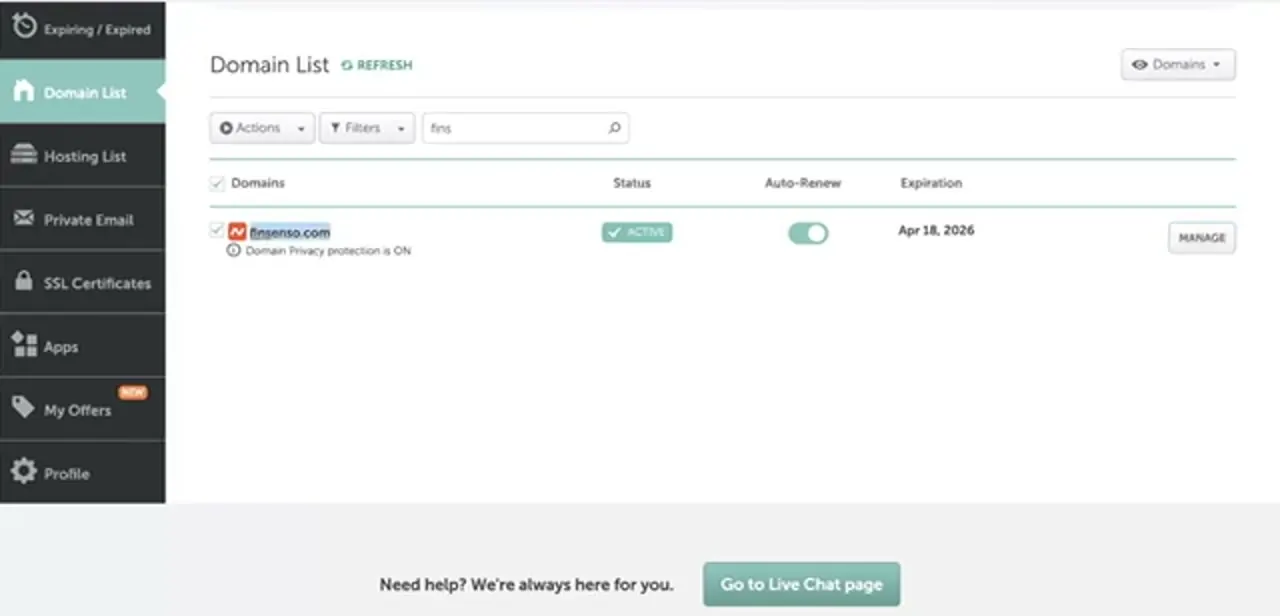
Log into Namecheap and open Domain List from the left sidebar, where every domain on the account is listed with its Status, Auto-Renew toggle, and Expiration date. Click Manage next to the domain you're connecting, find the Nameservers section on that domain's management page, switch it to Custom DNS, and enter the two Wix nameservers from the wizard exactly as copied — no trailing spaces, no extra entries.
05Save and confirm back in Wix
After saving the nameserver change in Namecheap, return to the Wix wizard and click "I've replaced my nameservers" to tell Wix the change is in. Wix can't verify it instantly since the update has to propagate first, but confirming this step lets Wix start checking in the background and move your domain connection status toward Connected once it detects the new nameservers.
06Give it time to propagate
Nameserver changes typically take anywhere from a few minutes to a few hours to fully propagate, though it can occasionally stretch close to 48 hours depending on your location and DNS caching along the way. Check the domain's status in Wix's Settings periodically rather than assuming something broke if it isn't instant — if it's still unconnected after a day or two, double-check that the nameservers in Namecheap match Wix's values exactly, including no leftover default entries.
Frequently asked questions
Should I use the nameserver method or manual DNS method?
The nameserver method shown here is simpler since Wix manages everything automatically once the two nameservers are set. A manual A-record and CNAME method exists too, for people who want to keep other DNS records under their own control at Namecheap.
Will switching nameservers affect my email?
It can. Handing DNS control to Wix's nameservers means any email-related records (like MX records) you had at Namecheap no longer apply, so you'd need to recreate them through Wix's DNS settings instead.
How long does domain propagation typically take?
It varies by domain and location, usually somewhere between a few minutes and a few hours, though it can occasionally take up to 48 hours in rarer cases.
What exactly do I remove and add in Namecheap?
In this walkthrough, Wix's wizard specified removing Namecheap's default dns1.registrar-servers.com and dns2.registrar-servers.com and adding ns0.wixdns.net and ns1.wixdns.net in their place — always use the exact values your own Wix wizard shows you.
Can I switch methods later if I change my mind?
Yes, you can move from the nameserver method back to manual DNS records or vice versa later, though switching back and forth unnecessarily just adds more propagation waiting time.
About the author

Impran M N
I've been hooked on technology for as long as I can remember — especially the new tools and AI apps that seem to land every other week. Easy Tech Tuts is where I write up whatever I've just worked out: I do the task in the real product, record the screen, and turn it into the guide I wish I'd found first.