Easy Tech Tuts
How to Connect Namecheap Domain to Google Workspace, Add Web Site Easily 2026
By Impran M N
Buying a domain through Namecheap and running your business on Google Workspace are two separate accounts that don't talk to each other automatically — the link between them is built entirely through DNS records you add yourself. Get this wrong and email either bounces or never arrives, so it's worth doing carefully the first time rather than troubleshooting delivery problems later.
This guide walks through the whole path: starting from your Namecheap dashboard, moving into the Google Admin console to manage the domain, and finishing with the DNS changes that make both email and your website resolve under your own name. None of it requires a developer, but it does require patience while DNS changes propagate.
01Confirm your domain in the Namecheap dashboard
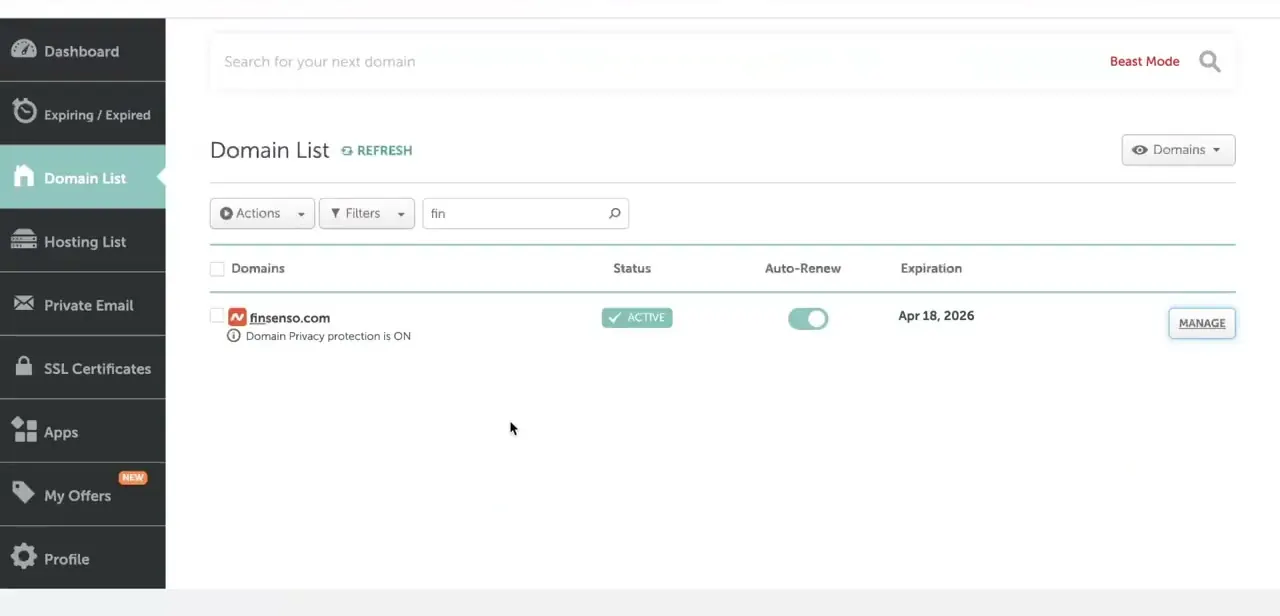
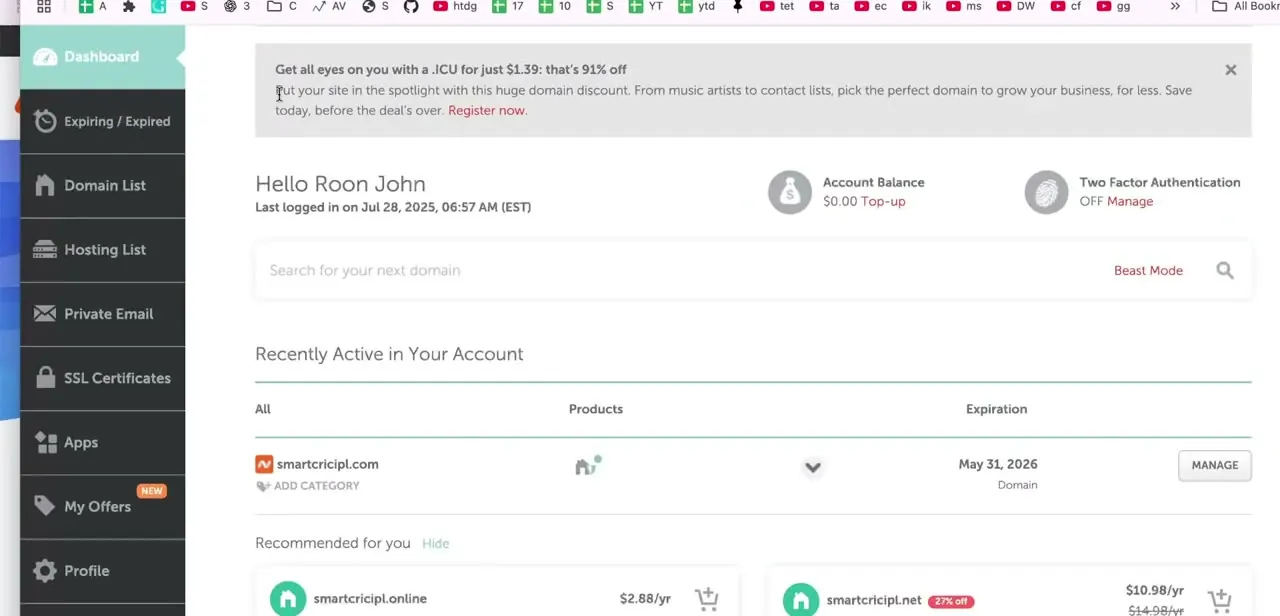
Log in to Namecheap and land on the dashboard, where "Recently Active in Your Account" lists the domains tied to your login along with their expiration date and a Manage button. Before touching Google Workspace, confirm you're looking at the exact domain you intend to connect — it's easy to have several similar-looking domains registered and edit the wrong one's DNS. Click Manage next to the correct domain to open its settings, since that's also where the Advanced DNS tab lives, the tab you'll come back to a few steps from now to actually add records.
02Start domain setup in Google Workspace
In a separate tab, sign up for or sign in to Google Workspace and enter the same Namecheap domain name when it asks which domain you want to use. Google treats this as the anchor for the whole account — every user's email address and every service tied to Workspace will live under this domain, so double-check the spelling matches exactly what you registered in Namecheap. If you're adding Workspace to a domain you already use for something else, Google will still walk you through the same setup flow rather than skipping steps.
03Verify ownership with a TXT record
Google won't activate anything on a domain it can't confirm you own, so it generates a verification method — usually a TXT record — that only the domain's actual owner could add. Copy the exact value Google gives you; a single missing character means verification fails and you have to start the check again. This step exists purely to stop someone else from claiming your domain inside Google Workspace, so there's no way to skip it even on a brand-new account.
04Add the verification and MX records in Namecheap
Back in Namecheap, open Advanced DNS for the domain and add a new TXT record with the exact value Google provided, then add the MX records Google lists for Gmail delivery — these have specific priority numbers that need to match what Google shows, not a guess. Leave any existing records alone unless Google's instructions say to remove them, since deleting the wrong record can take down a working website or inbox. Save the changes, then return to Google Workspace and click Verify; if it doesn't pass immediately, wait rather than repeatedly editing the record, since DNS changes take time to spread across the internet's servers.
05Manage the domain from the Google Admin console
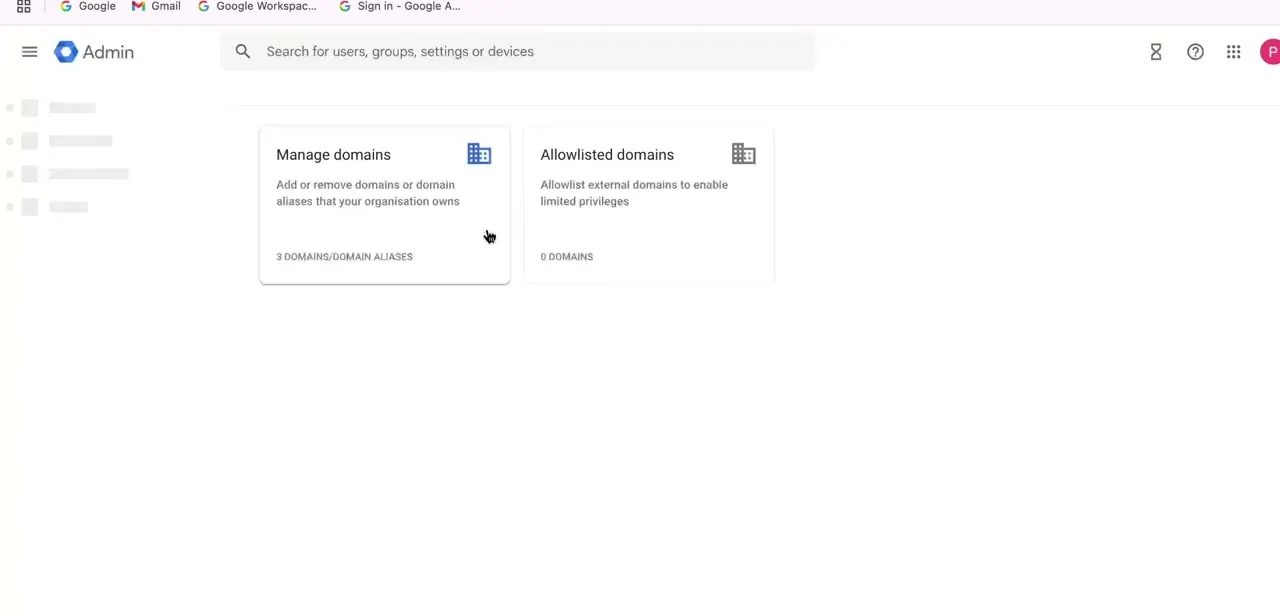
Once verified, the domain shows up in the Google Admin console under Account settings, on the Manage domains screen alongside any domain aliases and a separate Allowlisted domains panel for external domains you want limited access for. This is the control center for the domain going forward — it's where you'd add a second domain alias later, or check that your primary domain is still marked correctly. Bookmark this screen, since it's also the fastest way to confirm Google's side agrees the domain is verified without digging through settings menus.
06Connect your website and confirm delivery
If you're building the actual website in Google Sites or another Google-connected tool, add the site's CNAME or A record the same way you added the MX records, following whatever Google specifies for that product. Once both sets of records are live, test both halves of the setup: send a real email to an address on the domain and check it lands in Gmail, then load the domain in a browser to confirm the site resolves. Give DNS up to 48 hours if either check fails right away — most "it's not working" reports are really just propagation still in progress rather than a misconfigured record.
Frequently asked questions
Do I need to transfer my domain from Namecheap to Google?
No, you can keep your domain registered with Namecheap and simply point the necessary DNS records to Google Workspace.
How long does it take for DNS changes to take effect?
DNS propagation can take anywhere from a few minutes up to 48 hours, so allow some time before troubleshooting if things aren't working immediately.
Can I use Namecheap's hosting alongside Google Workspace email?
Yes, you can keep your website hosted elsewhere while using Google Workspace strictly for email, as long as the DNS records are set correctly for each service.
What if verification fails in Google Workspace?
Double-check that the exact verification record was added in Namecheap's DNS settings and give it time to propagate before trying again — repeatedly re-adding the record without waiting usually just resets the propagation clock.
Where do I manage the domain once it's connected?
Inside the Google Admin console, under Account settings → Domains → Manage domains, which lists every domain and domain alias tied to your Workspace account.
About the author

Impran M N
I've been hooked on technology for as long as I can remember — especially the new tools and AI apps that seem to land every other week. Easy Tech Tuts is where I write up whatever I've just worked out: I do the task in the real product, record the screen, and turn it into the guide I wish I'd found first.