Easy Tech Tuts
How To Connect Namecheap Domain To Blogger Blog Website, Solve 404 Error Easily 2026
By Impran M N
Connecting a Namecheap domain to a Blogger blog gives your site a professional, branded web address, but it commonly runs into a 404 error if the DNS records aren't set up exactly right. The two sides of this — Blogger's Custom domain field and Namecheap's Advanced DNS records — have to agree with each other precisely, and a single missing CNAME record is usually the whole story behind the error. This guide walks through both panels so you can see exactly what needs to match.
01Set your custom domain in Blogger
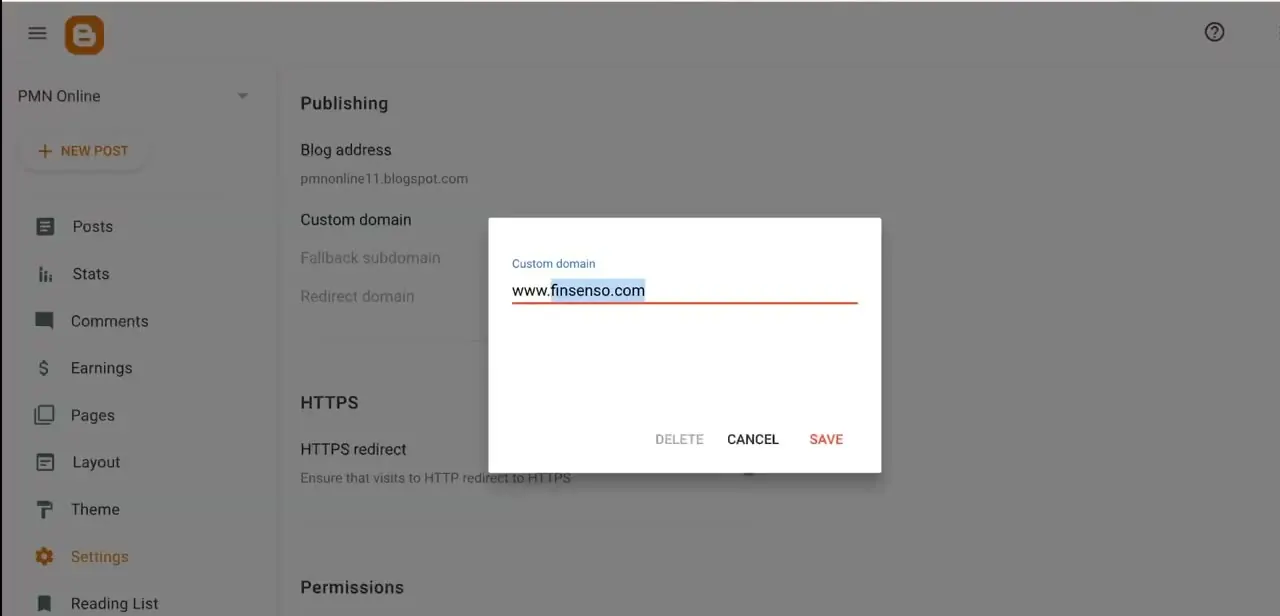
In Blogger, open Settings and find Publishing, where your blog currently shows its default blogspot.com address. Click Custom domain and type the domain you want to use, including the www prefix — for example www.yourdomain.com rather than the bare root domain, since Blogger's setup is built around the www subdomain by default.
Hit Save, and Blogger will immediately try to verify the domain; at this point it will fail, because Namecheap doesn't yet have the DNS records Blogger needs. That's expected — this step just tells Blogger what to look for.
02Log in to Namecheap and open your domain list
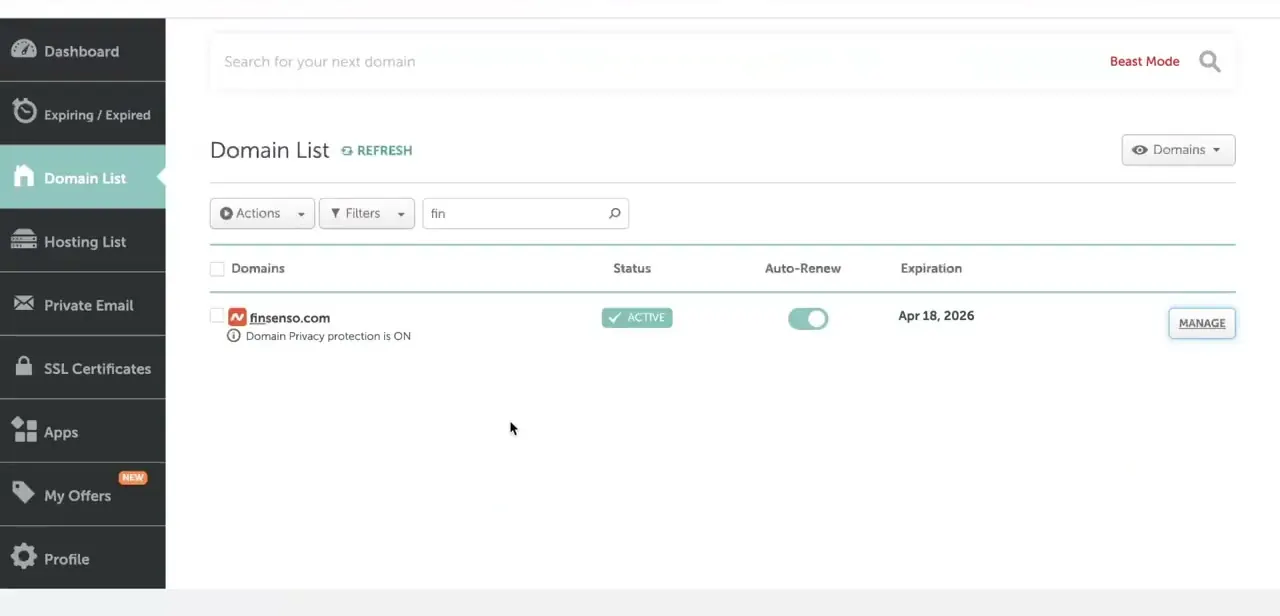
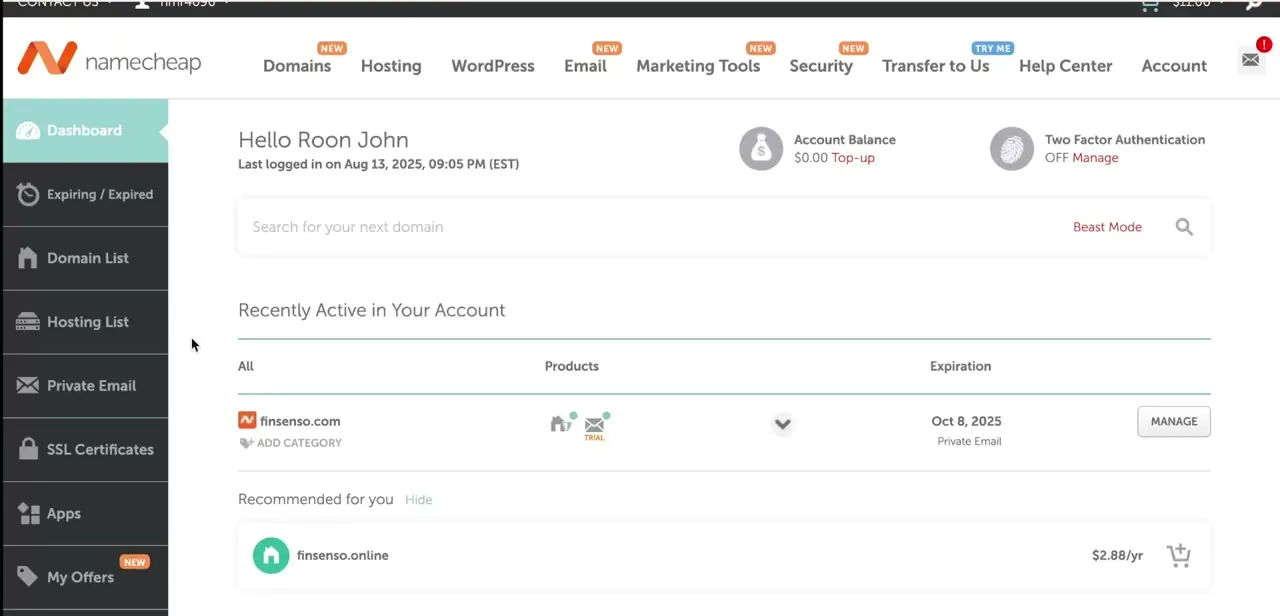
Sign in to your Namecheap account and go to Domain List, where every domain you've registered is shown alongside its expiration date and a Manage button. Find the domain you just entered into Blogger and click Manage to open its settings. This is also a good moment to note the domain's expiration date while you're there — a domain about to lapse is a separate problem from a 404 error, but it's an easy thing to miss if you're only focused on DNS.
03Add the CNAME records Blogger requires
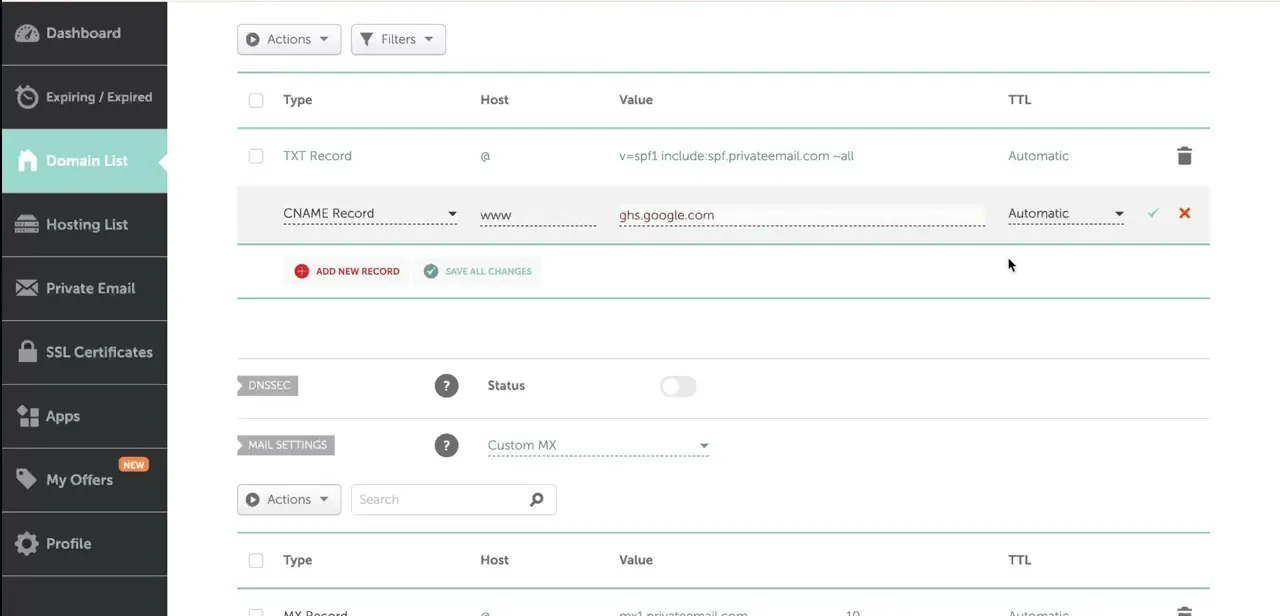
Inside the domain's management page, open the Advanced DNS tab and use Add New Record. Blogger's verification step (or its help documentation) gives you two CNAME records to add: one for the www host pointing to ghs.google.com, and a second, longer verification CNAME with a unique host and value that Blogger generates specifically for your domain.
Set the record type to CNAME, fill in the host and value exactly as shown — no typos, no trailing dots added by hand — and leave TTL on Automatic. Click the checkmark to save each record, then Save All Changes at the bottom of the list.
04Remove conflicting records
A 404 error after adding the right records is very often caused by leftover records that conflict with them — most commonly an old A record, URL redirect record, or parking-page CNAME still pointed at Namecheap's default hosting on the same host (www or @). DNS only resolves one way for a given host, so if Namecheap is still serving its own placeholder page for www while a CNAME also points www at Google, the result is inconsistent or wrong. Scan the Advanced DNS list for anything else touching the www host or the root, and delete it.
05Wait for propagation, then verify in Blogger
DNS changes don't apply instantly — propagation across the internet's resolvers can take anywhere from a few minutes to a couple of days, though it's usually much faster. Once you've given it some time, go back to Blogger's Custom domain field and save it again (or just check your site) to trigger a fresh verification. If it still 404s after a reasonable wait, go back through the CNAME values character by character — a single wrong character in the verification record's host or value is the most common reason this drags on.
06Confirm both www and non-www versions work
Once your domain loads correctly, test both www.yourdomain.com and the bare yourdomain.com in a browser. Blogger typically needs a redirect setting enabled so visitors who type the root domain get forwarded to the www version automatically — check the Redirect domain option in Blogger's Publishing settings if the non-www version isn't resolving. Getting both to work means links and bookmarks people already have won't break no matter which version they use.
Frequently asked questions
Why do I get a 404 error after connecting my domain to Blogger?
This is usually caused by incorrect, missing, or leftover CNAME records in Namecheap's Advanced DNS that don't exactly match what Blogger's custom domain verification requires.
Do I need to change nameservers to connect to Blogger?
No, you typically just add specific CNAME records in Namecheap's Advanced DNS panel rather than changing nameservers entirely.
How long until my custom domain works on Blogger?
It depends on DNS propagation, which can take anywhere from a few minutes up to 24-48 hours in some cases.
Can I use a subdomain instead of the root domain for Blogger?
Yes, Blogger supports connecting a subdomain, which can be simpler to set up since it avoids some of the root-domain redirect configuration.
Why does Blogger ask me to enter www in front of my domain?
Blogger's custom domain setup is built around a www CNAME pointing to ghs.google.com, so the www version is the primary address, with the root domain optionally redirecting to it.
About the author

Impran M N
I've been hooked on technology for as long as I can remember — especially the new tools and AI apps that seem to land every other week. Easy Tech Tuts is where I write up whatever I've just worked out: I do the task in the real product, record the screen, and turn it into the guide I wish I'd found first.