Easy Tech Tuts
How to Give Jira Access to User, Provide Dashboard Access in Projects Easily 2026
By Impran M N
Adding a teammate to Jira is more than firing off an invite — until you set the right project role, they can't open a board, and until you share a dashboard, they can't see the reports it's tracking. This guide walks through the actual admin screens: inviting someone into your organization, confirming the invite landed, and then setting their role on a specific project so their access matches what they're supposed to be doing.
It also covers the follow-up step most people skip — deciding who can see which dashboards once the account exists. By the end you'll know exactly where each of these settings lives instead of hunting through Jira's admin menus.
01Open your organization's admin settings
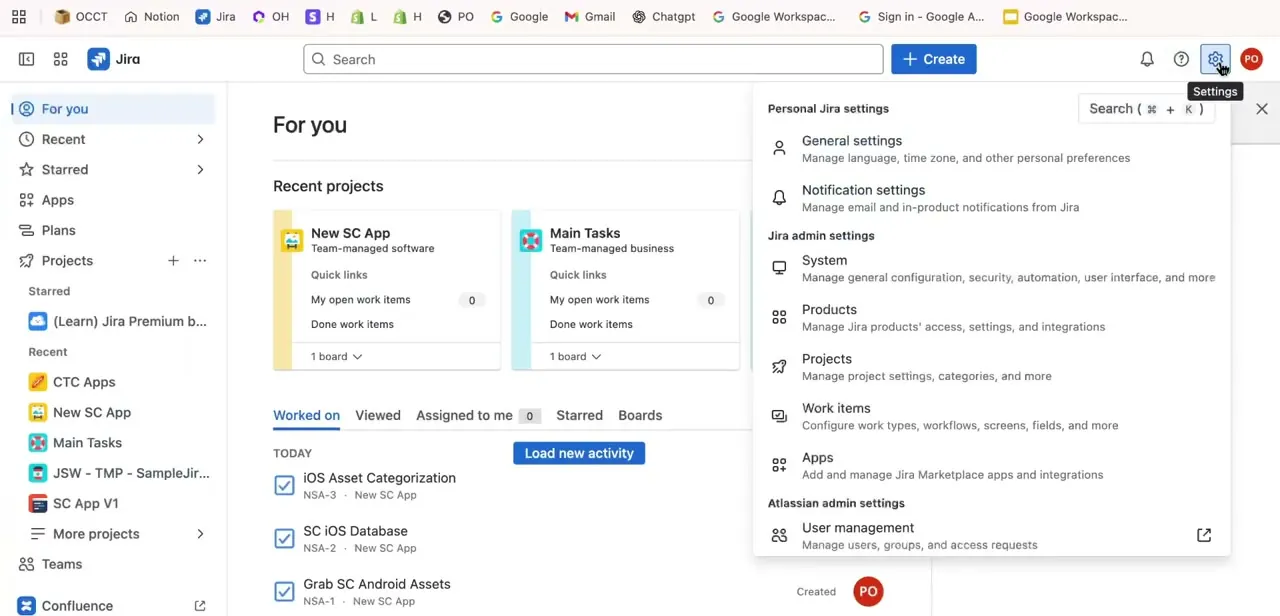
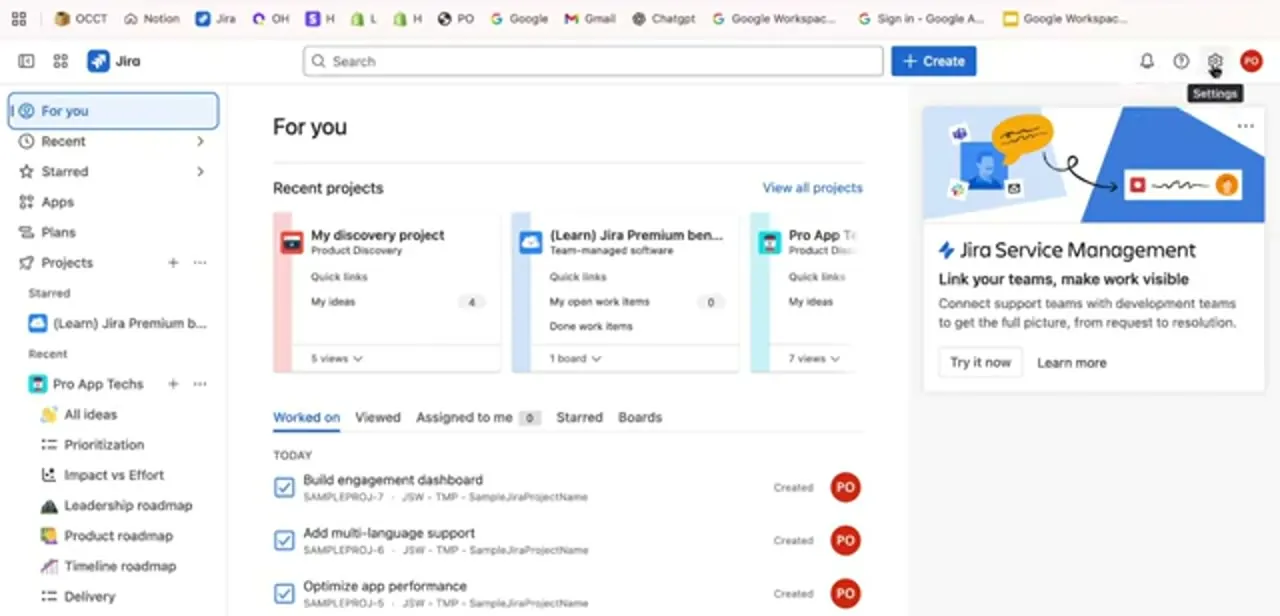
User access in Jira isn't managed from inside a project — it starts at the organization level. Click the gear icon in the top-right corner of Jira to reach Settings, which is also where Atlassian surfaces account-wide features like Jira Service Management. From here you're one click away from the Admin area that lists every user and product in your organization, so this is the starting point any time you need to add, remove, or audit who has access.
02Invite the new user
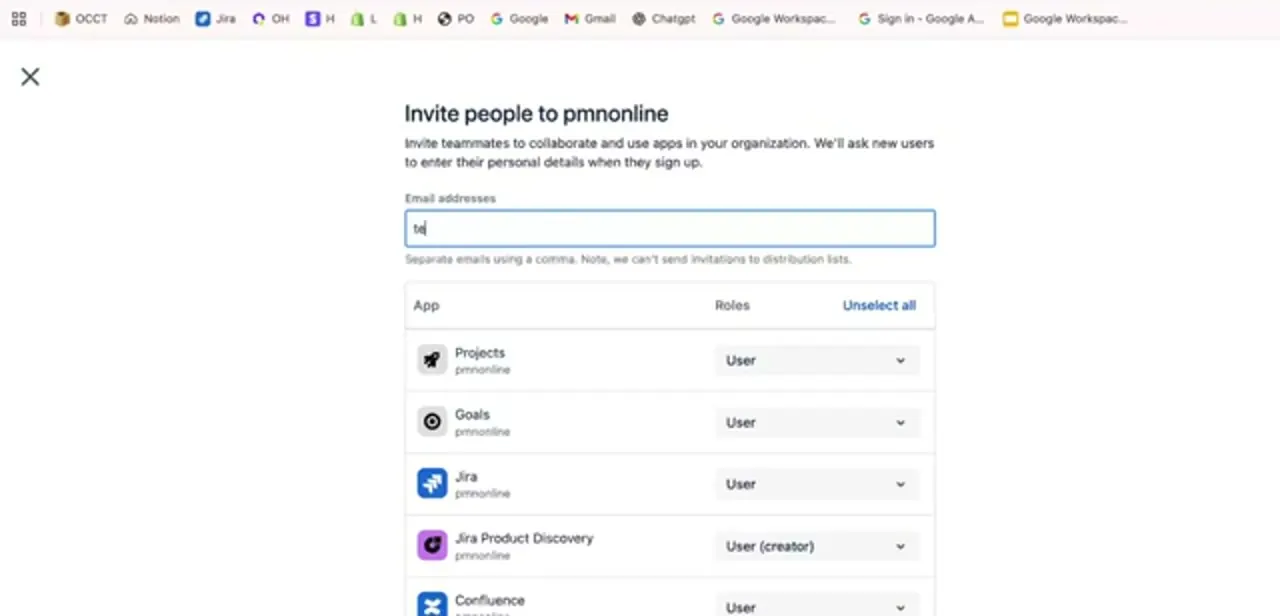
From the admin area, use Invite users to open the invite form. Type the person's email address, and you'll see a table listing every app in your organization — Projects, Goals, Jira, Jira Product Discovery, Confluence, and so on — each with its own Role dropdown defaulted to User.
Leave the defaults if they need standard access, or narrow individual apps down before sending the invite. Jira sends the recipient an email asking them to complete their account details, so nothing is granted until they accept.
03Confirm the invite in the Users list
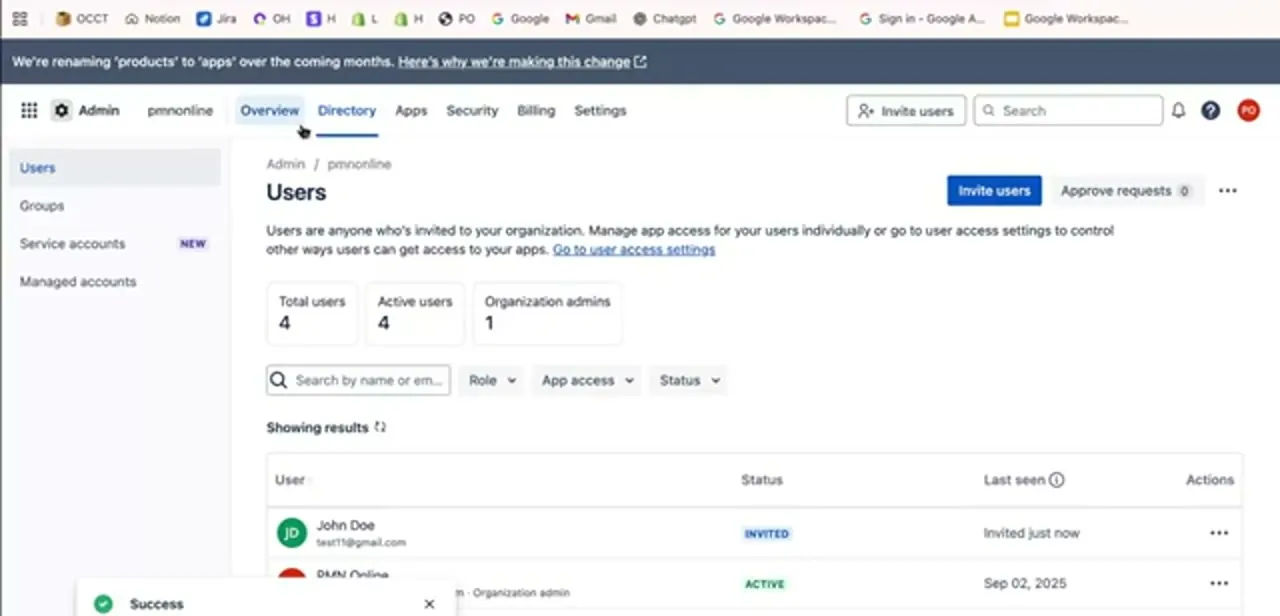
After sending the invite, head back to Admin → Users to verify it went through. The new account shows up with an Invited status until they accept, at which point it flips to Active. This screen is also your ongoing roster — it shows total users, active users, and organization admins at a glance, and you can search by name or filter by role and app access whenever you need to check who currently has access to what.
04Assign the user's project role
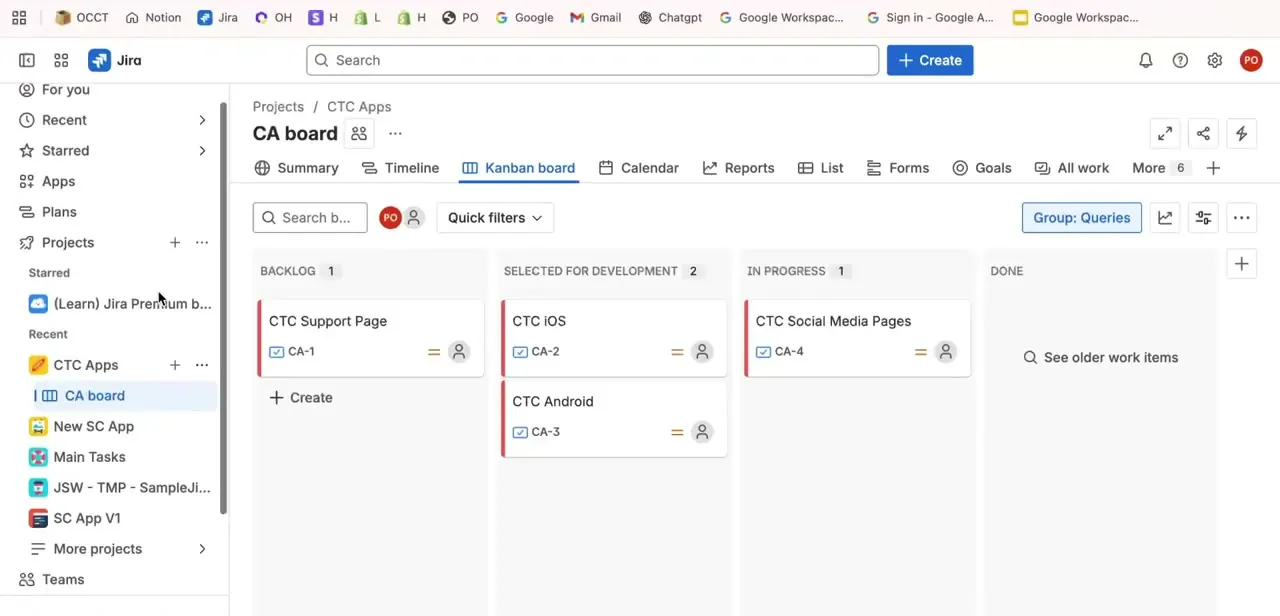
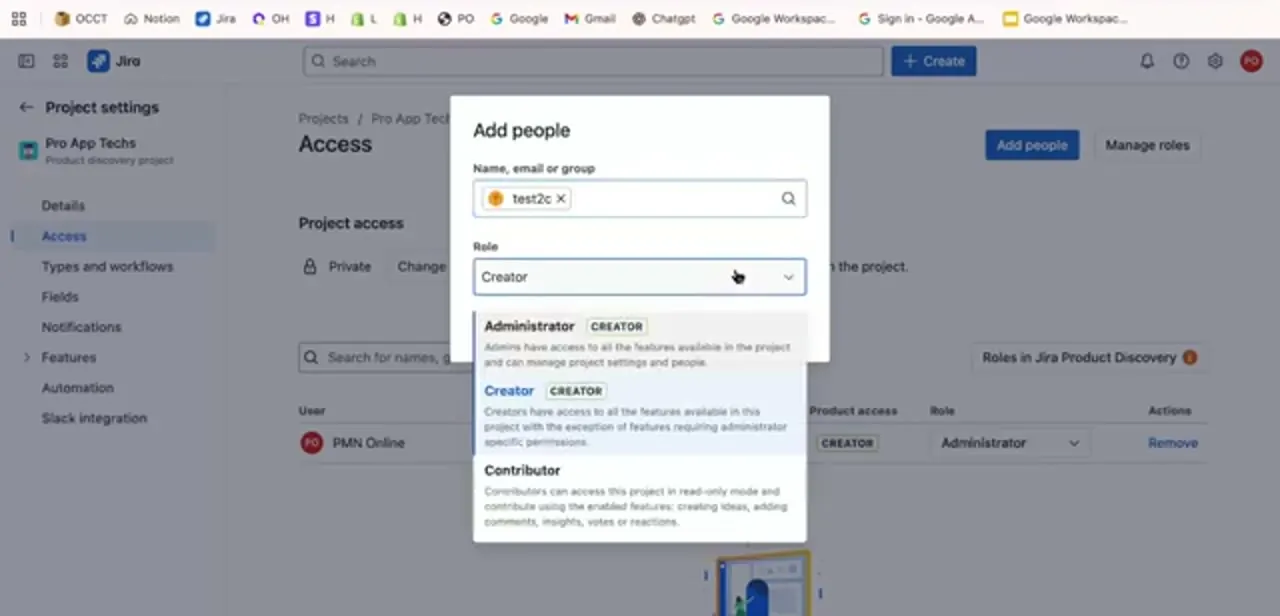
Being invited to the organization doesn't automatically put someone inside a project — that's a separate step done from within the project itself. Open the project, go to Project settings → Access, and use Add people to search for the person by name or email.
The Role dropdown here is project-specific: Administrator gives full control including people and settings, Creator can use every feature except admin-only settings, and Contributor gets read-only access plus the ability to add ideas, comments, and reactions. Pick the narrowest role that still lets them do their job.
05Share the dashboard they need
Project access controls boards and issues, but dashboards are shared separately. Open the dashboard, use its Share or Edit permissions option, and add the individual, a group, or the whole project as a viewer or editor. This is what actually lets the new teammate see burndown charts, sprint reports, or custom gadgets without you having to walk them through building their own.
06Review access before you move on
Once the invite, project role, and dashboard sharing are all in place, take thirty seconds to log in as a test or ask the new user to confirm what they can see. Grant only what someone's role genuinely requires — an admin role for a contributor-level task is the kind of over-provisioning that becomes a security headache later, and it's far easier to widen access when it's actually needed than to track down and revoke it after the fact.
Frequently asked questions
Who can invite new users to Jira?
Typically only organization or site administrators can send invites and manage app-level roles from the Admin area.
Does inviting someone to the organization give them project access?
No. The organization invite only creates the account and sets which apps they can open. You still need to add them inside each specific project through Project settings → Access.
What's the difference between Administrator, Creator, and Contributor roles?
Administrator has full control of the project including settings and people. Creator can use nearly every feature except admin-only settings. Contributor is read-only with the ability to add ideas, comments, and reactions — the safest default for most new teammates.
How do I share a dashboard with a specific user?
Open the dashboard and use its share or edit-permissions option to add the individual, a group, or an entire project as a viewer or editor.
What happens if I remove a user's access?
Removing them from a project or app immediately revokes their ability to view or edit it, though their historical activity and past contributions remain in the project's history.
About the author

Impran M N
I've been hooked on technology for as long as I can remember — especially the new tools and AI apps that seem to land every other week. Easy Tech Tuts is where I write up whatever I've just worked out: I do the task in the real product, record the screen, and turn it into the guide I wish I'd found first.