Easy Tech Tuts
How to Create a 3-Part Seamless Banner for Instagram With Canva Easily 2026
By Impran M N
A seamless banner splits one wide idea across three consecutive Instagram posts, so a visitor scrolling your grid sees a single continuous graphic instead of three unrelated squares. Canva makes this manageable with multi-page projects — you build each panel as its own page inside one file, keeping elements like a flight path, a gradient, or a background image consistent as they cross from one page into the next. This guide walks through setting up that multi-page canvas and designing panels that actually connect instead of just looking similar.
01Start a new Banner Landscape design
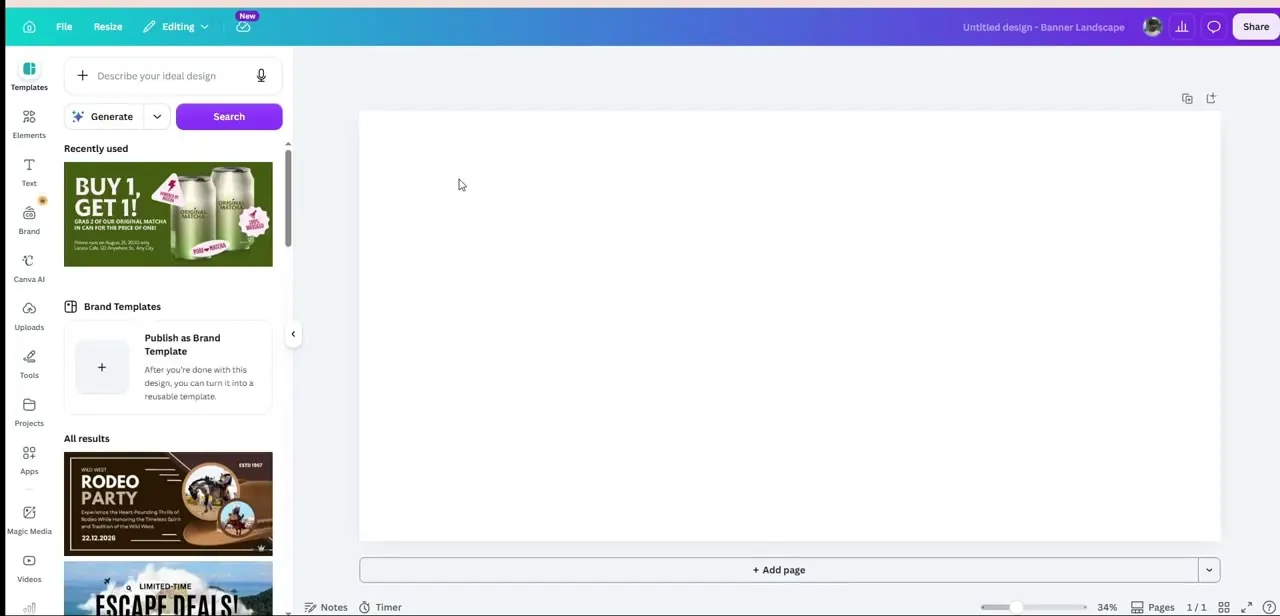
From Canva's Create menu, search for a Banner Landscape format or set a Custom size matching your Instagram post dimensions repeated three times across, and open a blank project. The left panel gives you Templates, Elements, Text, and Uploads to pull from, plus a Recently used row and a Generate search bar if you want Canva to suggest a starting layout rather than building every panel from a blank page.
02Add two more pages to hold each panel
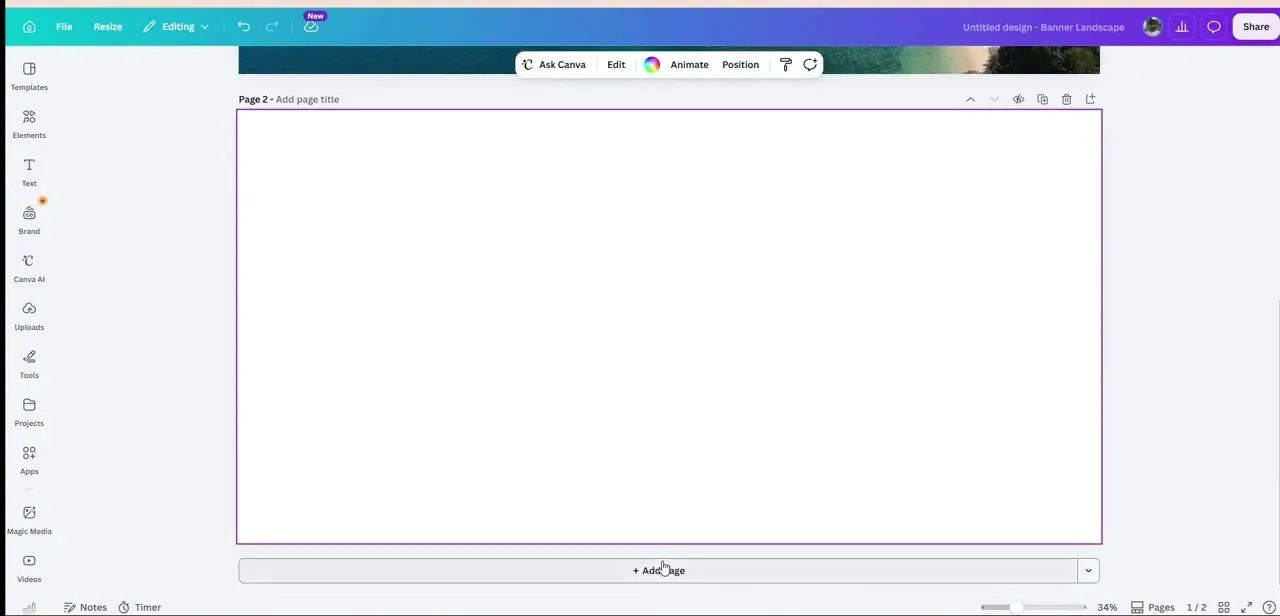
Click "+ Add page" at the bottom of the canvas to create Page 2, and again for Page 3, so you end up with three pages total inside one project — one per Instagram post. Keeping all three as pages in a single file, rather than three separate Canva documents, is what makes it realistic to check alignment between them as you work, since you can scroll between pages and compare edges directly instead of switching files.
03Design the first panel with room to continue
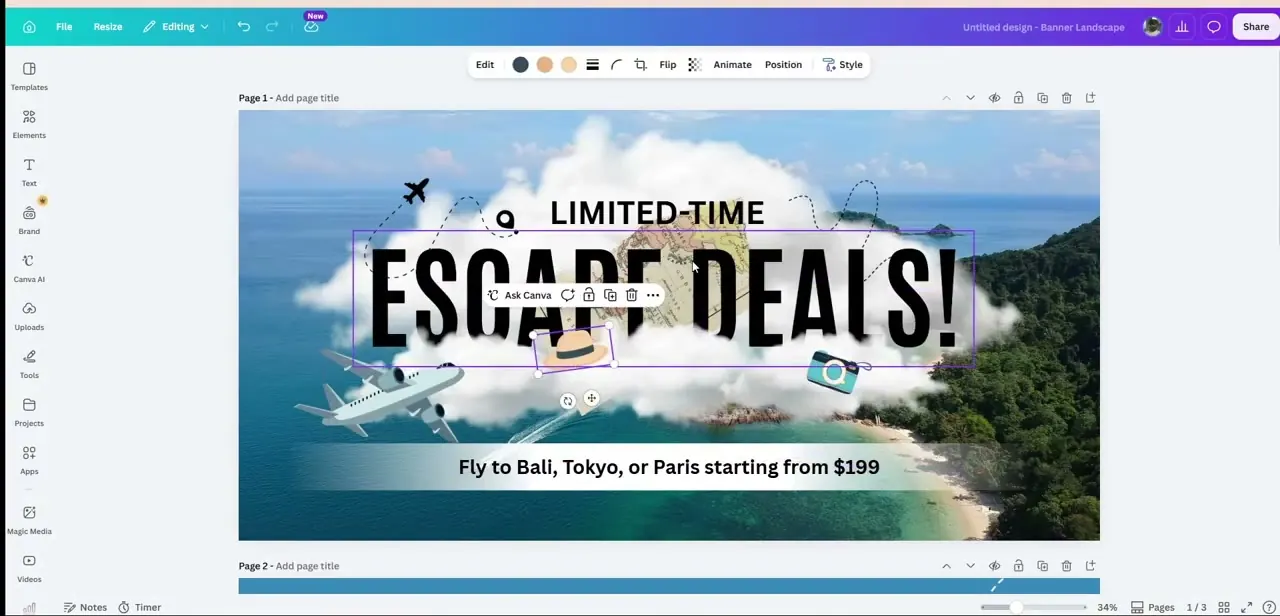
Build Page 1 with your background image, headline, and any graphic elements — in this example, a travel scene with a bold "Escape Deals!" headline, a plane icon, and a dashed flight path curling across the sky. The detail that makes a banner read as seamless rather than three matching posts is deliberately running an element toward the edge of the panel, like a flight path or cloud that visually trails off the right side, so a viewer's eye expects it to continue into the next post.
04Carry the motif through to the final panel
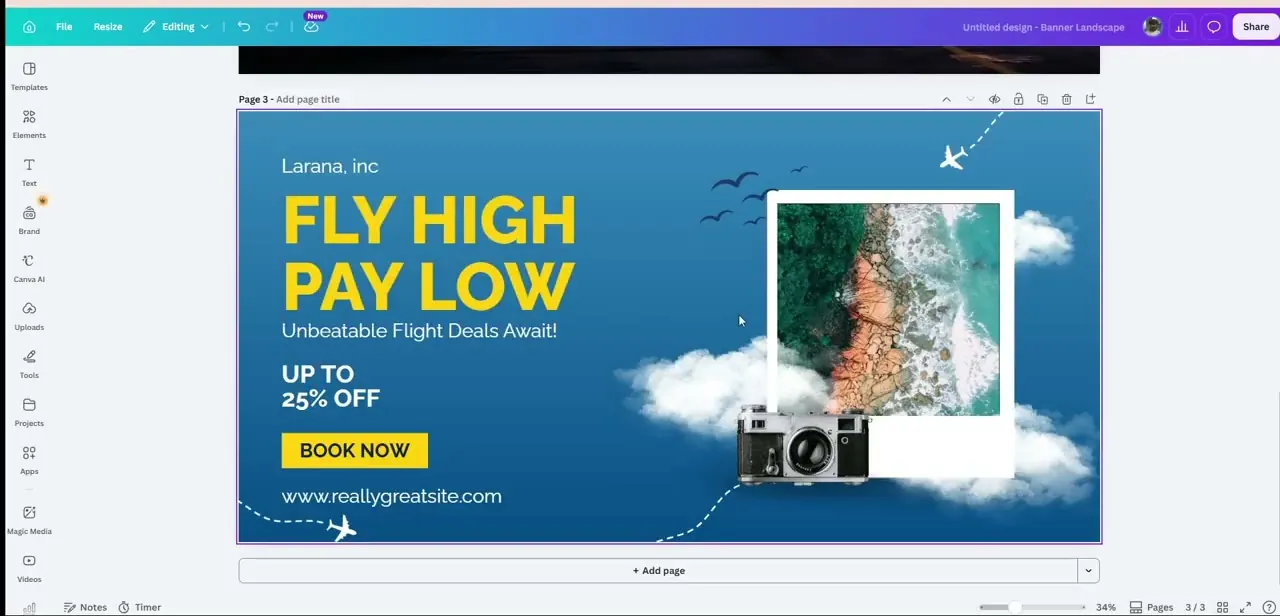
On the third page, pick the visual thread back up — here, the same dashed flight path resumes from the bottom-left corner as if it had traveled straight through from the previous panels, leading into a closing call to action like "Book Now" and a website URL. Matching the color palette, font choices, and any recurring icon (the plane, the camera) across all three pages is what sells the continuity; a mismatched font or a completely different background color between panels breaks the seamless effect even if the layout otherwise lines up.
05Check alignment by viewing all three pages in sequence
Use Canva's page thumbnails or the grid view at the bottom of the editor to see Pages 1 through 3 side by side at a reduced size, roughly mimicking how they'll actually appear stacked in your Instagram grid. Look specifically at where elements meet the top and bottom edges of adjacent panels — colors, cloud shapes, or gradients that don't quite line up are much easier to catch here than after you've already downloaded and posted all three images.
06Export each page separately and post in the right order
Use File, then Download, and choose to export each page as its own image file rather than a single multi-page PDF — Instagram needs three distinct image files, one per post. Upload them to your grid in the correct sequence, since Instagram's grid fills left to right, top to bottom in the order you post, and posting them out of order will scramble the continuous effect even though each individual image is correct.
Frequently asked questions
What size should each part of the banner be?
Each panel should match Instagram's standard square or portrait post dimensions so the three pieces align correctly once they sit side by side in your grid.
Do the three images need to be posted in a specific order?
Yes — post them in the same left-to-right sequence you designed them in Canva, since Instagram's grid fills in posting order and an out-of-sequence upload breaks the continuous visual.
Can I use this technique for a two-part or four-part design instead?
Yes, the same multi-page approach in Canva works for any number of panels — just add or remove pages to match how many posts you want the banner to span.
Will editing my grid layout later break the banner effect?
Yes — deleting a post in between the banner panels, or adding a new post between them later, will disrupt the sequence and break the seamless read across your grid.
What makes a banner actually look seamless instead of just similar?
Consistency in background color, font, and at least one recurring visual element (like a line, path, or shape) that appears to continue across the edge of each panel — matching colors alone isn't enough if the layout doesn't lead the eye from one panel into the next.
About the author

Impran M N
I've been hooked on technology for as long as I can remember — especially the new tools and AI apps that seem to land every other week. Easy Tech Tuts is where I write up whatever I've just worked out: I do the task in the real product, record the screen, and turn it into the guide I wish I'd found first.