Easy Tech Tuts
How to Create MySQL Database in Hostinger & Access Phpmyadmin Easily 2026
By Impran M N
Whether you're setting up WordPress or building a custom application, most projects eventually need a MySQL database, and Hostinger keeps the whole process — creating the database, connecting it to phpMyAdmin, and browsing what's inside — in one control panel. This guide walks from the site dashboard where the Databases tool lives through to actually browsing tables inside phpMyAdmin, including what a real Hostinger-created database name looks like.
01Open your site's dashboard in hPanel
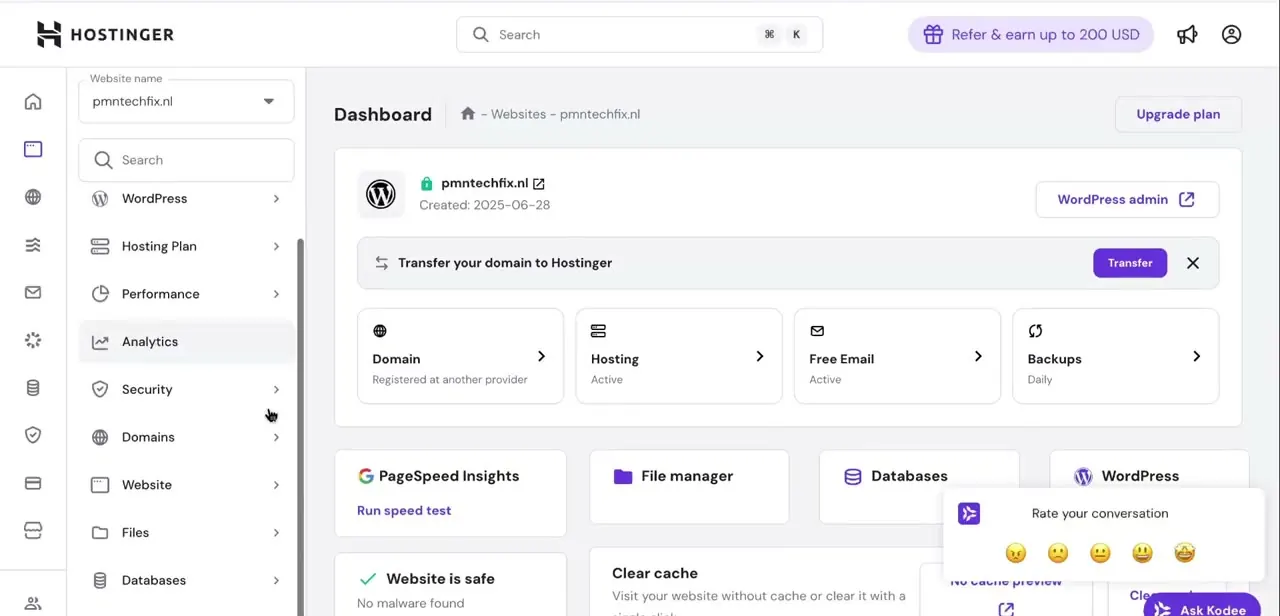
Log in to Hostinger and select the website you're working on to land on its Dashboard. This overview page shows tiles for Domain, Hosting, Free Email, and Backups near the top, and a second row further down with PageSpeed Insights, File manager, and Databases. The Databases tile is your entry point for everything covered in this guide — creating a new database, managing existing ones, and launching phpMyAdmin.
02Create a new MySQL database
Click into Databases and choose the option to create a new one. Hostinger names your database with your account's numeric prefix attached automatically — something like u276259427_yourdbname — so the name you type becomes a suffix rather than the full name. Set a database name that describes what it's for, since you'll be referencing this full prefixed name in your site's configuration file later.
03Create a database user and assign permissions
Alongside the database itself, create a MySQL user with its own username and password, then assign that user full permissions on the new database. This user-and-database pair is what your WordPress installation or custom application will authenticate with — keep the password somewhere secure, since Hostinger typically shows it only once at creation time.
04Connect the database to your site or app
For WordPress, enter the database name, username, password, and host (usually localhost) into your wp-config.php file during setup, or let the WordPress installer handle it if you're using Hostinger's one-click install. For a custom app, use the same four credentials in whatever connection string or environment file your framework expects.
05Log in to phpMyAdmin
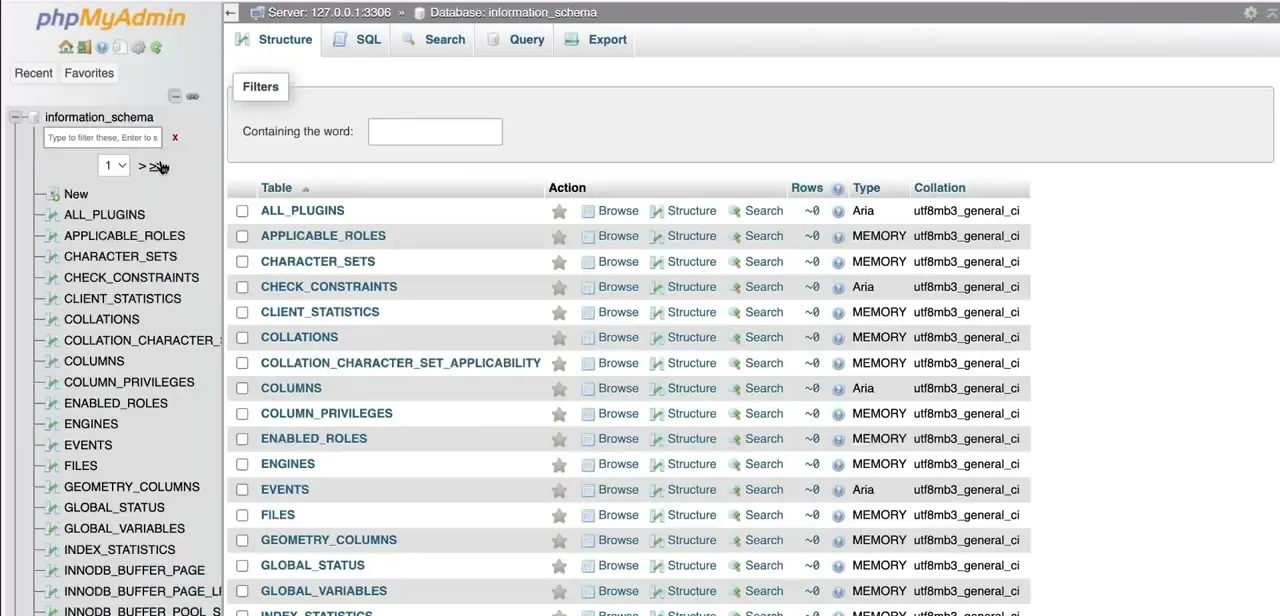
From the Databases section, launch phpMyAdmin, which opens to a Structure view of whatever database is currently selected — by default this often lands on the internal information_schema database, showing dozens of system tables like COLUMNS, ENGINES, and EVENTS with their row counts, types, and collations. This is normal; information_schema is MySQL's built-in metadata database, not something you created.
06Switch to your own database
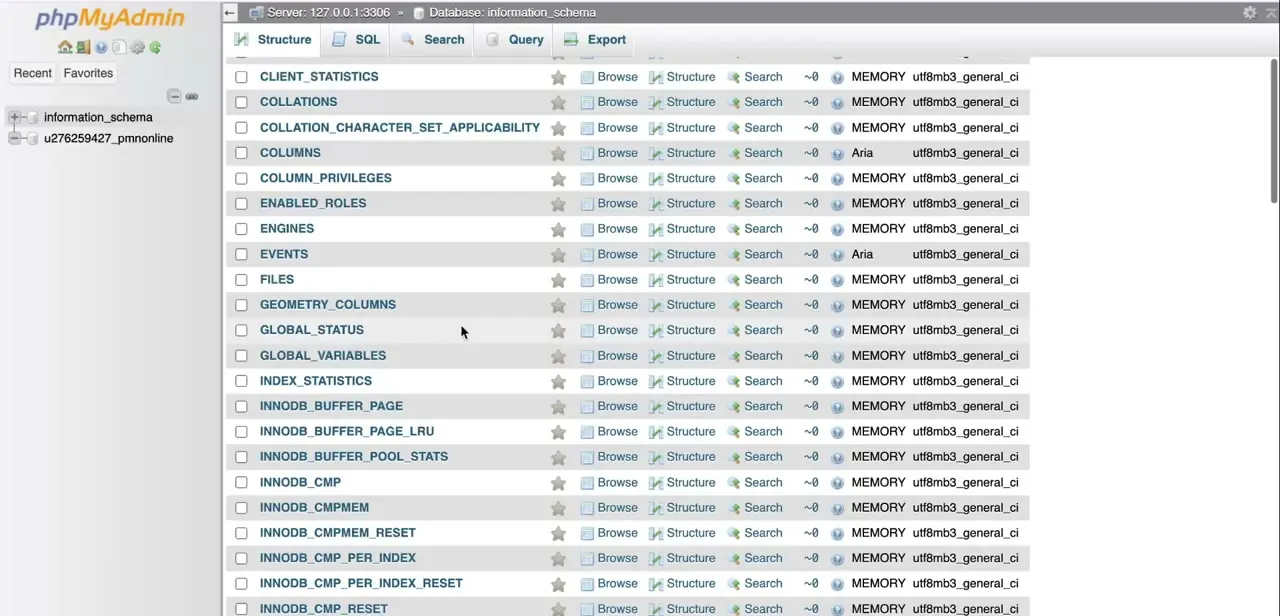
In phpMyAdmin's left sidebar, click your actual database — it will appear with the same prefixed name Hostinger generated, such as u276259427_pmnonline, sitting below information_schema in the list. Selecting it switches the Structure view to your own tables instead of MySQL's internal ones, which is where you'll do the real work of browsing rows, editing structure, and running queries.
07Manage tables, import data, and run queries
Once inside your own database, use the Browse and Structure links per table to view or edit rows and columns, the SQL tab to run raw queries directly, and Import or Export at the top to move data in or out as a .sql file. This covers the everyday database management most WordPress and custom-app workflows need without ever leaving the browser.
Frequently asked questions
Do I need to create a user separately from the database?
Yes, you create the database and then create a MySQL user with permissions on it, since Hostinger treats the database and its access credentials as separate objects.
Why is my database name longer than what I typed?
Hostinger automatically prefixes every database and username with your account's numeric ID, so a name you enter as "pmnonline" becomes something like u276259427_pmnonline.
Can I import and export data in phpMyAdmin?
Yes, phpMyAdmin lets you import and export data as .sql files along with running SQL queries directly from the SQL tab.
Why does phpMyAdmin open to information_schema instead of my database?
information_schema is MySQL's built-in metadata database and is often the default selection; just click your own prefixed database name in the sidebar to switch to it.
Is this suitable for WordPress users?
Yes, it's helpful for both beginners working on WordPress and developers building custom sites that need direct database access.
About the author

Impran M N
I've been hooked on technology for as long as I can remember — especially the new tools and AI apps that seem to land every other week. Easy Tech Tuts is where I write up whatever I've just worked out: I do the task in the real product, record the screen, and turn it into the guide I wish I'd found first.