Easy Tech Tuts
How to Use Contact Tags in GoHighLevel Easily 2026
By Impran M N
Contact tags in GoHighLevel let you label each person in your list — high priority, follow-up, client, vip, and anything else that matters to your workflow — so your outreach can be targeted instead of one-size-fits-all. This guide walks through where tags live on a contact's record, how to add or change them, and how the Contacts list ties tagging into broader filtering and Smart Lists. It's designed for marketers, sales professionals, and business owners who want their contact list to actually work for their communication strategy.
01Open a contact and find the Tags field
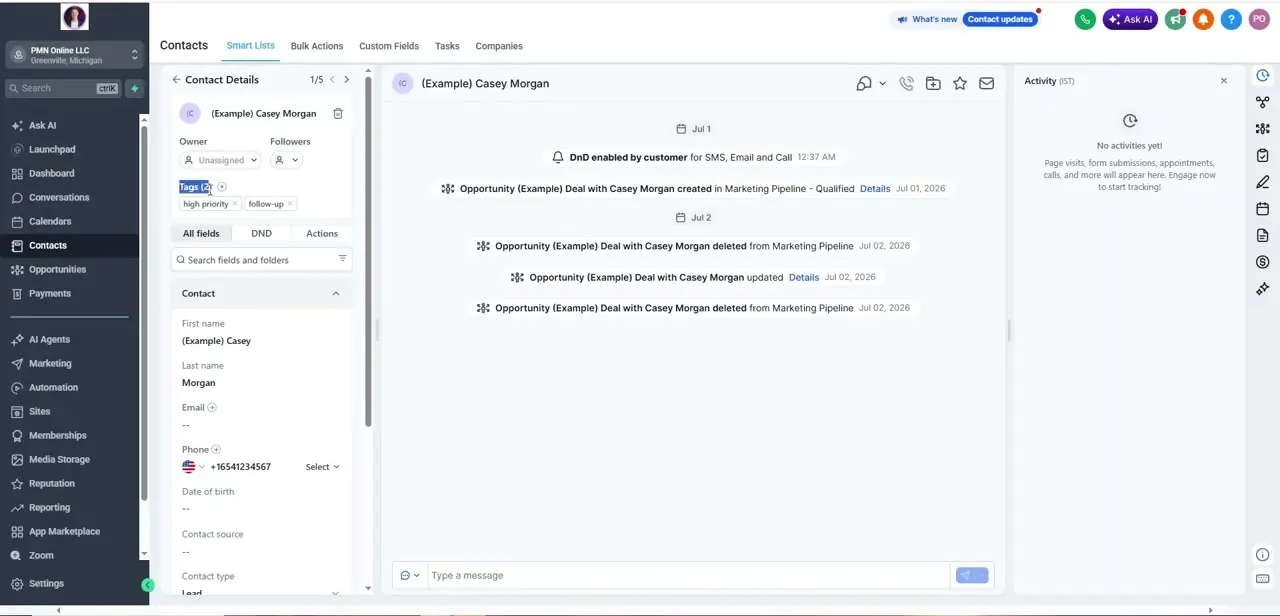
Click into Contacts, then select any individual contact to open Contact Details on the left. Right below the contact's name, Owner, and Followers fields sits a Tags section, labeled with a count in parentheses — in the video, an example contact named Casey Morgan showed "Tags (2)" with high priority and follow-up already applied as small pill-shaped labels. A plus icon next to the Tags heading is how you add another one.
02Add or swap tags to match reality
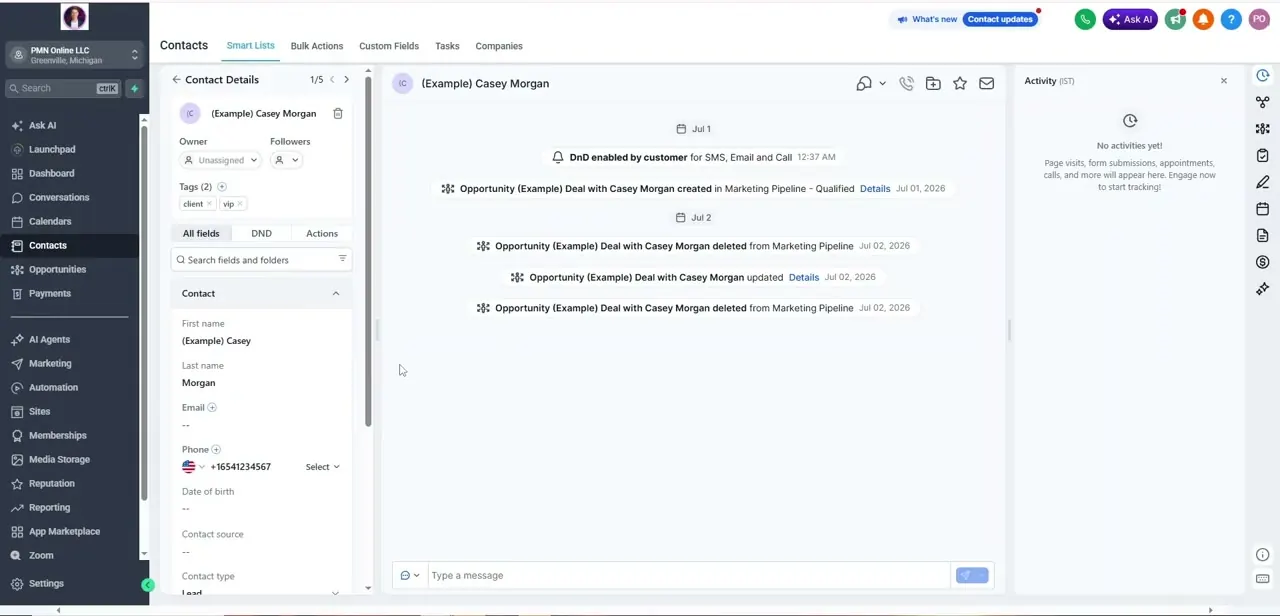
Click the plus icon to search existing tags or type a new one, and click the x on any tag pill to remove it. The same contact record later showed a different pair — client and vip — in place of the original high priority and follow-up tags, which is exactly how tagging should work in practice: as a contact moves from lead to customer, update their tags rather than leaving stale labels that no longer describe them.
03Use Filters on the Contacts list to build segments
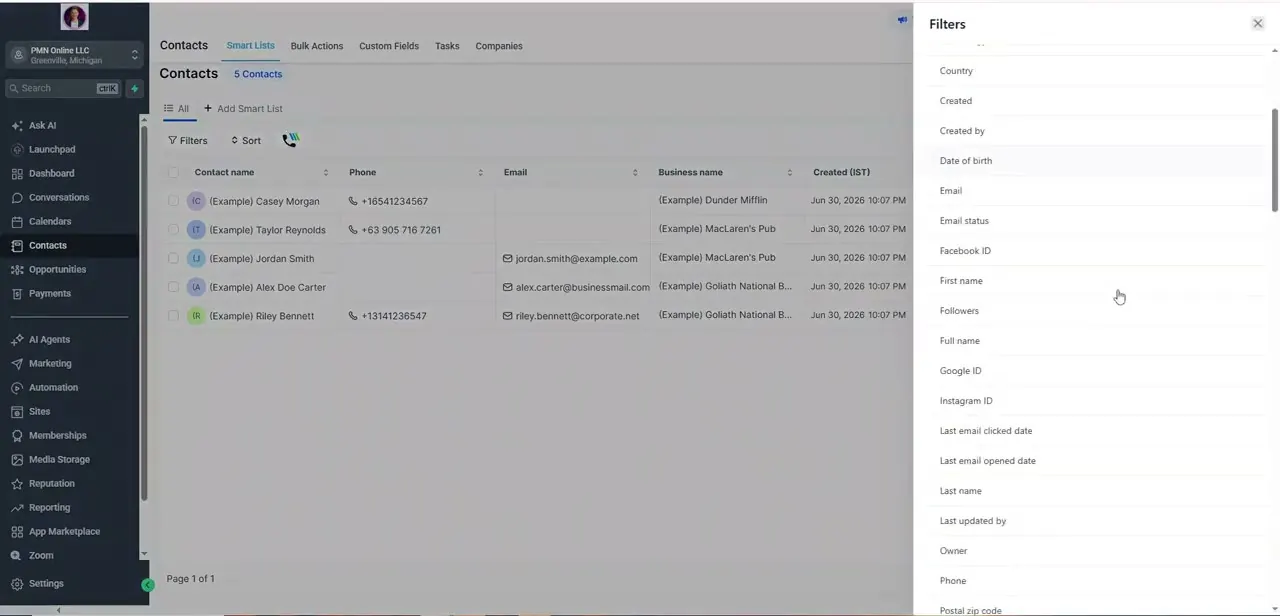
Back on the main Contacts screen, the Smart Lists tab shows your full contact table with columns for name, phone, email, business name, and creation date. Clicking Filters opens a long panel of fields you can filter by — Country, Email status, First name, Last email opened date, Owner, and dozens more, scrolling well past what fits on one screen. Tags is one of the fields in this list, and filtering by it is how a label on an individual contact turns into an actual audience you can message as a group.
04Save a filtered view as a Smart List
Once you've filtered contacts down to a meaningful group — say, everyone tagged vip — the Smart Lists tab lets you save that filter combination as a named list you can return to instantly instead of rebuilding the filter each time. This is where tags earn their keep: a one-off search is fine for a single campaign, but a saved Smart List built on a tag keeps updating automatically as new contacts get that same tag applied.
05Apply tags consistently across your workflow
Tags are only useful if they mean the same thing every time someone applies one. Agree on a short, specific set upfront — lead stage tags like new-lead or qualified, relationship tags like client or vip, and action tags like follow-up or high priority are a reasonable starting set — and avoid letting overlapping or redundant tags multiply, since that's what turns a useful filter into a cluttered mess nobody trusts.
06Pair tags with automation for hands-off sorting
Beyond manual tagging, GoHighLevel's automation and workflow tools can apply or remove tags automatically based on a contact's behavior — filling out a form, clicking a link in an email, or booking an appointment. Setting this up once means new contacts get sorted the moment they take a qualifying action, so your Smart Lists and segmented campaigns stay current without anyone manually reviewing new contacts one by one.
Frequently asked questions
Where do I find a contact's tags in GoHighLevel?
Open Contacts, click into an individual contact, and look at Contact Details on the left — the Tags section sits just below the Owner and Followers fields, showing each applied tag as a small pill you can remove with its x icon.
Can I apply more than one tag to a single contact?
Yes. The example contact in the video had two tags applied at once (high priority and follow-up, later changed to client and vip), and there's no indication of a hard limit on how many you can add.
How does automation work with contact tags?
Workflows and automations can apply or remove tags automatically based on a contact's behavior, such as clicking a link, submitting a form, or booking an appointment, without anyone manually editing the contact record.
How do I turn a tag into an actual list I can message?
Use the Filters panel on the Contacts screen under Smart Lists, filter by the tag you want, and save that filtered view as a named Smart List so it stays current as new contacts get the same tag.
How many tags should I create to stay organized?
Keep the set focused on categories genuinely useful to your workflow — lead stage, relationship type, and required actions cover most cases — since too many overlapping tags make filtering harder rather than easier.
About the author

Impran M N
I've been hooked on technology for as long as I can remember — especially the new tools and AI apps that seem to land every other week. Easy Tech Tuts is where I write up whatever I've just worked out: I do the task in the real product, record the screen, and turn it into the guide I wish I'd found first.