Easy Tech Tuts
How to Upload Images in Godaddy Website Builder, Add Photos Easily 2026
By Impran M N
Good visuals make a real difference for a blog, business site, or portfolio, and GoDaddy Website Builder makes adding them fairly straightforward once you know where to look. This guide covers getting from your GoDaddy account into the editor, finding the section types that hold images, and dropping photos into a gallery so your page actually shows them off. It's aimed at beginners who want their site looking sharp without digging through menus to find the right tool.
01Sign in to your GoDaddy account
Everything starts at your GoDaddy account dashboard, reachable after signing in with your email and password or one of the quick sign-in options like Google or Apple. From the dashboard you'll see shortcuts to your domains, renewals and billing, and the Website Builder product itself. If you haven't started a site yet, this is also where GoDaddy surfaces the Website Builder plan alongside domain offers, so it's worth glancing at what's already active on your account before diving into the editor.

02Open your site in the Website Builder editor
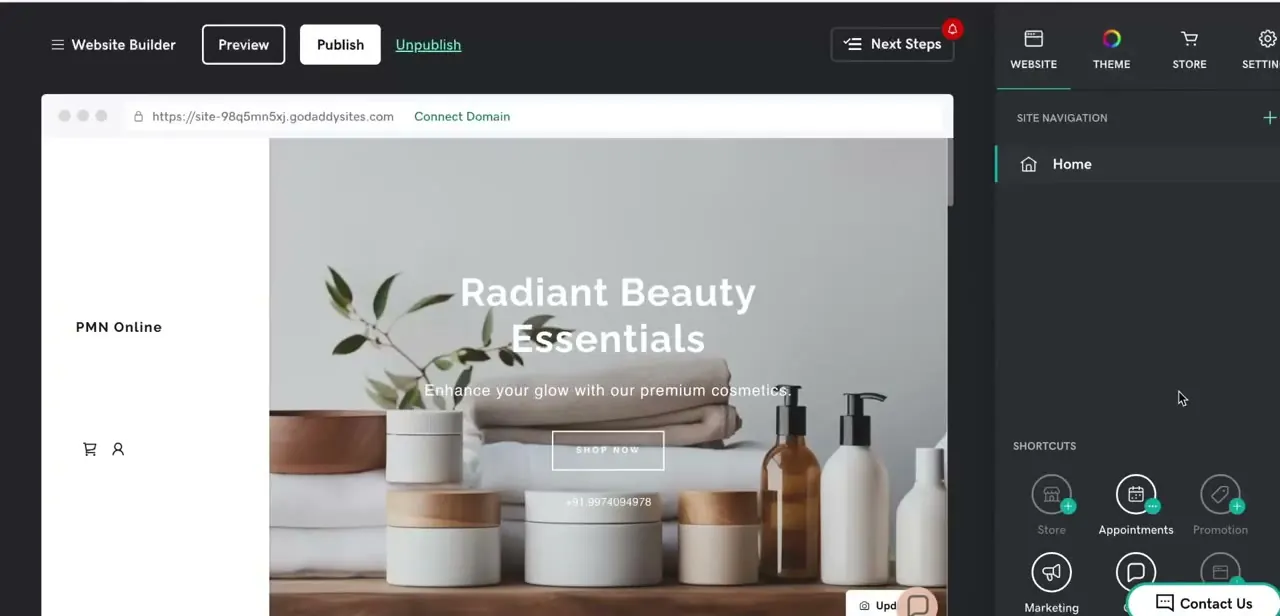
From the dashboard, launch Website Builder for the site you want to edit. You land in the editor with a live preview of your homepage on the left and a Website, Theme, Store, and Settings menu running along the top right.
The site navigation panel on the right lists your pages — Home and any others you've created — and a Shortcuts row below it gives one-click access to common sections like Store, Appointments, and Marketing. This is your home base for every visual change, including adding photos.
03Add a section built to hold images
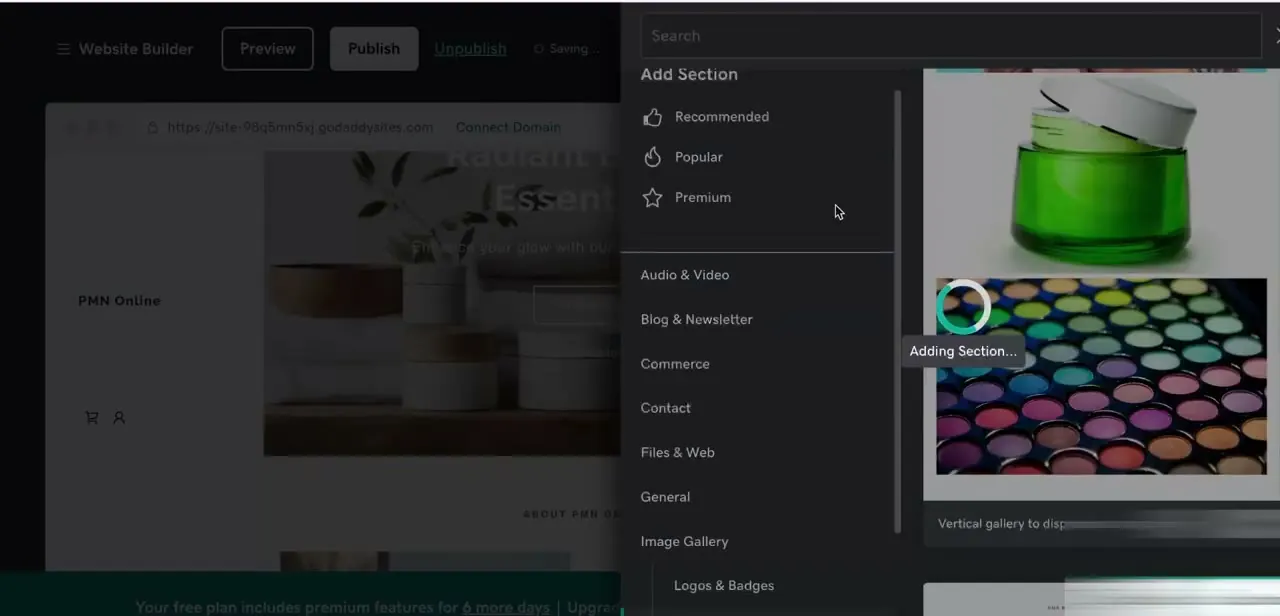
Click into the page where you want a photo and use the add-section control to open the section library. It's organized by category — Audio & Video, Blog & Newsletter, Commerce, Files & Web, General, and a dedicated Image Gallery group with options like Logos & Badges for different layout styles. Picking a gallery-type section is the fastest route to a clean photo layout, since it's already built with image placeholders instead of forcing you to wedge a picture into a text section.
04Upload your photo into the section
Once the section is on the page, click into any image placeholder to open the upload dialog. You can drag a file in from your computer or select one from your existing media library if you've uploaded it before. GoDaddy accepts standard formats like JPG and PNG, and the upload happens directly inside the editor, so there's no separate file manager to navigate to first.
05Adjust cropping and positioning
After the image lands in its placeholder, use the built-in crop and position controls to fit it to the section's frame. Square, wide, and portrait crops are typically available depending on the section style, and you can drag to recenter the focal point so the important part of the photo doesn't get cut off on smaller screens. Preview the page at both desktop and mobile widths before moving on, since a crop that looks right on desktop can hide a subject's face on mobile.
06Keep your media library organized
Every photo you upload gets stored in your site's media library, which you can reopen any time you add a new image section rather than re-uploading the same file. Delete unused images periodically so the library stays easy to search, and give files sensible names before uploading — GoDaddy keeps the original filename, and a name like radiant-beauty-shelf.jpg is far easier to find later than IMG_4021.jpg.
Frequently asked questions
Can I edit photos directly in GoDaddy Website Builder?
Yes, you can crop, reposition, and apply basic visual edits to images directly within the builder after uploading them, without needing outside photo editing software.
Will large images slow down my GoDaddy site?
Unoptimized images can slow load times, so it's worth resizing large photos before upload and letting the builder's image sections handle responsive display for different screen sizes.
Where are my uploaded photos stored?
Uploaded images are kept in your site's media library, which you can browse and reuse across pages instead of uploading the same file twice.
Which section type should I use for a photo gallery?
The Image Gallery category in the Add Section panel is built specifically for this — it includes layout styles like Logos & Badges alongside standard gallery grids.
Is this suitable for beginners?
Yes, the whole flow — sign in, open the editor, add a section, upload a photo — uses GoDaddy's built-in visual tools with no code or design experience required.
About the author

Impran M N
I've been hooked on technology for as long as I can remember — especially the new tools and AI apps that seem to land every other week. Easy Tech Tuts is where I write up whatever I've just worked out: I do the task in the real product, record the screen, and turn it into the guide I wish I'd found first.