Easy Tech Tuts
How to Assign Tickets in Freshdesk
By Impran M N
A ticket sitting in an unassigned queue is a customer waiting longer than they should. Freshdesk gives you two ways to fix that: assign tickets one by one from the detail view, or select a batch and hand them off together. This guide walks through both, using the actual ticket list and bulk-update screen so you can see exactly where the assignment controls live and what a real support inbox looks like once sentiment and status columns are turned on.
01Open your ticket list and see what needs an owner
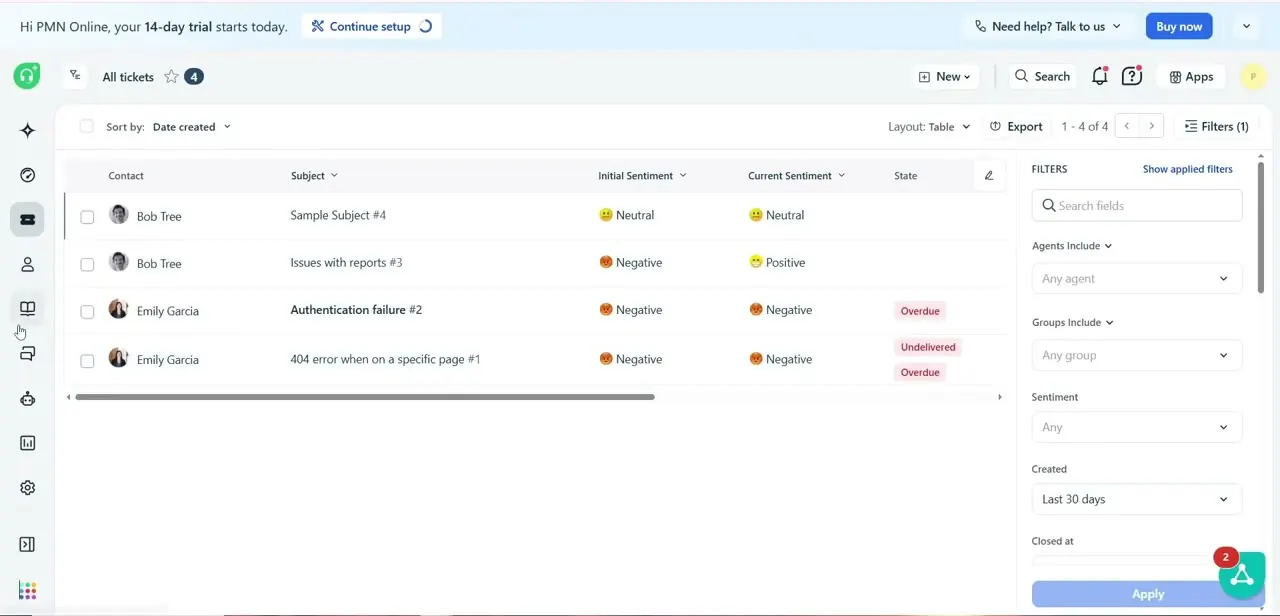
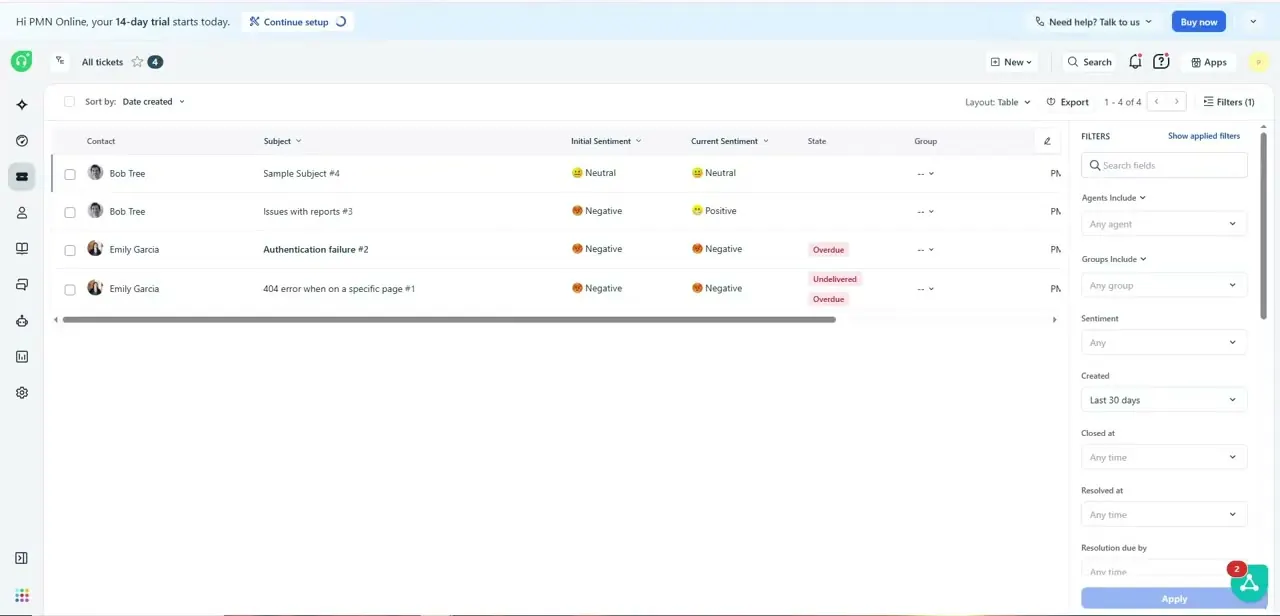
Freshdesk's default view is the All tickets table, which lists every open request with its contact, subject, sentiment, and state in columns you can sort and filter. Tickets with no agent or group assigned are the ones worth scanning for first, since those are the requests nobody currently owns. The filters panel on the right lets you narrow this down fast — by agent, by group, by sentiment, or by how recently the ticket was created — so a busy queue doesn't force you to eyeball every row.
02Assign a single ticket from its detail view
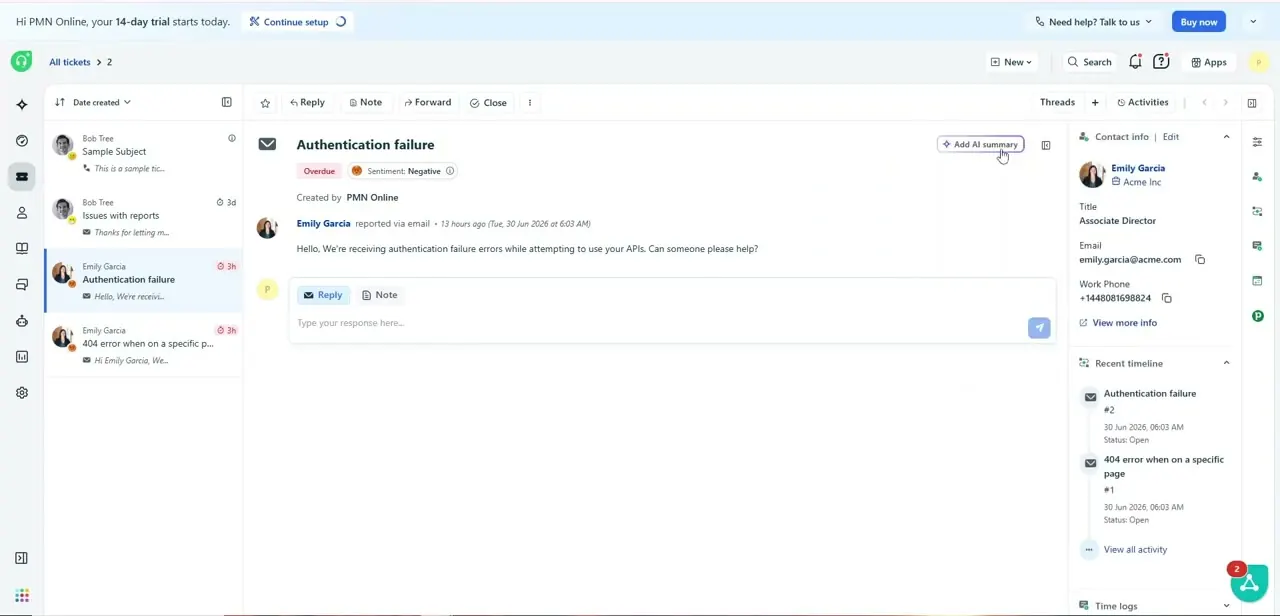
Click into a ticket and you get the full conversation on the left with the requester's contact details on the right — name, title, email, and a recent activity timeline showing their other open tickets. This context matters before you assign: a VP flagging an API authentication failure probably needs a senior agent, not whoever's next in a round-robin queue. The assignment control itself sits near the top of the ticket alongside Reply, Note, Forward, and Close, and picking an agent or group there routes the ticket without leaving the conversation.
03Assign several tickets at once with Bulk update
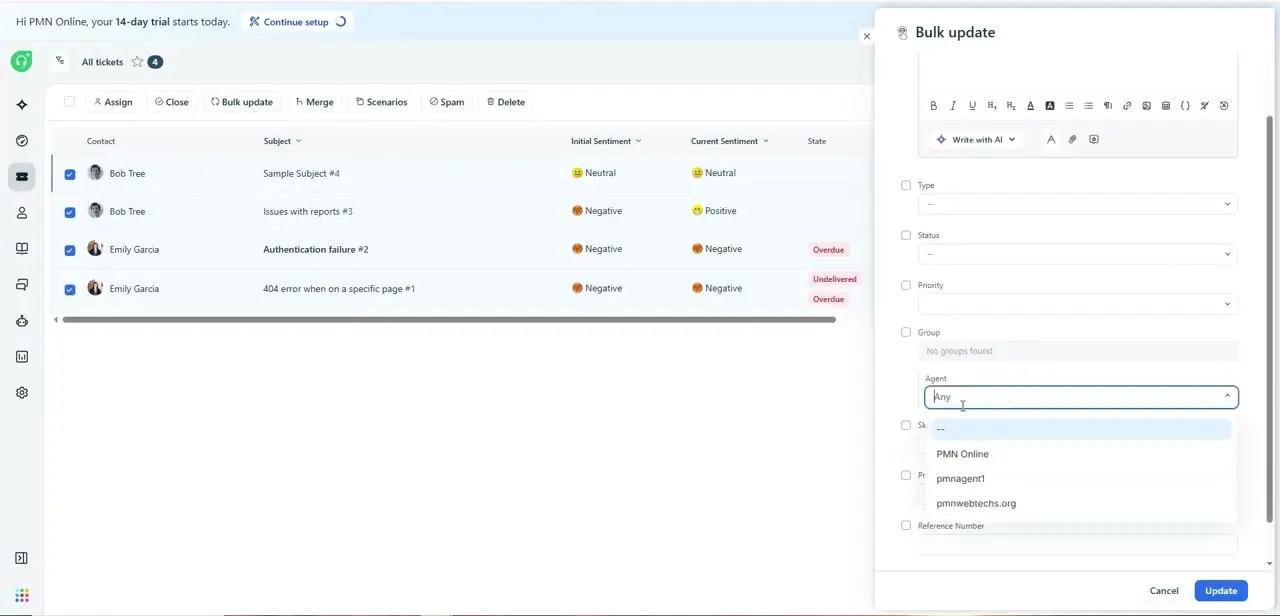
When multiple tickets need the same owner — say a batch of similar bug reports — checking their boxes in the list and clicking Bulk update is faster than opening each one. The Bulk update panel exposes Type, Status, Priority, Group, and Agent fields you can set in a single pass; opening the Agent dropdown shows every available agent in the account so you pick a name and apply it to the whole selection at once. This is also where you'd reassign a group of tickets after someone goes on leave, without touching each ticket individually.
04Decide between assigning to a person or a group
Freshdesk lets you route a ticket to an individual agent or to a group, and the choice changes how quickly it gets picked up. Assigning directly to a person is best when you already know who should handle it — a specific account, a known escalation, a subject-matter expert. Assigning to a group is better for general queues, since any available agent in that group can claim the ticket, which spreads the load and avoids a single person becoming a bottleneck when they're out.
05Use sentiment and state to prioritize what you assign first
The ticket list surfaces Initial Sentiment and Current Sentiment alongside State flags like Overdue and Undelivered, and these are worth reading before you assign anything. A ticket that started Negative and is still Negative, and is also flagged Overdue, should jump the queue ahead of a Neutral ticket with no state flags — assigning strictly in creation order ignores signals Freshdesk is already showing you for free.
06Set up automatic assignment for recurring patterns
Once you notice the same type of request landing in the same place — password resets always going to one group, billing questions to another — set up an automation rule so Freshdesk assigns those tickets on arrival instead of waiting for a human to sort them. Automation rules live under the admin settings and match on criteria like keywords, source, or category, then apply an agent or group the moment a matching ticket is created. This doesn't replace manual assignment entirely, but it clears the predictable cases so your team's attention goes to the tickets that actually need judgment.
Frequently asked questions
Can I reassign a ticket after it's been assigned?
Yes. Open the ticket and change the assignee from the same control used to assign it the first time, or select it in the list and use Bulk update to reassign it along with others.
Can tickets be assigned to a group instead of a person?
Yes. The assignment field accepts either an individual agent or a group, and any agent in that group can then pick up the ticket.
How do I assign multiple tickets at the same time?
Check the boxes next to the tickets in the list view, click Bulk update, open the Agent dropdown, and apply your choice to the whole selection in one action.
Does the agent get notified when assigned a ticket?
Yes, agents receive a notification when a ticket is assigned to them, whether it was assigned individually or as part of a bulk update.
Can ticket assignment be automated?
Yes. Freshdesk's automation rules can assign tickets to an agent or group automatically based on conditions like keywords, source, or category, so recurring request types don't need manual sorting.
About the author

Impran M N
I've been hooked on technology for as long as I can remember — especially the new tools and AI apps that seem to land every other week. Easy Tech Tuts is where I write up whatever I've just worked out: I do the task in the real product, record the screen, and turn it into the guide I wish I'd found first.