Easy Tech Tuts
How to Add a Subdomain in Cloudflare Easily 2026
By Impran M N
A subdomain lets you carve out a separate section of your site, like shop.yoursite.com or blog.yoursite.com, without buying a new domain. This guide covers adding that subdomain from a real Cloudflare account's DNS panel — reaching the domain's Overview screen, opening the DNS Records section, and filling in the Add record form, whether you're pointing it directly to a server IP or aliasing it to another URL.
01Open your domain's Overview in Cloudflare
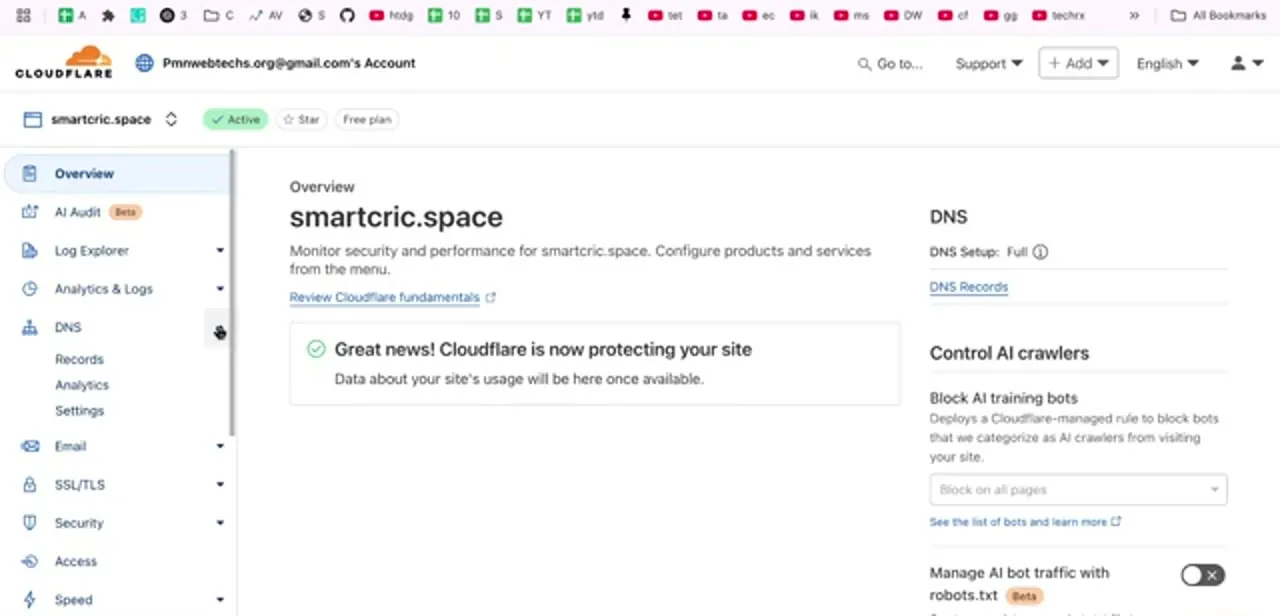
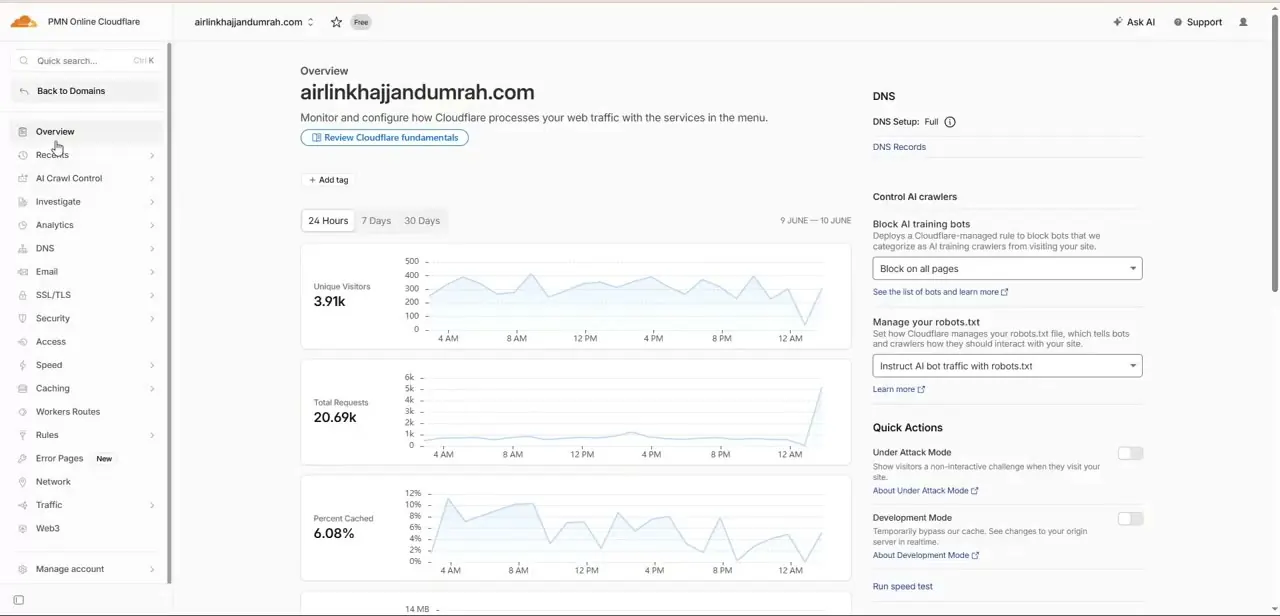
After logging in, selecting a domain from your account drops you on its Overview screen, which shows unique visitors, total requests, and cache percentage over the last 24 hours, 7 days, or 30 days, alongside a DNS panel on the right confirming your DNS Setup is Full. The left sidebar is where every other section lives — Records, AI Crawl Control, Investigate, Analytics, DNS, Email, SSL/TLS, Security, and more, all scoped to whichever domain is currently selected at the top of the page.
02Expand DNS in the sidebar
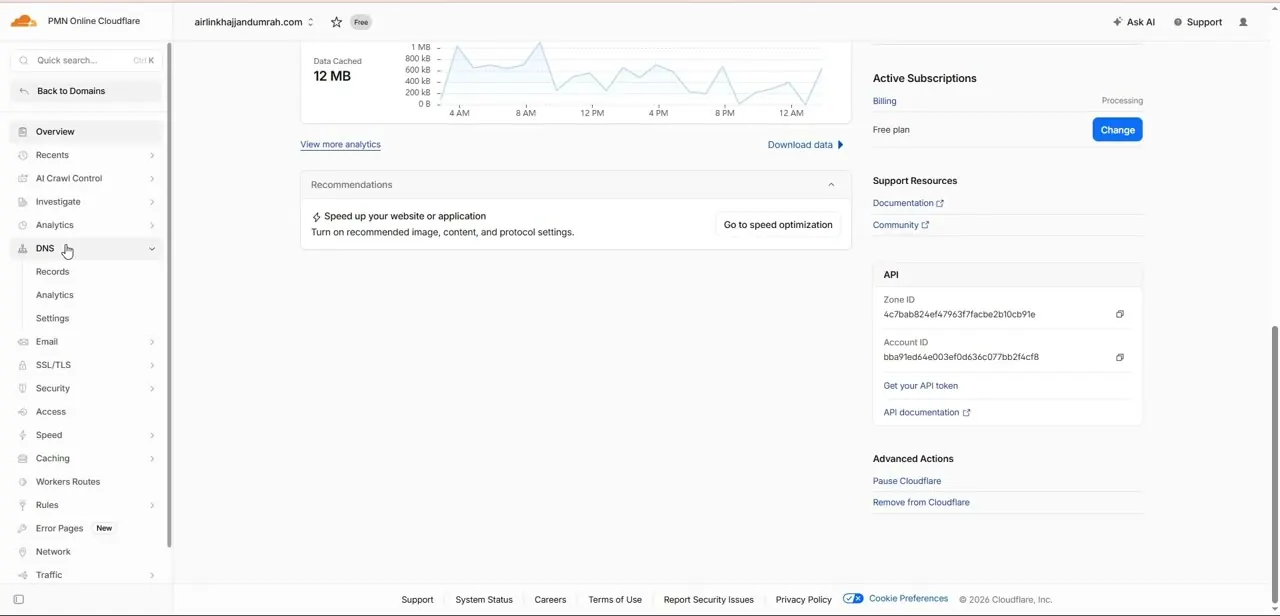
Clicking DNS in the left sidebar expands it into three sub-items: Records, Analytics, and Settings. Records is what you want for adding a subdomain — it's the actual list of every A, AAAA, CNAME, MX, and TXT entry currently configured for the domain. The same page also surfaces an Active Subscriptions panel showing your current plan (Free, in a lot of small-site setups) and an API section with your Zone ID and Account ID, which matter if you're ever scripting DNS changes instead of using the dashboard.
03Click Add record and choose the type
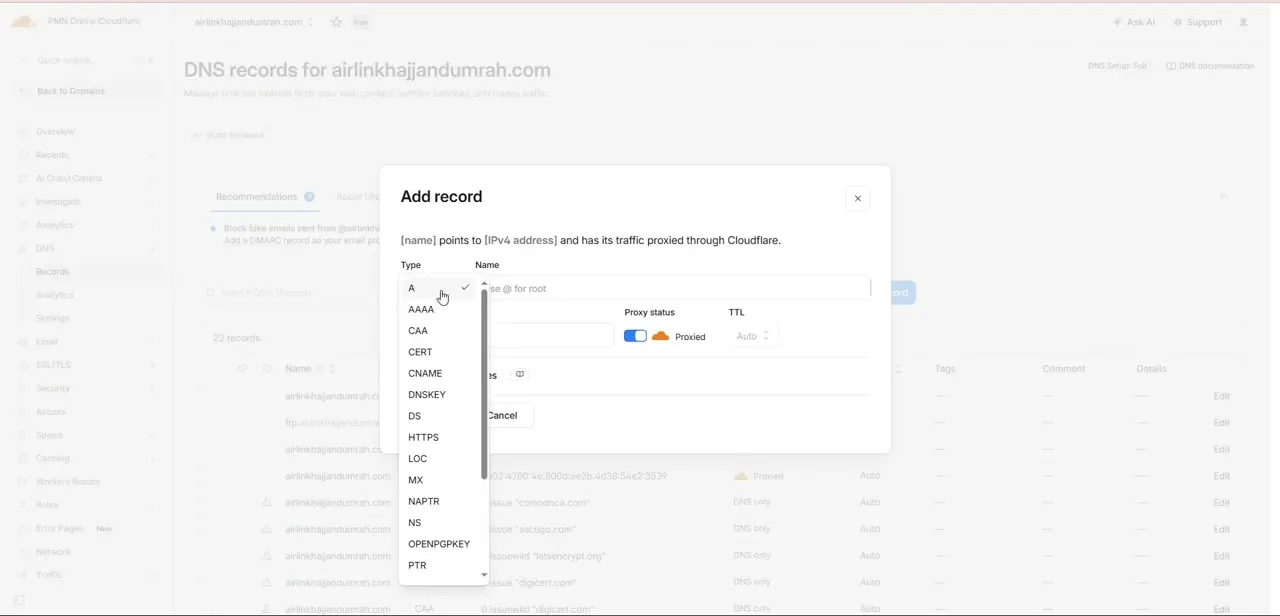
On the DNS records page, the Add record button opens a modal titled simply "Add record," with a live description underneath that updates as you fill in the form — for example, "[name] points to [IPv4 address] and has its traffic proxied through Cloudflare." The Type dropdown lists every record kind Cloudflare supports: A, AAAA, CAA, CERT, CNAME, DNSKEY, DS, HTTPS, LOC, MX, NAPTR, NS, OPENPGPKEY, and PTR among them. For a subdomain, the two you'll actually use are A, if you're pointing straight at a server's IPv4 address, or CNAME, if you're aliasing to another domain or a third-party platform's URL.
04Fill in the name, value, and proxy status
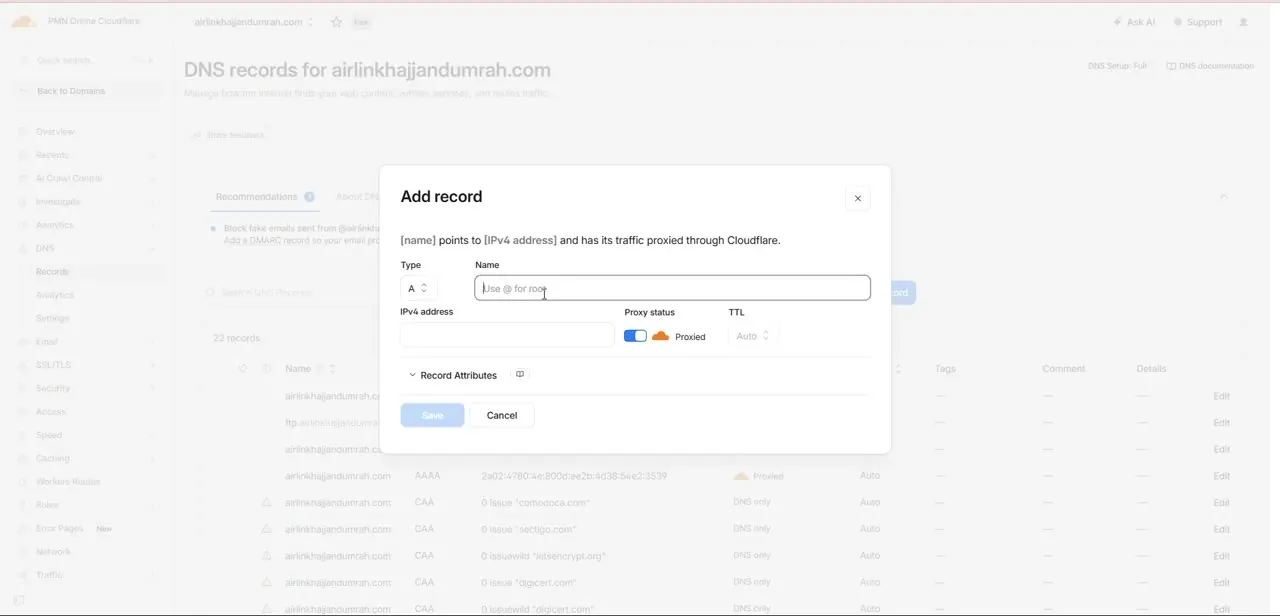
With Type set to A, the form settles into its final shape: a Name field with placeholder text reminding you to "use @ for root" — meaning you only type the subdomain prefix, like blog or shop, not the whole domain — an IPv4 address field below it, a Proxy status toggle defaulting to on (the orange cloud, labeled Proxied), and a TTL field set to Auto. A collapsible Record Attributes section sits below for anything more advanced you don't need for a basic subdomain.
05Decide on proxy status before you save
The Proxy status toggle is the one decision on this form worth pausing on. Orange cloud (Proxied) routes traffic through Cloudflare first, which enables caching, DDoS protection, and hides your origin server's real IP address.
Gray cloud (DNS only) just resolves the name to the IP directly, with none of Cloudflare's edge features in front of it — the right choice for records like a mail server that shouldn't be proxied. For a typical web-facing subdomain like blog or shop, leaving it proxied is the standard choice.
06Save and confirm the record resolves
Clicking Save on the modal adds the new row to your DNS records table immediately, and Cloudflare's own edge network picks up the change right away since it's authoritative for the zone. Full propagation to every DNS resolver worldwide can still take a little longer in rare cases, so give it a few minutes before assuming something's wrong if the subdomain doesn't resolve on the very first try. Once it does, your new subdomain is live and, if proxied, already benefiting from Cloudflare's caching and security layer.
Frequently asked questions
What's the difference between an A record and a CNAME for a subdomain?
An A record points your subdomain directly to a server's IPv4 address, while a CNAME aliases it to another domain name, which is common when pointing at a third-party platform.
Should I proxy my new subdomain through Cloudflare?
Proxying (orange cloud) enables Cloudflare's caching and security features. DNS-only mode (gray cloud) routes traffic directly to your origin without those benefits, which is usually right for things like mail servers.
How long does it take for a new subdomain to start working?
Cloudflare's own edge network picks up the change almost immediately, though full global DNS propagation to every resolver can occasionally take longer.
Can I add multiple subdomains to the same domain?
Yes. You can add as many A or CNAME records as you need from the same DNS Records page, each with its own unique subdomain prefix in the Name field.
Where do I find the Add record button?
From your domain's Overview page, expand DNS in the left sidebar, click Records, and the Add record button sits above the existing records table.
About the author

Impran M N
I've been hooked on technology for as long as I can remember — especially the new tools and AI apps that seem to land every other week. Easy Tech Tuts is where I write up whatever I've just worked out: I do the task in the real product, record the screen, and turn it into the guide I wish I'd found first.