Easy Tech Tuts
How to Connect WhatsApp to n8n, Link, Use & Trigger it Easily 2026
By Impran M N
Connecting WhatsApp to n8n turns your automation canvas into a two-way messaging hub — you can fire outbound notifications and, just as importantly, react the moment a customer replies. n8n ships an official WhatsApp Business Cloud integration alongside a long list of third-party alternatives, and picking the right one up front saves you from re-wiring credentials later. This guide walks through starting a fresh workflow, finding the right node, and setting up the trigger that listens for incoming messages.
01Start a new workflow
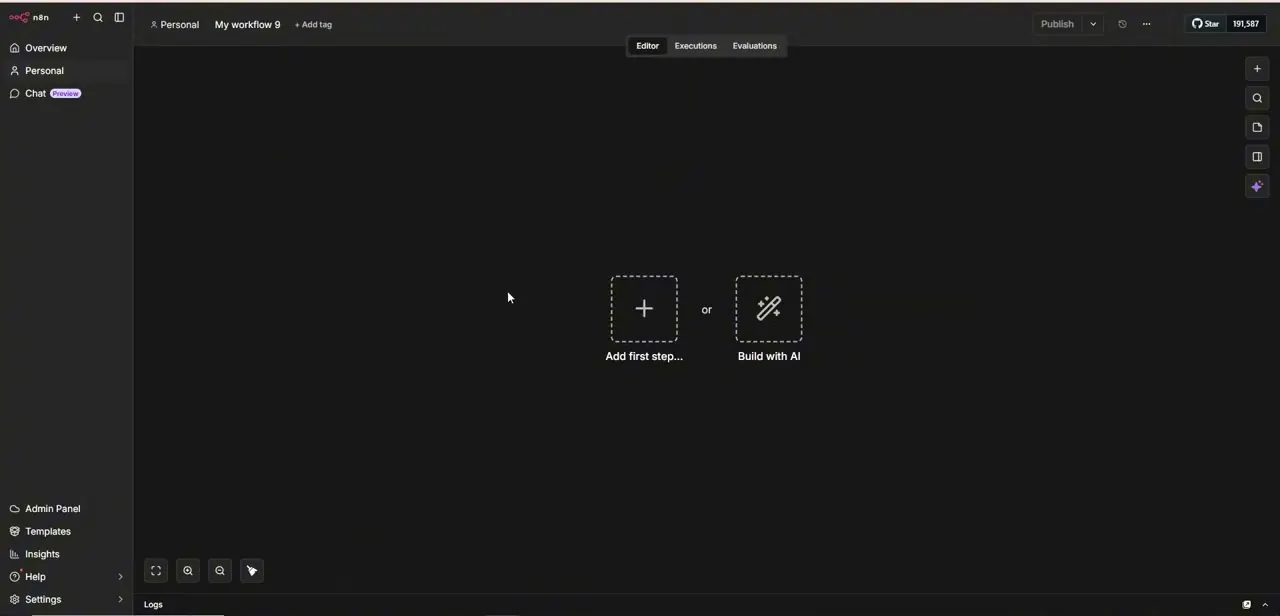
From your n8n Overview screen, click Create workflow to open a blank canvas. You'll land on an empty editor with two options in the center: Add first step manually, or let n8n's Build with AI assistant scaffold something for you. For a WhatsApp integration where you want full control over credentials and trigger behavior, adding the first step manually is the more predictable route.
02Search for the WhatsApp node
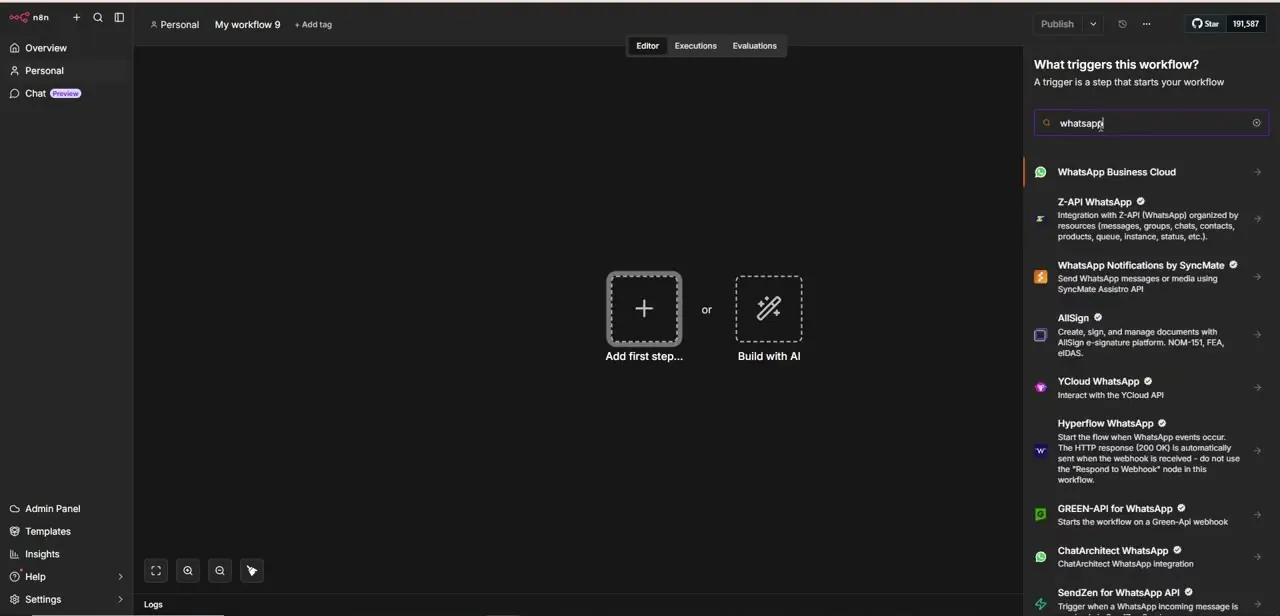
Click Add first step and type "whatsapp" into the trigger search. n8n surfaces the official WhatsApp Business Cloud trigger at the top of the list, followed by a long tail of community-built alternatives — Z-API, SyncMate, AllSign, YCloud, Hyperflow, GREEN-API, and others, each with different setup requirements and pricing outside of n8n itself. Unless you have a specific reason to use one of the third-party options, the official WhatsApp Business Cloud node is the one to pick, since it talks directly to Meta's API rather than through an intermediary service.
03Configure the WhatsApp Trigger node
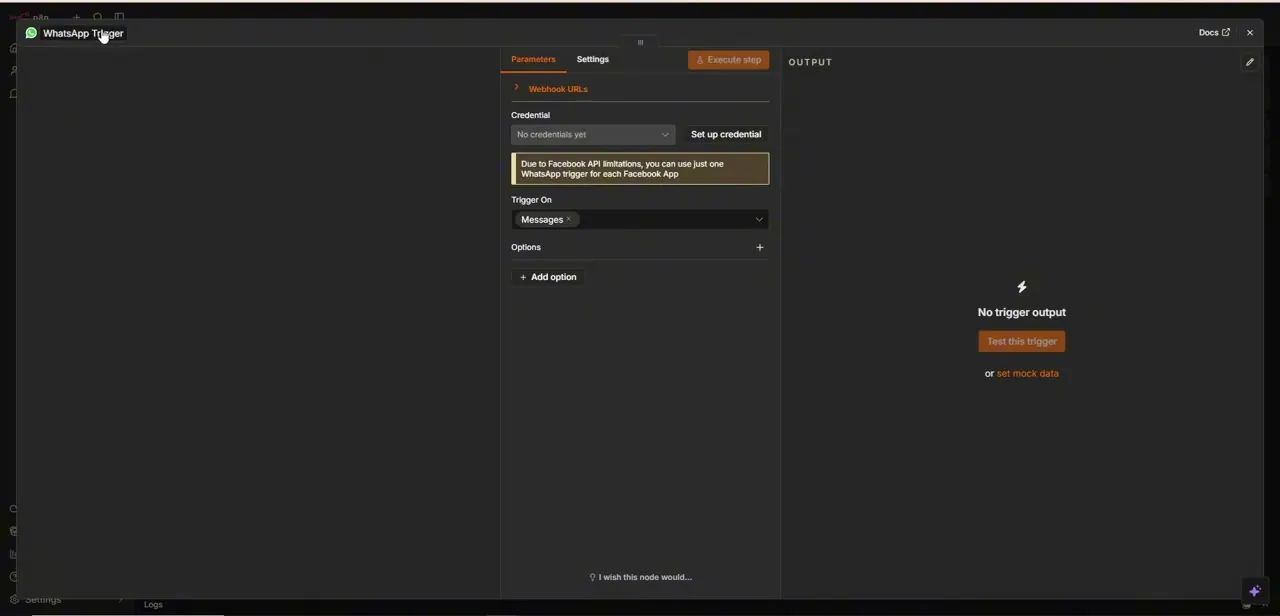
Once it's on the canvas, open the WhatsApp Trigger node's parameters. You'll set Trigger On to Messages so the workflow fires whenever a new inbound chat arrives, and there's a webhook URL section you'll need when registering the trigger with Meta's side of the integration. n8n flags one important limitation directly in the node: due to Facebook API restrictions, you can only run one WhatsApp trigger per connected Facebook App, so plan your workflow structure around that constraint rather than discovering it mid-build.
04Set up your credential
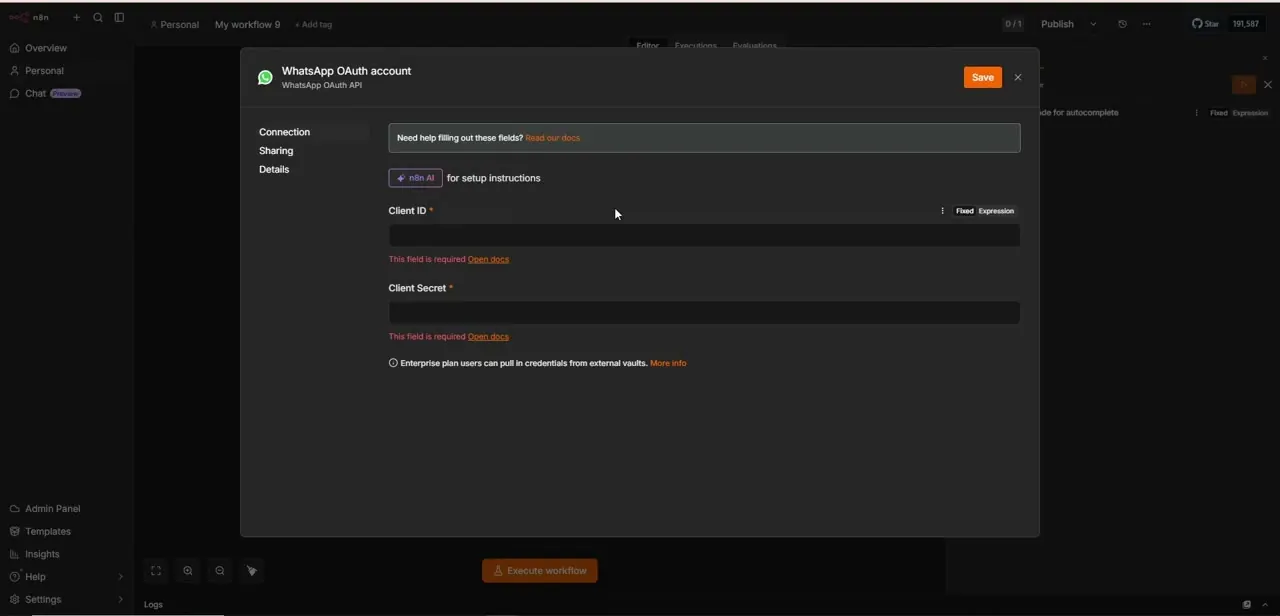
Click Set up credential to open the WhatsApp OAuth account dialog. This requires a Client ID and Client Secret rather than a simple API key — both come from the app you register in Meta's developer console, so you'll need that app created and configured on Meta's side before you can finish this step in n8n. Enterprise-plan users have the option to pull these credentials from an external vault instead of pasting them directly, which is worth using if you're managing multiple environments.
05Add an outbound WhatsApp node for replies or notifications
With the trigger catching inbound messages, add a second WhatsApp node further down the canvas to send messages back out — either a pre-approved message template for the first contact with a customer, or a free-text reply within the window Meta allows after they've messaged you. Map any dynamic fields, like a customer's name or order number, into the message body so replies feel personal rather than canned.
06Test with your own number before going live
Save the workflow, activate it, and send a test message from your own phone to the connected WhatsApp Business number. Confirm the trigger fires and produces the data you expect in the output pane, then confirm any outbound message you configured actually arrives. Testing end to end with one real number catches credential and formatting issues while the blast radius is just you, instead of during a scaled broadcast to real customers.
Frequently asked questions
Do I need a WhatsApp Business account to use this integration?
Yes, you need a Meta developer app connected to a WhatsApp Business Cloud API setup, which supplies the Client ID and Client Secret n8n's OAuth credential requires.
Can I send free-form messages to any customer?
Generally you can only send free-form replies within a limited response window after a customer messages you first; outside that window you need an approved message template.
How do I trigger a workflow from an incoming WhatsApp message?
Add the official WhatsApp Trigger node, set Trigger On to Messages, and connect its credential — it fires automatically whenever a new inbound chat arrives.
Can I have more than one WhatsApp trigger running?
Not on the same Facebook App. n8n notes directly in the trigger node that Facebook API limitations allow only one WhatsApp trigger per connected app.
Should I test with my own number before going live?
Yes. Testing the full send-and-receive path with a personal number first catches credential or formatting problems before you run a broadcast to real customers.
About the author

Impran M N
I've been hooked on technology for as long as I can remember — especially the new tools and AI apps that seem to land every other week. Easy Tech Tuts is where I write up whatever I've just worked out: I do the task in the real product, record the screen, and turn it into the guide I wish I'd found first.