Easy Tech Tuts
How to Get Microsoft Forms Responses to Excel and Email With Power Automate Easily 2026
By Impran M N
If you've ever exported a Microsoft Forms response sheet by hand, you know how quickly that habit falls apart — someone forgets to check, a submission sits unread for two days, and your "live" spreadsheet is really just yesterday's snapshot. Power Automate closes that gap with a flow that watches your form, writes every new response straight into an Excel Online table, and fires off an email the moment it happens.
None of it needs code, and once it's built it keeps running on its own. This guide walks through building that flow from the Power Automate home screen to a working, tested notification.
01Start from the Power Automate home screen
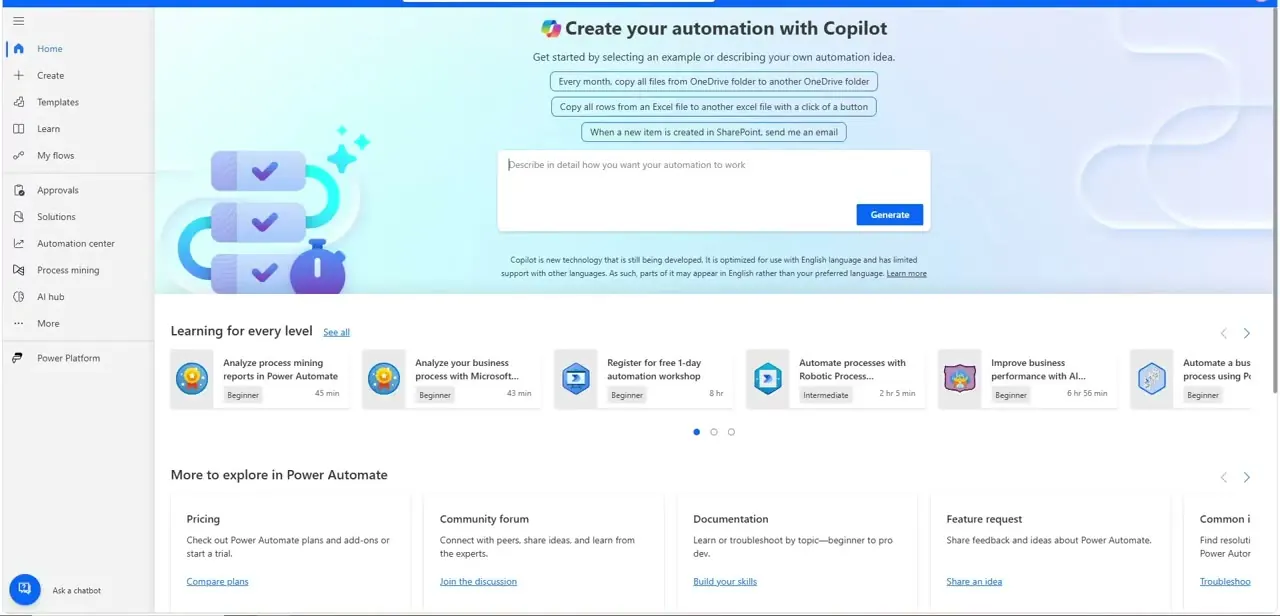
Power Automate's home page is built around Copilot now — a prompt box invites you to describe an automation in plain language, with a few one-click examples above it like copying Excel rows between files or emailing you when a SharePoint item is created. You can absolutely try typing your own request here, but for this flow it's worth building it manually the first time so you understand each connector and can troubleshoot it later. The left-hand rail has Create, Templates, My flows, and Automation center, which is where you'll come back to check run history once the flow is live.
02Build a new automated cloud flow and pick the Forms trigger
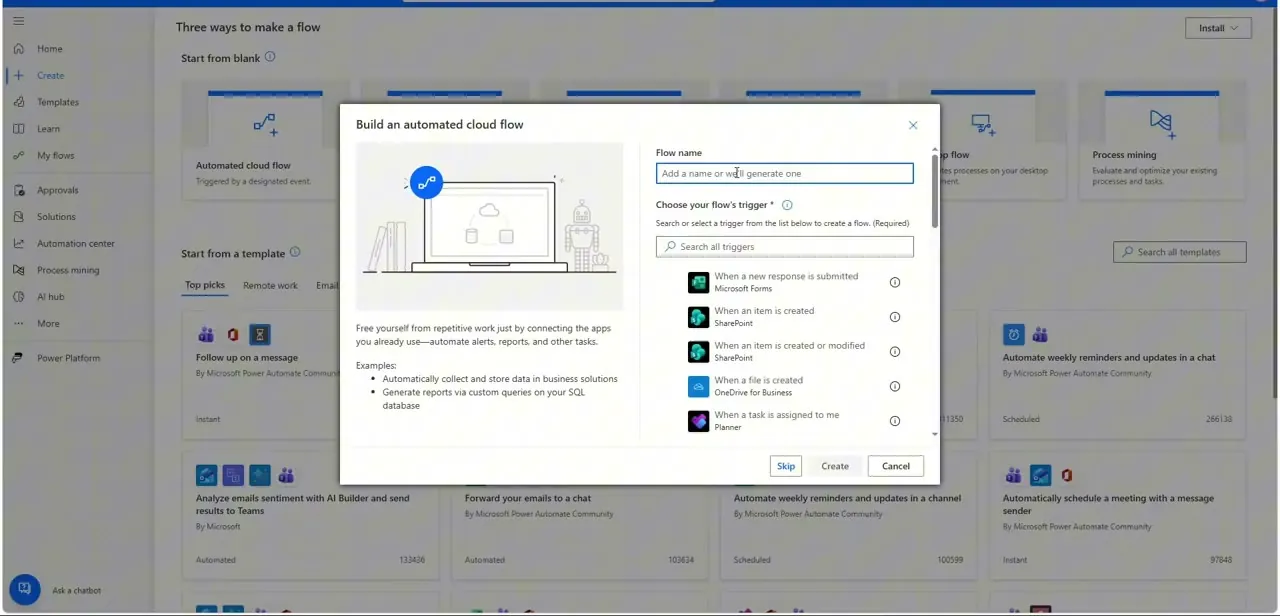
Click Create, then choose Automated cloud flow to open the trigger picker. Give the flow a descriptive name — something like "Forms to Excel and Email" — so you can find it later among dozens of others. In the trigger search list, look for "When a new response is submitted," the Microsoft Forms trigger, sitting alongside other common starters like SharePoint's "When an item is created." Selecting it and hitting Create opens the flow designer with that trigger already on the canvas, ready to be pointed at your specific form.
03Add Get response details and pull the submission data
The Forms trigger alone only tells you that something was submitted — it doesn't hand you the answers. Underneath it, add the "Get response details" action and connect it to the same form.
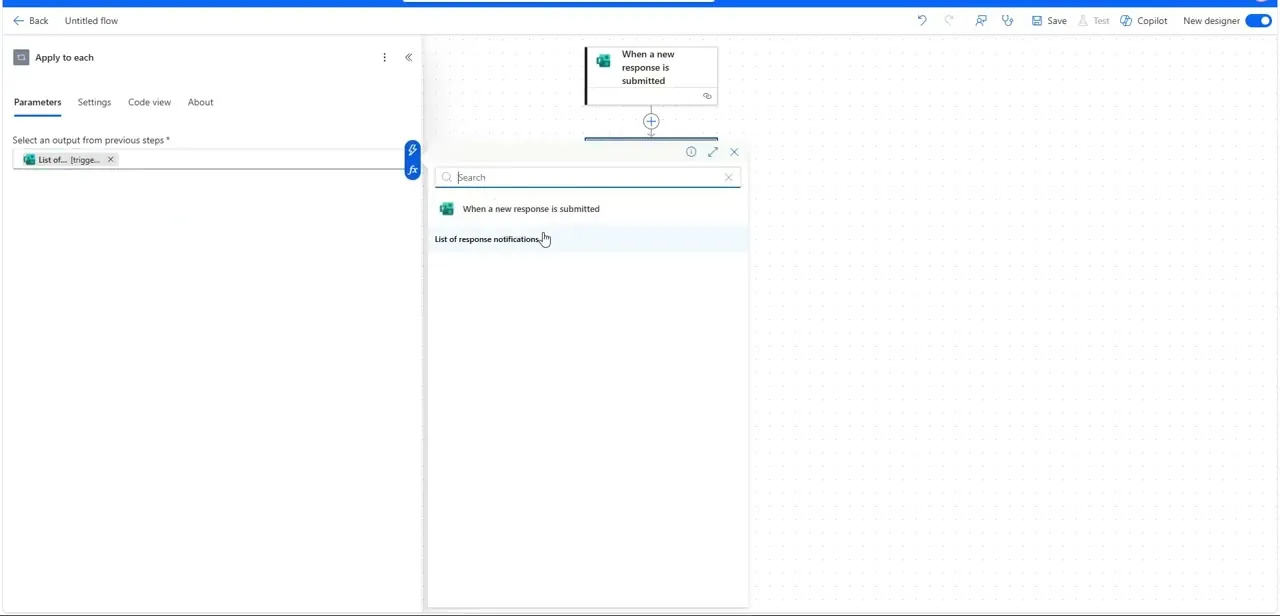
Inside that action, set Response Id using the dynamic content token that comes from the trigger, so each run automatically fetches the specific response that just came in rather than an old one. This is also where the flow starts exposing individual question answers as tokens you can drop into later steps — the exact fields you defined when you built the form.
04Prepare an Excel Online table to receive the rows
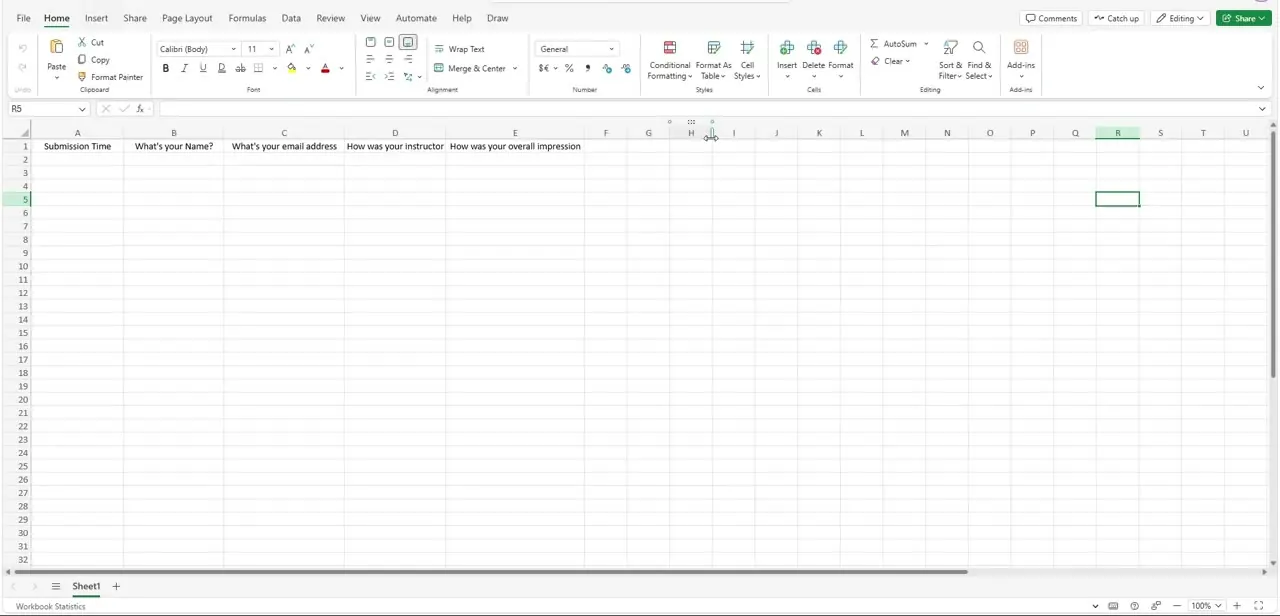
Before you wire up the Add a Row step, your destination spreadsheet needs to actually be a table, not just a range of cells with headers — Power Automate's Excel connector only writes into named tables. Open the workbook in Excel Online, select your header row plus a few blank rows below it, and use Insert > Table so Excel formats it and names it automatically. Match your column headers to the questions on your form — Submission Time, Name, Email, and any custom questions — so the mapping in the next step lines up cleanly with no guessing.
05Map form fields into the Excel table with Add a Row
Back in the flow, add the "Add a row into a table" action, pick the Excel file's location, the workbook, and the table you just created. Power Automate reads the table's column headers and gives you one input field per column — click into each one and insert the matching dynamic content token from the Get response details step, so the submitter's name lands under Name, their email under Email, and so on. Getting this mapping right the first time is the single most common source of blank or misaligned rows, so double-check each field before moving on.
06Add the Outlook notification email
Add a "Send an email (V2)" action from the Office 365 Outlook connector underneath the Excel step. Write a subject line that tells you at a glance what came in — something like "New form response from [Name]" using the same dynamic token you used for Excel — and build the body out of the individual answer tokens rather than one blob of raw data, so the email reads like a clean summary instead of a debug log. Set the To field to whoever needs to see submissions first; you can add more recipients later once the flow is proven out.
07Save, run a test, and confirm both outputs
Save the flow, then submit a real test response to your form. Power Automate's run history shows each step lighting up green as it executes — the trigger firing, the response details being pulled, then the Excel and Outlook actions completing in sequence, similar to how the flow designer displays each connected block with its own configuration panel underneath the trigger.
Open your Excel table to confirm the new row landed in the right columns, and check the inbox for the notification email. If either one is missing or misaligned, it's almost always a dynamic-content mapping to fix rather than a broken connector.
Frequently asked questions
Do I need a paid Power Automate license to do this?
Basic flows like this one typically work within the Power Automate license bundled with many Microsoft 365 plans, though premium connectors can require an upgraded plan.
Can I send the notification to more than one person?
Yes, you can add multiple recipients in the Send an Email action or route different fields to different people based on the form data.
What happens if the Excel file is open when the flow runs?
Excel Online generally handles automated row additions fine even while the file is open, but it's still good practice to avoid heavy manual editing at the same time.
Why isn't my form data showing up in Excel?
This is usually a field mapping issue — double-check that each dynamic content token in the Add a Row action matches the correct form question, and confirm the destination range is actually formatted as a table.
Can I use Copilot to build this flow instead of doing it manually?
Yes — the Power Automate home screen lets you describe the automation in plain language and generate a starting flow, but reviewing and adjusting each step manually still helps when you need to troubleshoot field mappings later.
About the author

Impran M N
I've been hooked on technology for as long as I can remember — especially the new tools and AI apps that seem to land every other week. Easy Tech Tuts is where I write up whatever I've just worked out: I do the task in the real product, record the screen, and turn it into the guide I wish I'd found first.