Easy Tech Tuts
How to Use the Zendesk Ticket System Easily 2026
By Impran M N
A support queue stops feeling chaotic the moment you understand the handful of screens Zendesk actually revolves around: the views list, the individual ticket, and the reply box that switches between talking to your team and talking to the customer. This guide walks through that core loop using the real 2026 agent workspace — filtering down to what needs attention, reading a customer's history before you respond, leaving a private note, and updating the ticket's status so your reporting stays accurate. None of it requires an app or a config change, just knowing where each control lives.
01Start from Your unsolved tickets view
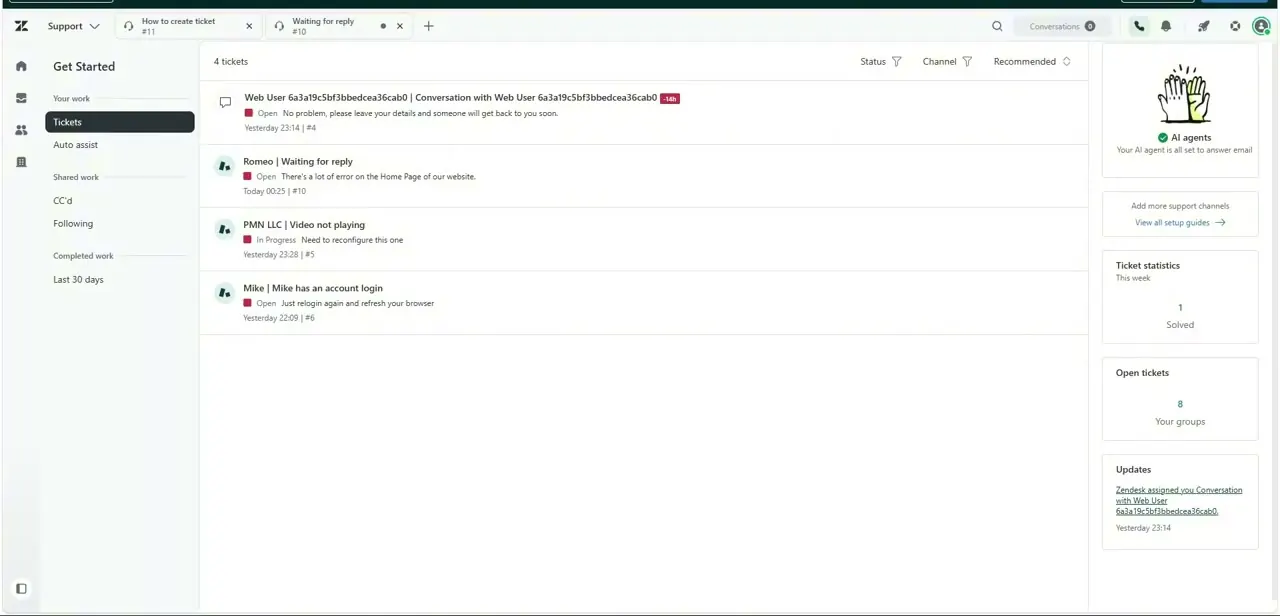
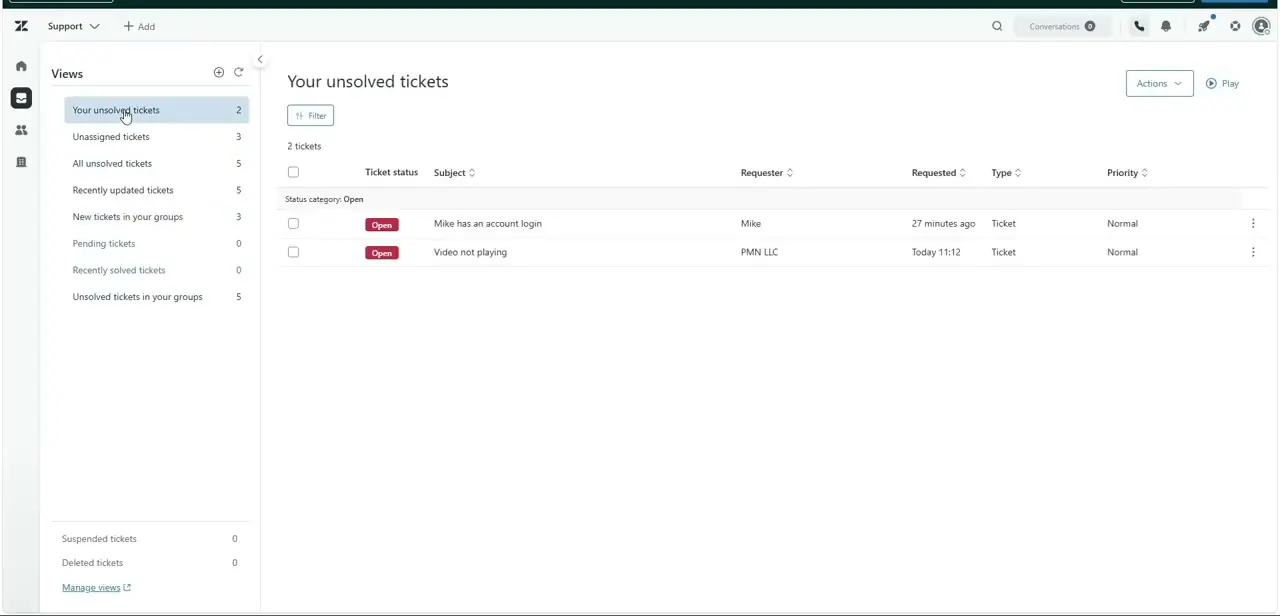
The left-hand Views panel is the front door to the whole queue, and "Your unsolved tickets" is the one you'll return to most — it lists only what's still assigned to you and open. Each row shows the ticket status, subject, requester, when it came in, and its priority, so you can triage without opening anything yet.
Other views like Unassigned tickets and Recently updated tickets sit right below it for when you're covering overflow or checking on something you replied to earlier. Clicking a subject opens the full ticket in a new tab next to whatever else you already have open.
02Open a ticket and check the requester panel
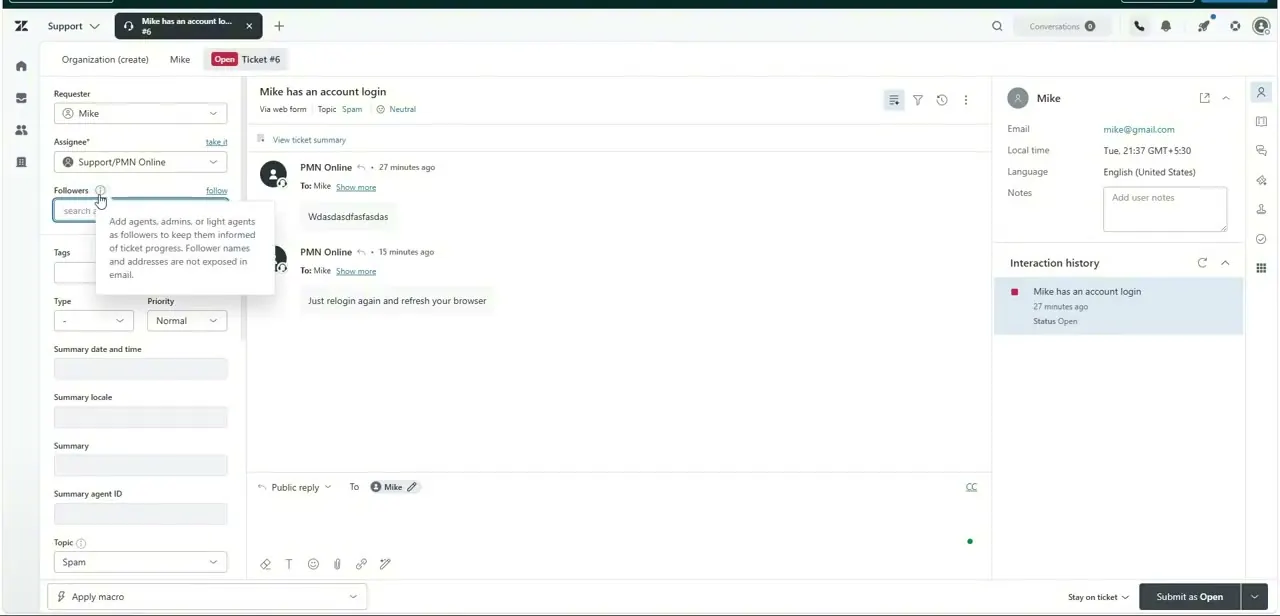
Once you're inside a ticket, the layout splits into three columns: ticket properties on the left, the conversation thread in the middle, and the requester's profile on the right. That right-hand panel shows the customer's email, local time zone, and language, which matters if you're deciding how formal to be or whether they're likely awake.
The center thread shows every message exchanged so far, tagged with who sent it and how long ago. Before typing a reply, skim this thread and the Interaction history box so you're not asking the customer to repeat something they already told you.
03Set the requester and assignee fields
The left column holds the ticket's core metadata, starting with Requester and Assignee. Requester is who the ticket is from; Assignee is which agent or team owns resolving it, and it defaults to whoever is logged in once you click "take it." Below that, Followers lets you add other agents who should be kept in the loop without being responsible for the reply — Zendesk notes that follower names are never exposed to the customer in email. These fields look small, but they're what makes filtered views and reporting work later, so it's worth setting them correctly on every ticket rather than leaving them blank.
04Switch between public reply and internal notes
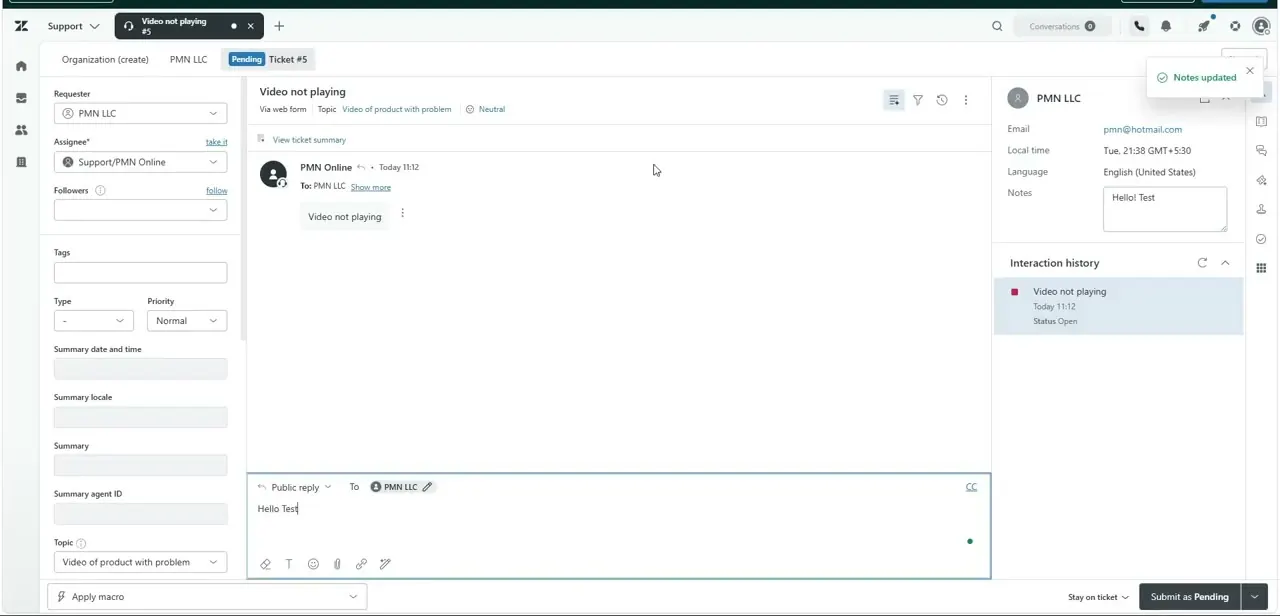
The reply box at the bottom of the thread has a dropdown that toggles between Public reply and internal note. Public reply sends exactly what you type to the customer at the email address shown in their profile.
Switching the same box to note mode keeps the text visible only to your team — useful for flagging something to a teammate or leaving context for whoever picks up the ticket next, like the "Hello! Test" note added to the customer notes field in this ticket. Get in the habit of checking which mode is active before you hit send, since the two look almost identical except for a color change around the box.
05Apply a macro for repeat questions
For questions you answer often, the Apply macro dropdown at the bottom of the ticket properties panel saves real time. A macro is a saved bundle of actions — typically pre-written reply text, but it can also set tags, change priority, or update status — that runs the moment you select it. Instead of retyping a troubleshooting explanation for the tenth time that week, you pick the matching macro and it drops the text into the reply box ready to send, then you personalize a line or two before submitting.
06Update the status and submit
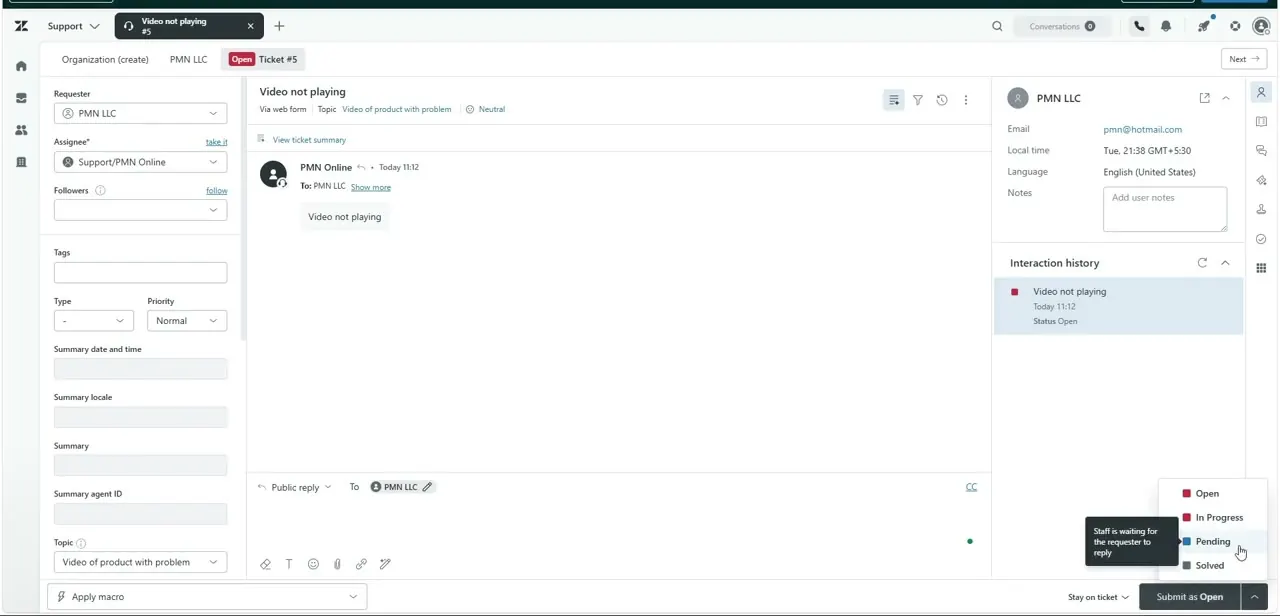
Every ticket carries a status — Open, Pending, Solved, or a couple of others depending on your setup — and the submit button at the bottom right always shows which one you're about to apply. Clicking the small arrow next to the button opens the full status list, where Pending is typically used while you're waiting on the customer to respond, as the tooltip in this workspace spells out directly. Once the issue is actually resolved, switch it to Solved and submit; that's what pulls the ticket out of your unsolved queue and into the reporting Explore uses to track resolution counts.
Frequently asked questions
What's the difference between an internal note and a public reply?
Internal notes are only visible to your team, while public replies are sent directly to the customer's email address shown in their profile.
Can I undo marking a ticket as solved?
Yes, you can typically reopen a solved ticket by changing its status again, though your workflow may set a window before it fully closes for good.
How do macros save time on repeat questions?
Macros let you apply a saved combination of text, tags, and status changes with a single click from the Apply macro dropdown instead of typing everything manually.
What happens if a ticket isn't assigned to anyone?
Unassigned tickets sit in the Unassigned tickets view until an agent clicks "take it," which is why checking that view regularly matters as much as your own queue.
Why does the requester panel show a time zone and language?
It helps you judge when the customer is likely to see your reply and whether to adjust your tone, without having to ask them directly.
About the author

Impran M N
I've been hooked on technology for as long as I can remember — especially the new tools and AI apps that seem to land every other week. Easy Tech Tuts is where I write up whatever I've just worked out: I do the task in the real product, record the screen, and turn it into the guide I wish I'd found first.