Easy Tech Tuts
How to Create an Approval Flow in Power Automate, Build Approval Workflow Process Easily 2026
By Impran M N
Any process where something needs a yes or no from another person — a leave request, an invoice, a purchase order — is a candidate for an approval flow, and Power Automate builds one without a line of code. The part that trips people up isn't the concept, it's the plumbing: which trigger to pick, where the approval action actually lives, and how to branch the rest of the flow once someone responds. This guide walks through building one from a blank canvas, using the same screens you'll see in the Power Automate maker portal, so you can go from an empty Approvals hub to a working, notifying, branching flow.
01Start from the Approvals hub
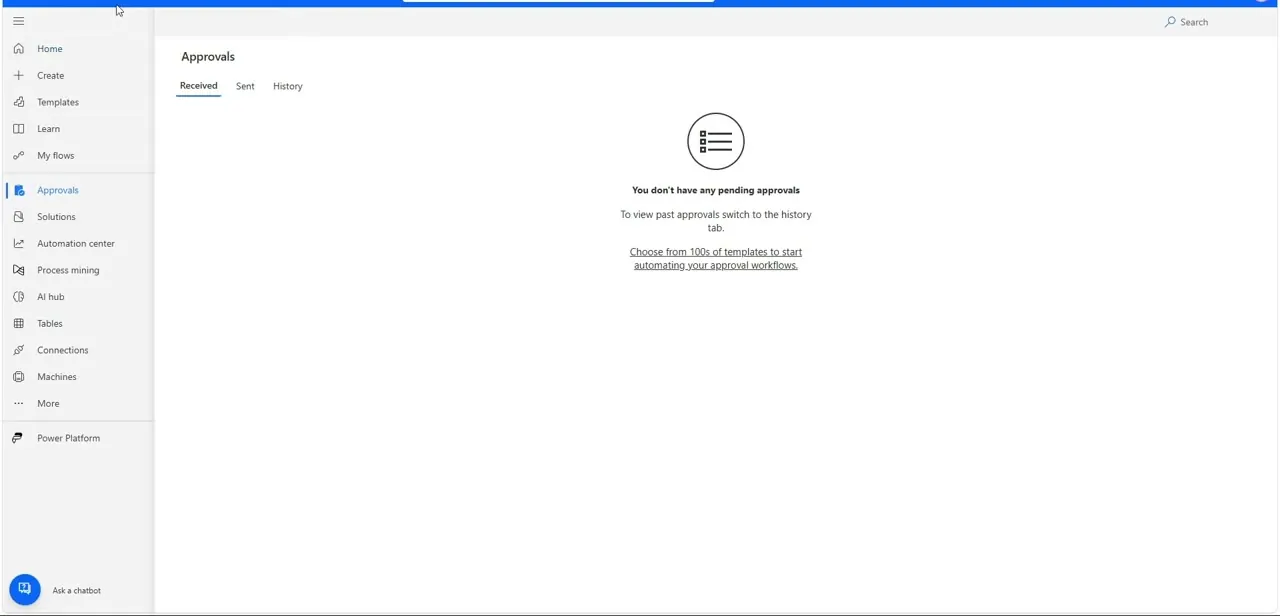
Power Automate has a dedicated Approvals area in the left-hand navigation, separate from My flows, with its own Received, Sent, and History tabs. On a fresh account it's empty — "You don't have any pending approvals" — because this hub only shows activity generated by flows you build, it isn't where you create them.
That's a common first mistake: people look here for a "new approval" button and don't find one. The actual build happens under Create, and the Approvals hub is what your requesters and approvers will use afterward to track responses.
02Create an instant cloud flow
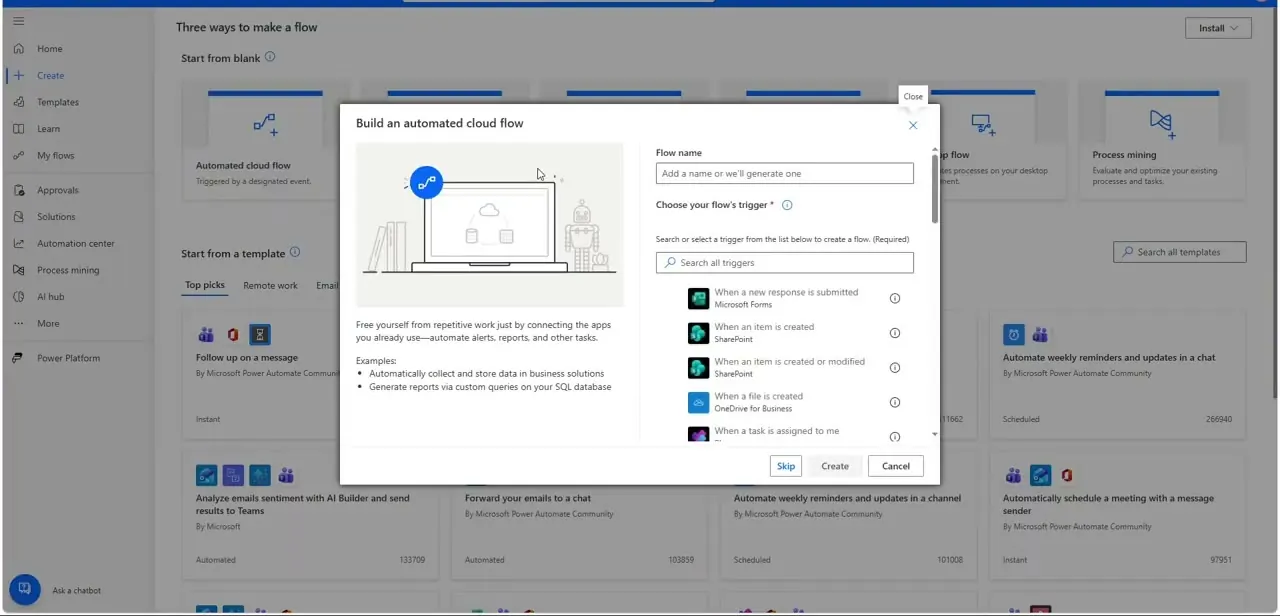
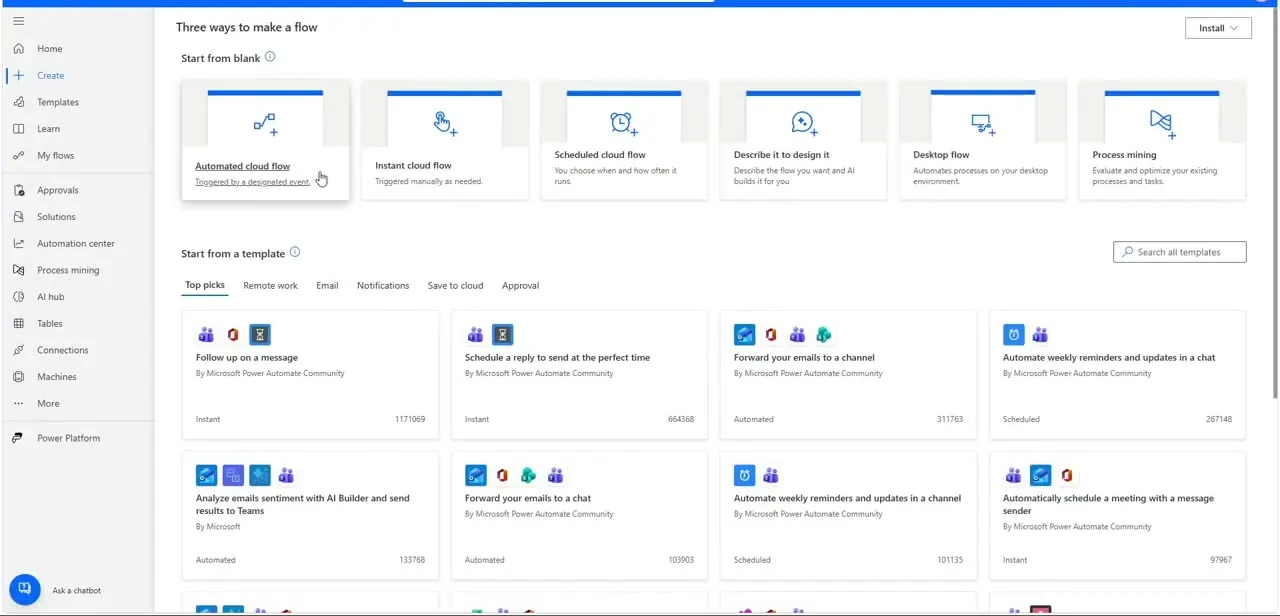
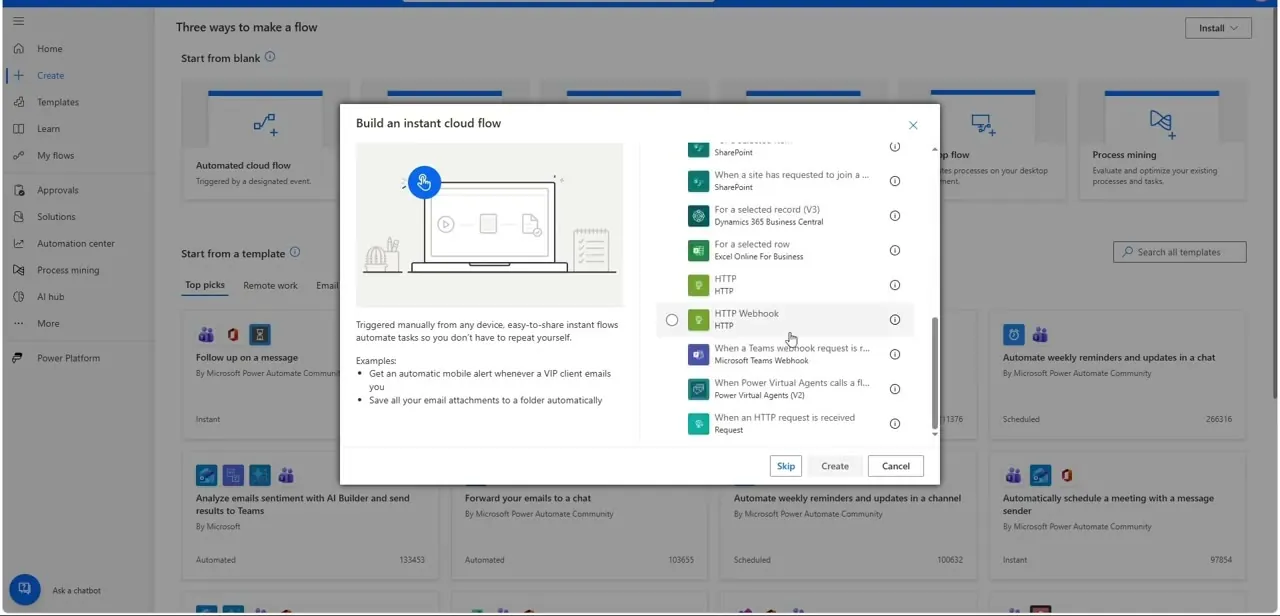
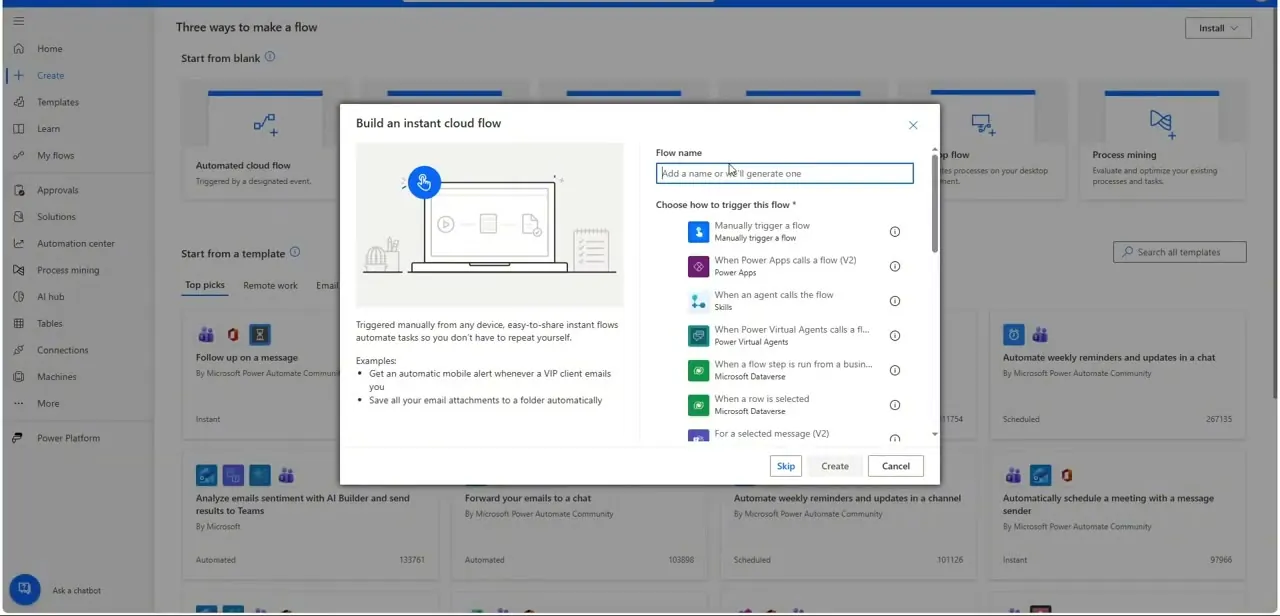
From Create, choose Build an instant cloud flow. A dialog opens asking for a flow name and, more importantly, how the flow should start.
For a manual approval — someone clicking a button to kick off a request — pick "Manually trigger a flow." The list also shows triggers for Power Apps, Power Virtual Agents, Dataverse rows, and selected messages, which matter if you want the approval to fire automatically from a form submission or a new item in a list rather than a manual click. Name the flow something specific, like "Expense Approval," so it's identifiable later in a list full of flows.
03Add the approval action and choose its type
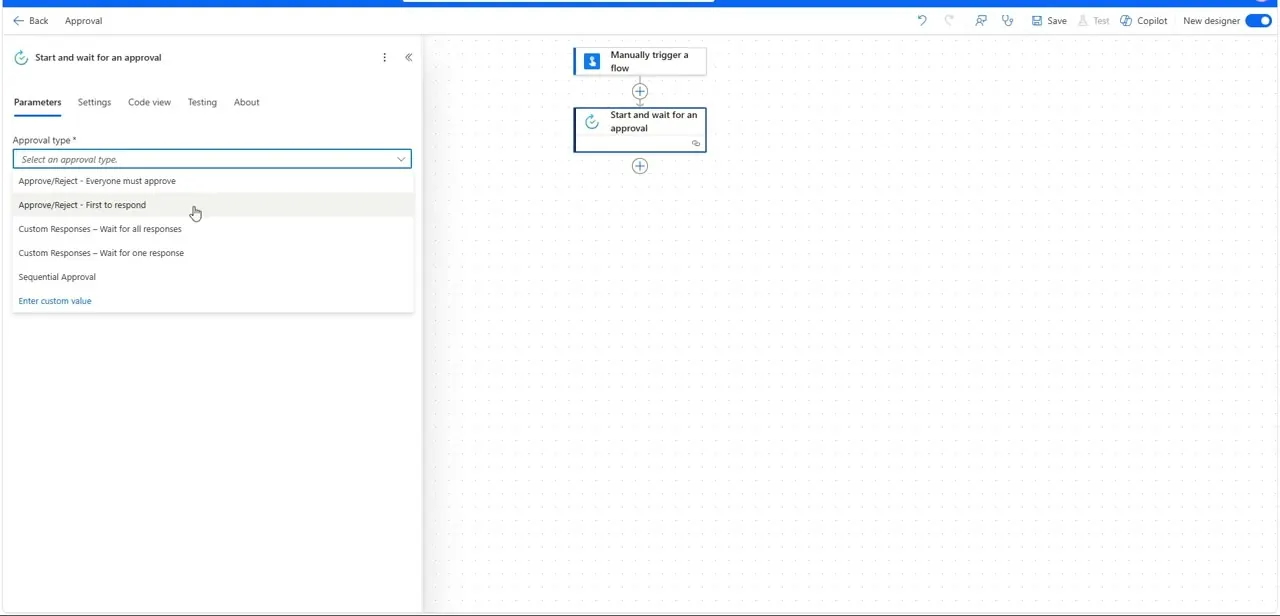
With the trigger in place, add a "Start and wait for an approval" step underneath it. This is the core action, and its most important setting is Approval type, a dropdown with five options: Approve/Reject – Everyone must approve, Approve/Reject – First to respond, Custom Responses – Wait for all responses, Custom Responses – Wait for one response, and Sequential Approval.
Everyone-must-approve is right for sign-offs that legally or procedurally need every stakeholder on record; first-to-respond is right when any one of several people can clear a request and you don't want to wait on the slowest one. Sequential Approval routes the request through approvers one at a time, in order, which is what a multi-stage process like manager-then-finance needs.
04Fill in title, assigned approvers, and details
Below the approval type, the action asks for a Title, the Assigned to field where you enter one or more approver email addresses, and Details, a free-text box where you pass through whatever context the approver needs — the requester's name, the amount, a link to the document. Dynamic content from the trigger, like a submitter's name or a form field, can be inserted directly into these fields so each request is self-explanatory without the approver having to dig through email or SharePoint. Keep the title short and specific, since it's what shows up in the approver's Teams and email notification.
05Branch the flow with a condition on the outcome
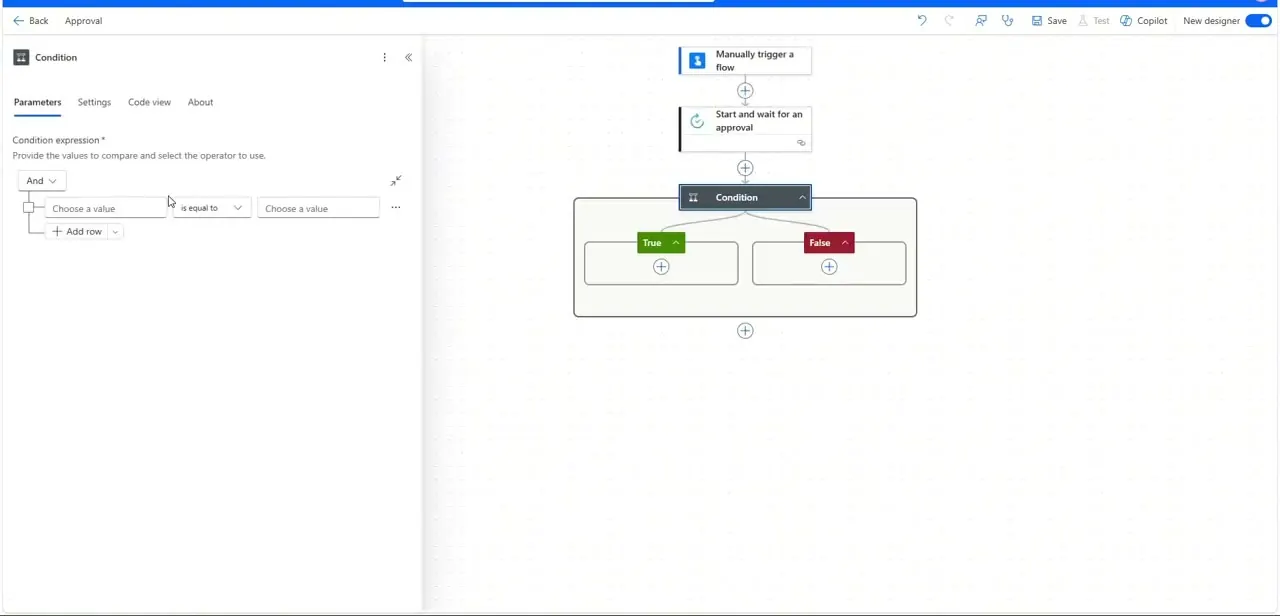
Every approval action returns an Outcome value, and the standard next step is a Condition control checking whether that outcome equals Approve. The condition builder splits into a green True branch and a red False branch, each with its own set of actions you add independently.
In the True branch you'd typically update a record, send a confirmation, or trigger the next stage of work; in the False branch you'd notify the requester of the rejection, often with the approver's comments included. This single condition is what turns a flow that just asks a question into one that actually acts on the answer.
06Add notifications for both outcomes
Inside each branch, add a "Send an email (V2)" or "Post message in a chat or channel" action addressed back to the original requester. Reference the approver's response and comments using dynamic content so the notification explains what happened rather than just stating a status. It's worth adding a notification on the False branch too, not just approvals — a request that silently disappears when rejected is the single most common complaint about homegrown approval processes, and one extra action here avoids it entirely.
07Save, test, and connect it to where work happens
Save the flow and run a manual test end to end, watching each step's run history to confirm the approval email actually reaches the approver and the condition branches correctly on both an approve and a reject. Once it works, connect the trigger side to wherever requests originate — a Microsoft Form, a SharePoint list, or a Teams button — so people never have to open Power Automate directly to start one. The flow itself stays exactly the same; only the trigger and the fields feeding into Details change per use case, which is why one approval pattern easily covers leave requests, invoices, and purchase orders alike.
Frequently asked questions
Where do I actually build an approval flow — is it inside the Approvals hub?
No. The Approvals hub only displays approvals that flows have already generated. You build the flow itself from Create → Build an instant cloud flow (or another trigger type), adding a Start and wait for an approval action.
Can I build multi-stage approval workflows?
Yes. Choose Sequential Approval as the approval type, or chain multiple Start and wait for an approval actions one after another, so a request moves through several approvers in order.
What happens after an approver responds?
The action returns an Outcome value. A Condition step checks that value and routes the flow into a True (approved) or False (rejected) branch, where you add whatever follow-up actions — notifications, record updates — fit your process.
Can approval flows be used for things other than leave requests?
Yes — invoices, purchase orders, expense claims, document sign-off, or any process needing a recorded yes or no. Only the trigger and the details you pass into the approval change between use cases.
Do approvers need a Power Automate license to respond?
Approvers respond through the email or Teams notification they receive, not by opening Power Automate, so they don't need a flow-building license just to approve or reject a request.
About the author

Impran M N
I've been hooked on technology for as long as I can remember — especially the new tools and AI apps that seem to land every other week. Easy Tech Tuts is where I write up whatever I've just worked out: I do the task in the real product, record the screen, and turn it into the guide I wish I'd found first.