Easy Tech Tuts
How to Automatically Save Email Attachments to OneDrive with Power Automate Easily 2026
By Impran M N
Dragging attachments out of email and into OneDrive by hand is the kind of task that's easy to fall behind on the moment your inbox gets busy. Power Automate can do it the instant an email arrives, and it can even sort attachments into different folders depending on who sent them. This guide follows a real flow built exactly that way — trigger on new email, branch true or false on a condition, then loop through and save each attachment — using the actual designer screens so you can see how the pieces connect.
01Start an automated cloud flow and choose the email trigger
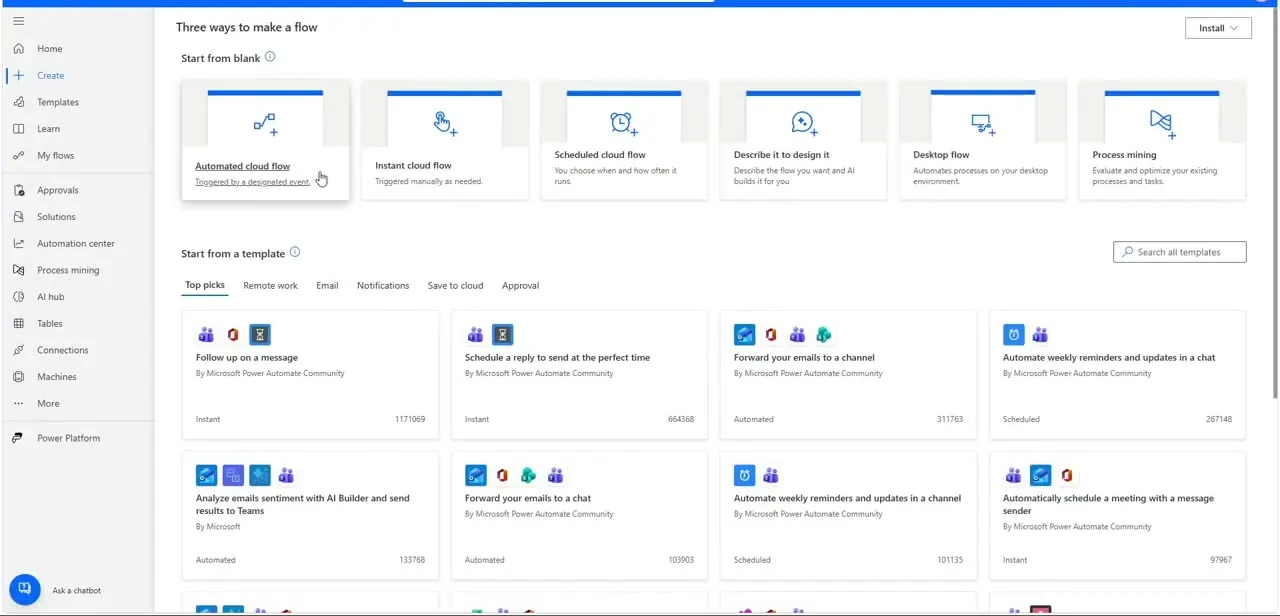
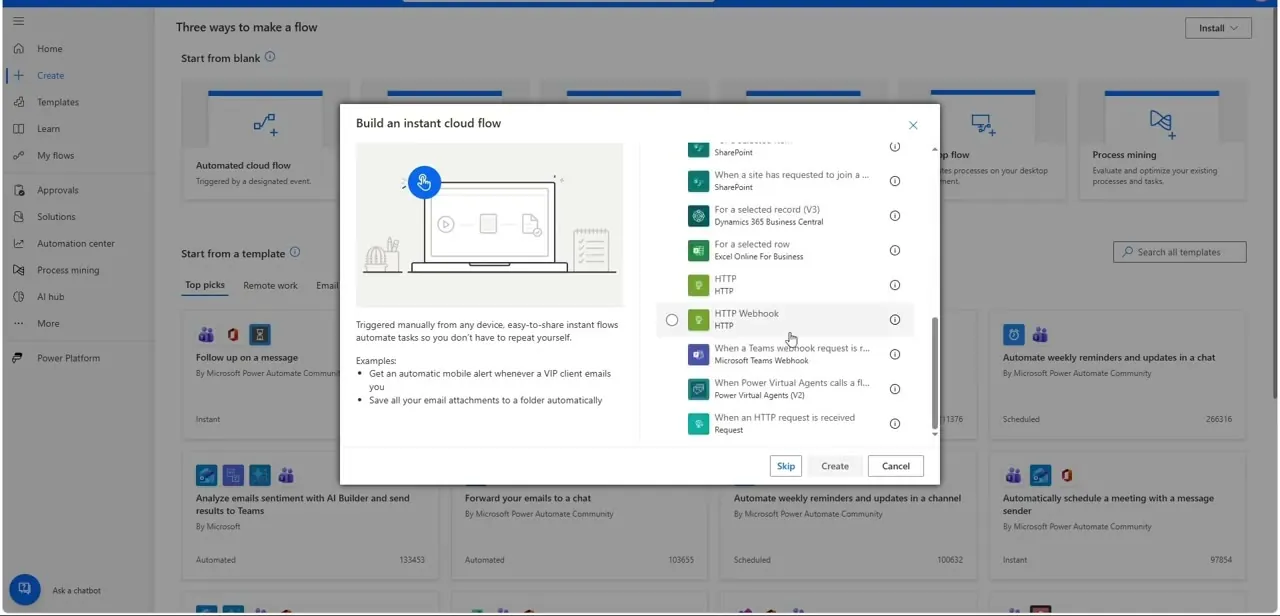
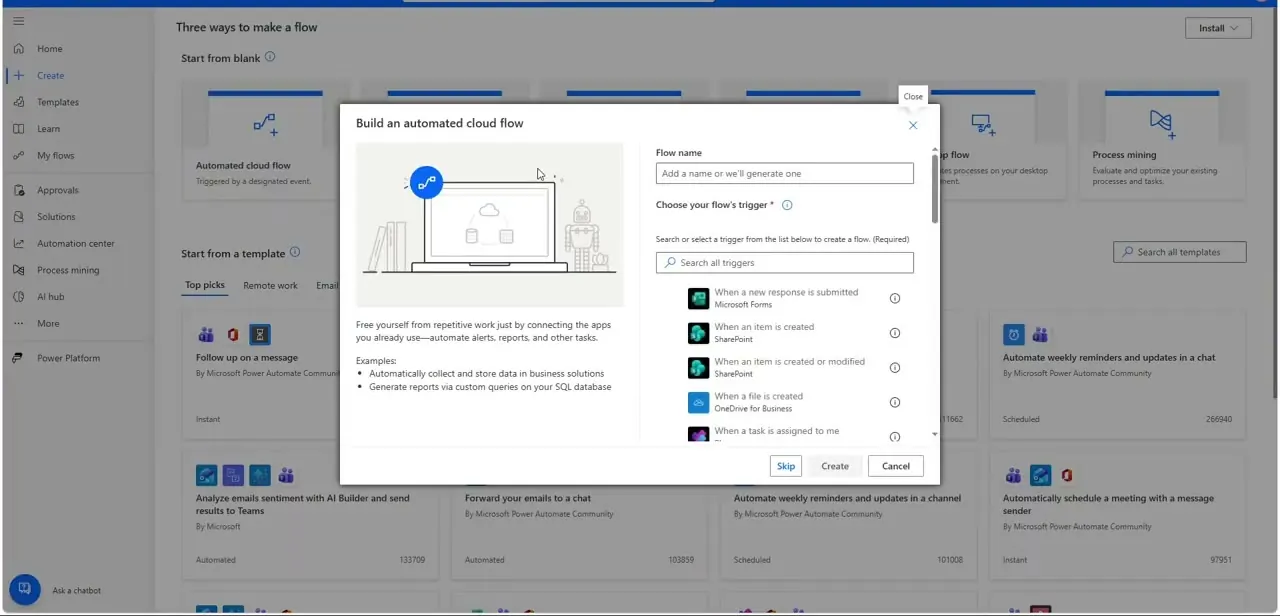
From Create, choose Automated cloud flow, which opens a "Build an automated cloud flow" dialog asking for a Flow name and a trigger. The trigger list is searchable and covers a wide range of events — When a new response is submitted, When an item is created in SharePoint, When a file is created in OneDrive for Business, and more — but for this flow you want the Outlook trigger, "When a new email arrives." Naming the flow clearly here (rather than leaving the auto-generated name) makes it much easier to find later in a busy My flows list.
02Add a Condition to branch by sender
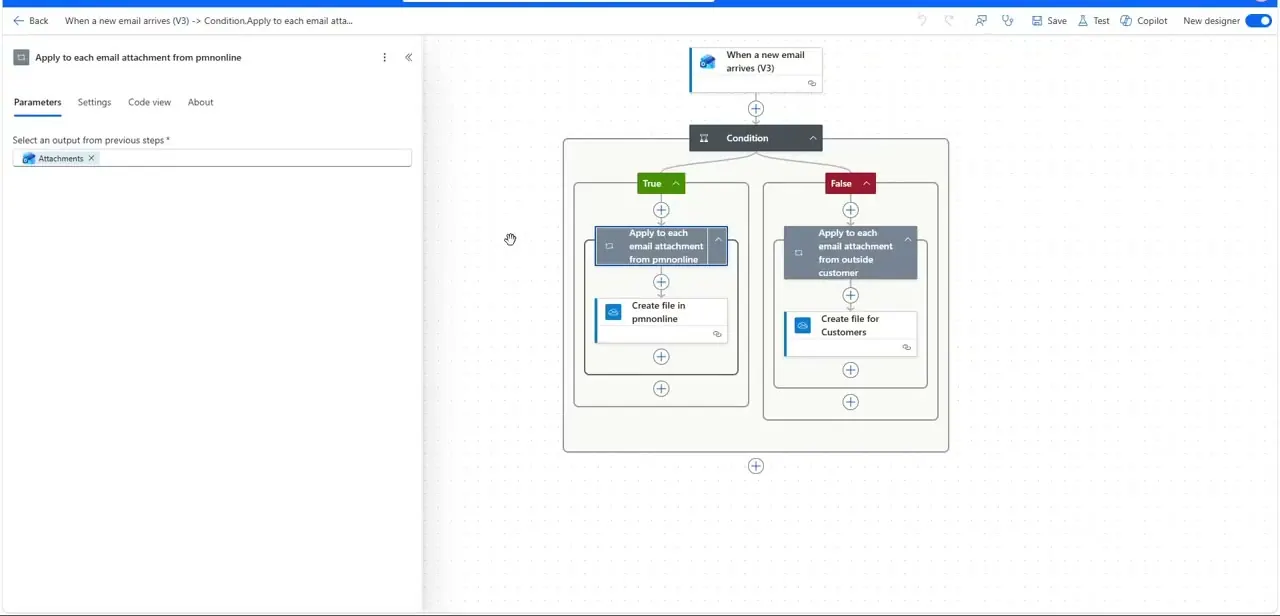
After the email trigger, this flow adds a Condition step that splits into a True branch and a False branch — in this case, checking whether the email came from inside the organization (pmnonline) versus an outside customer. Branching like this before you even touch attachments means you can route internal files and external files to completely different destinations without writing two separate flows.
03Add the OneDrive action to each branch
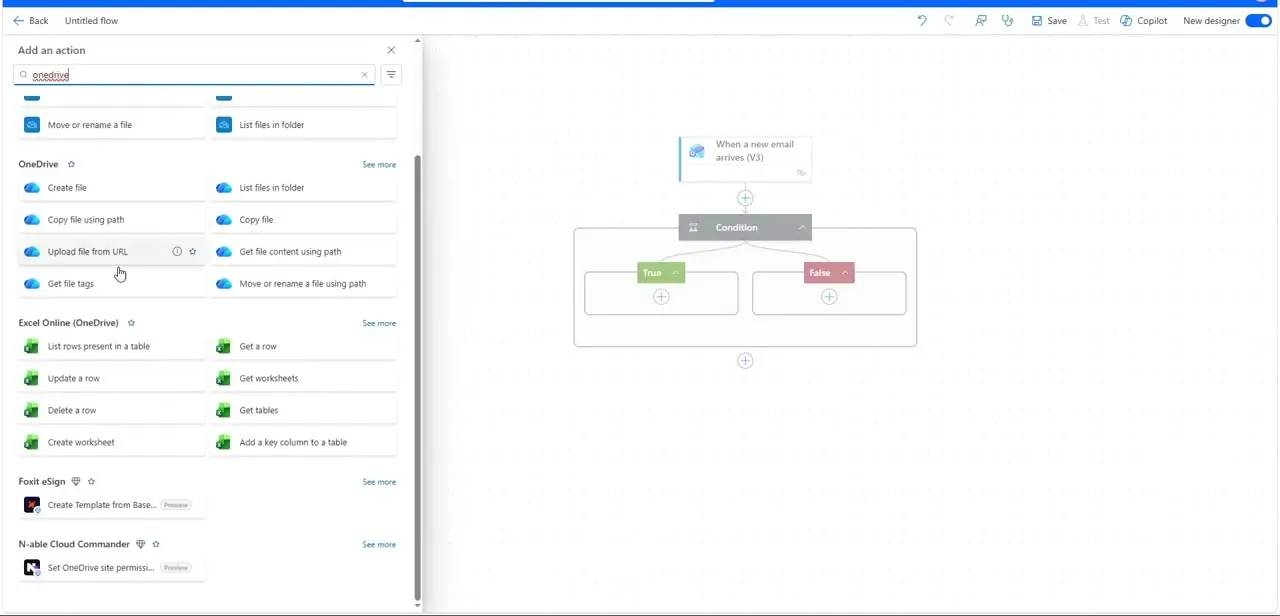
Inside the flow designer, search the action picker for "onedrive" to see the available OneDrive actions: Create file, Copy file using path, Upload file from URL, Get file tags, and more. Create file is the one that matters here — it takes a file name and content and writes it into a folder you specify. This flow adds a Create file action inside both the True and False branches of the earlier condition, so each path ends up writing to its own destination.
04Loop through attachments with Apply to each
An email can carry more than one attachment, so each branch wraps its Create file action inside an Apply to each loop set to the trigger's Attachments output. In the finished flow this shows up as two clearly named loops — "Apply to each email attachment from pmnonline" feeding into "Create file in pmnonline," and "Apply to each email attachment from outside customer" feeding into "Create file for Customers." Naming the loops and actions this specifically, rather than leaving Power Automate's defaults, makes the whole flow self-documenting when you or a teammate opens it months later.
05Point each branch at the right OneDrive folder
Inside each Create file action, set the folder path to wherever that branch's files should land — an internal team folder for the True branch, a customer-facing or intake folder for the False branch. Keeping these destinations separate at the flow level means nobody has to remember to manually sort attachments after the fact; the routing decision happens automatically based on the sender.
06Guard against duplicate uploads
Because this flow can run every time a matching email arrives, the same attachment name can show up more than once if someone resends a message. Add a check before Create file — either a Get file metadata call against the target folder or a simple condition on the file name — and if a match already exists, append a timestamp to the new file's name rather than overwriting or skipping it, so you never lose a file silently.
Frequently asked questions
Can I choose which OneDrive folder attachments go into?
Yes. Each Create file action specifies its own destination folder, and this flow uses two different folders depending on which branch of the Condition an email falls into.
Will this work with multiple attachments in one email?
Yes. Each branch wraps its Create file action inside an Apply to each loop over the trigger's Attachments output, so every attachment in the email gets saved individually.
Can I filter out emails I don't want processed?
Yes. Beyond the Condition used here to branch by sender, the email trigger's own Advanced parameters let you filter by sender, subject, or folder so irrelevant emails never enter the flow at all.
How do I prevent the same attachment from being saved twice?
Add a file-existence check against the destination OneDrive folder before the Create file step, and append a timestamp to the filename if a match already exists.
Why use a Condition to branch instead of one Create file action?
Branching lets you route attachments to different folders based on who sent the email — internal senders to one location, outside customers to another — without building and maintaining two separate flows.
About the author

Impran M N
I've been hooked on technology for as long as I can remember — especially the new tools and AI apps that seem to land every other week. Easy Tech Tuts is where I write up whatever I've just worked out: I do the task in the real product, record the screen, and turn it into the guide I wish I'd found first.