Easy Tech Tuts
How to Upload Files in Microsoft Teams Easily 2026
By Impran M N
Sharing a document in a Teams channel or community doesn't mean leaving the conversation to dig through folders — the attachment option lives right in the message compose box, next to the same formatting tools you'd use for a normal post. This guide walks through that flow exactly as it appears: opening a channel, composing a post, and choosing where the file comes from, whether that's the cloud or your own device.
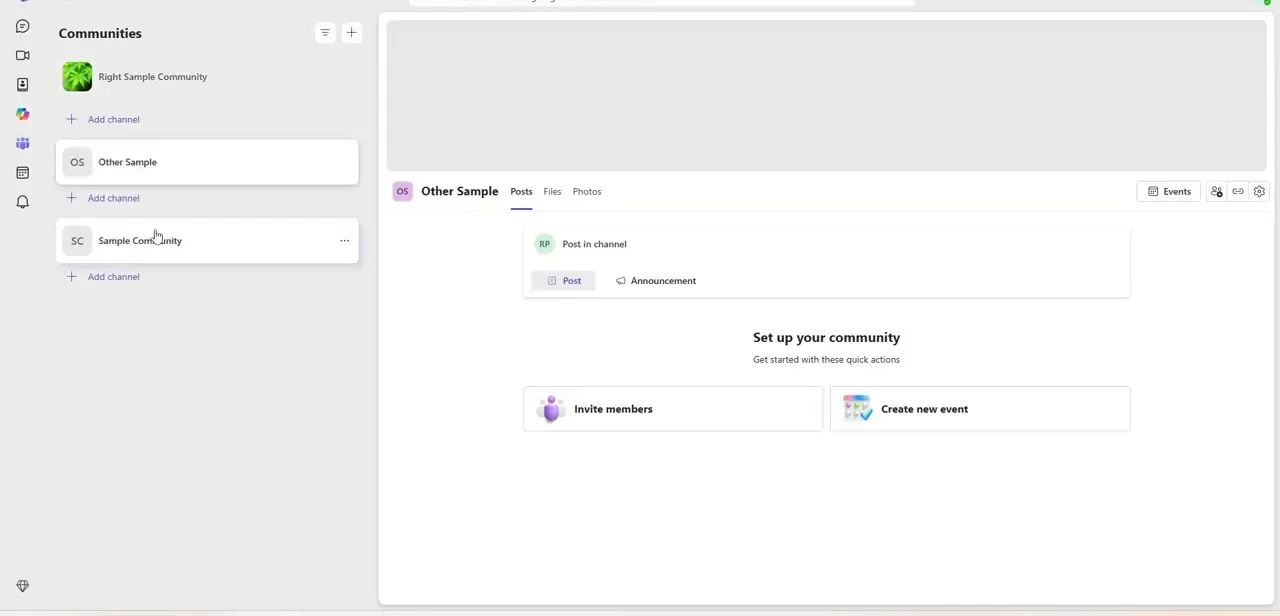
01Open the channel or community you're posting to
In the left rail, Teams groups channels under whatever community or team you're part of, each with its own set of channels you can add to. Selecting a channel brings up its main feed, along with three tabs across the top — Posts, Files, and Photos — which matters because Files is where anything you upload ends up living permanently, not just in the scrollback of the conversation.
02Start a post and open the compose toolbar
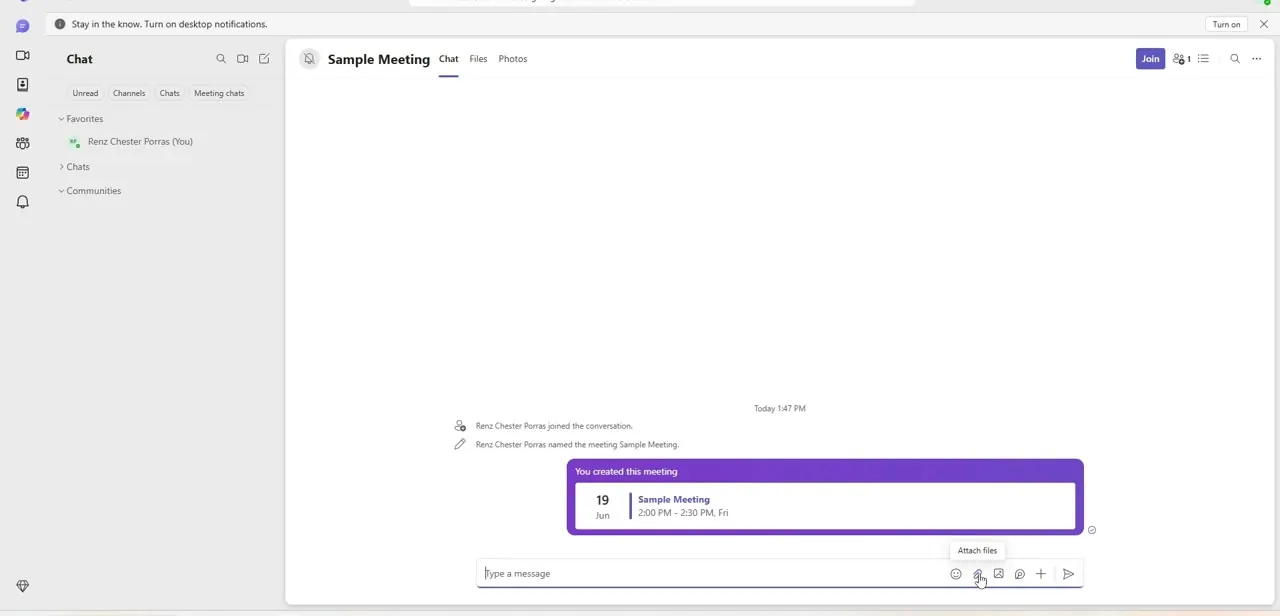
Click into the post composer and it expands into a full formatting toolbar — bold, italic, lists, highlighting, and a set of icons along the bottom row including an emoji picker, a paperclip for attachments, and an image icon. Add a subject line if you want the post easy to find later, then type your message above or alongside the file you're about to attach.
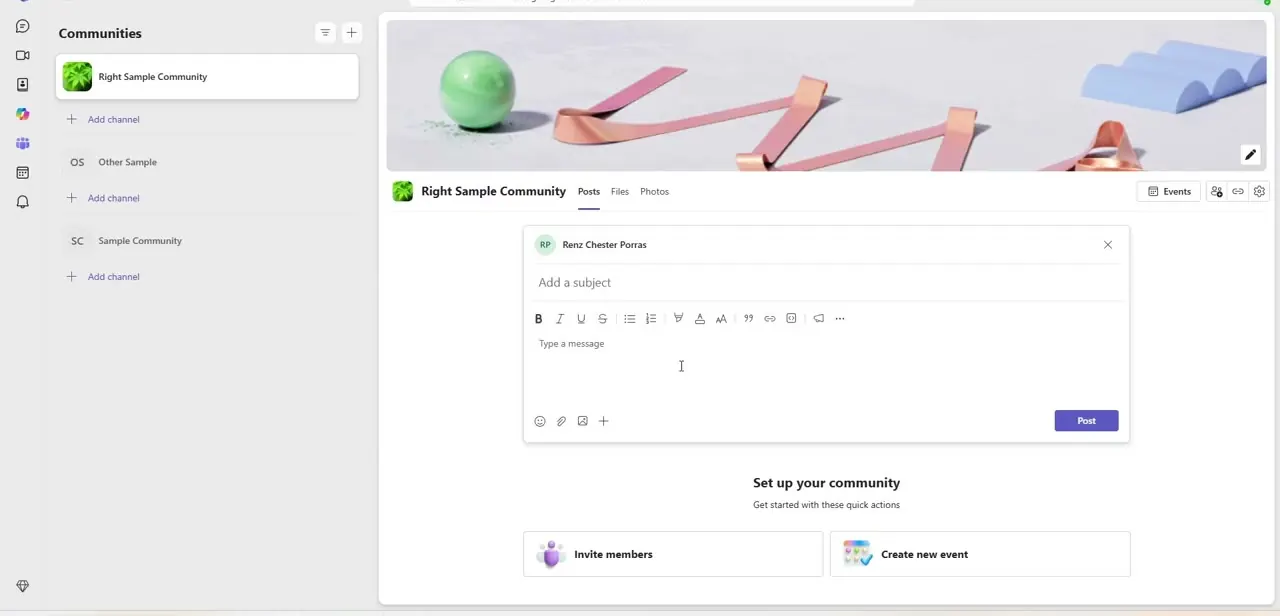
03Click the paperclip to attach a file
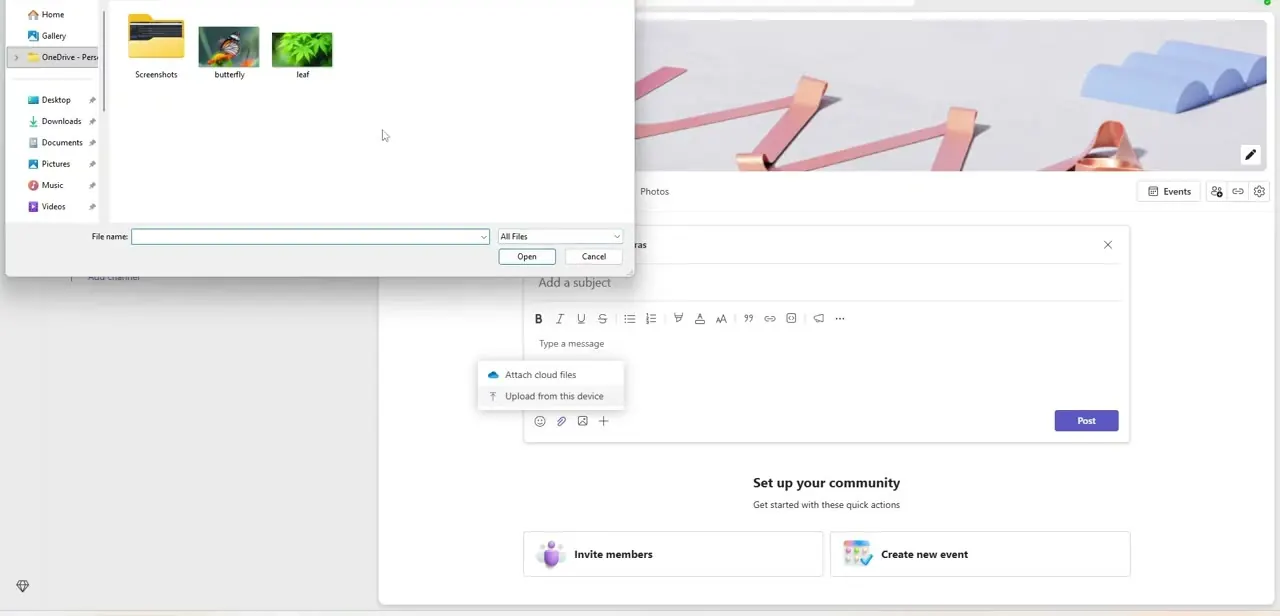
Clicking the paperclip icon opens two options: Attach cloud files, for pulling something already stored in OneDrive or SharePoint, and Upload from this device, for a file sitting on your local computer. Cloud files keep everyone on the same version and don't take up local upload time; a device upload is faster when the file only exists locally and hasn't been saved to the cloud yet.
04Pick the file from your device
Choosing Upload from this device opens your operating system's standard file browser, with your usual shortcuts down the left side — Desktop, Downloads, Documents, Pictures — plus any pinned folders. Navigate to the file, select it, and click Open to attach it to the post you're composing.
05Post the message with the file attached
Once the file shows up attached to your draft, finish typing your message and click Post. The file becomes part of that conversation entry, but it's also filed automatically into the channel's Files tab, so anyone who missed the original post can still find it without scrolling back through history.
06Find it again later from the Files tab
Instead of hunting through old messages, click the Files tab at the top of the channel to see everything shared there in one organized list. This is also where you'd go to upload a file directly, without wrapping it in a post at all — useful for building out a shared reference library rather than sharing something as part of an active conversation.
Frequently asked questions
Where is the attach-file button in Teams?
Inside the message compose box, in the row of icons below the text field — it's the paperclip icon, alongside emoji and image icons.
What's the difference between Attach cloud files and Upload from this device?
Attach cloud files pulls something already saved in OneDrive or SharePoint, keeping everyone on the same synced version. Upload from this device opens your local file browser for a file that only exists on your computer.
Where do files I share in a channel end up?
Alongside appearing in the post itself, they're automatically filed into that channel's Files tab, which sits next to Posts and Photos at the top of the channel.
Can I upload a file without writing a post?
Yes. Going directly to the Files tab lets you upload files into the channel's shared library without attaching them to a specific conversation post.
Do I need to type a message to attach a file?
No, but adding a subject or short message makes the post easier to find later, since search and scrollback both rely on that text.
About the author

Impran M N
I've been hooked on technology for as long as I can remember — especially the new tools and AI apps that seem to land every other week. Easy Tech Tuts is where I write up whatever I've just worked out: I do the task in the real product, record the screen, and turn it into the guide I wish I'd found first.