Easy Tech Tuts
How to Autofill Jotform Using Excel Easily 2026
By Impran M N
Asking a returning customer to retype their name, address, and order history into a form every single time is friction nobody needs, especially when that data already sits in a spreadsheet you maintain. Jotform's Spreadsheet to Form widget closes that gap by letting a form field autofill from an uploaded Excel file the moment a user enters a matching access code. This guide follows the real path through the Form Builder — opening the widgets panel, finding the widget by search, and what it takes to prepare the spreadsheet behind it.
01Open your form in the Form Builder
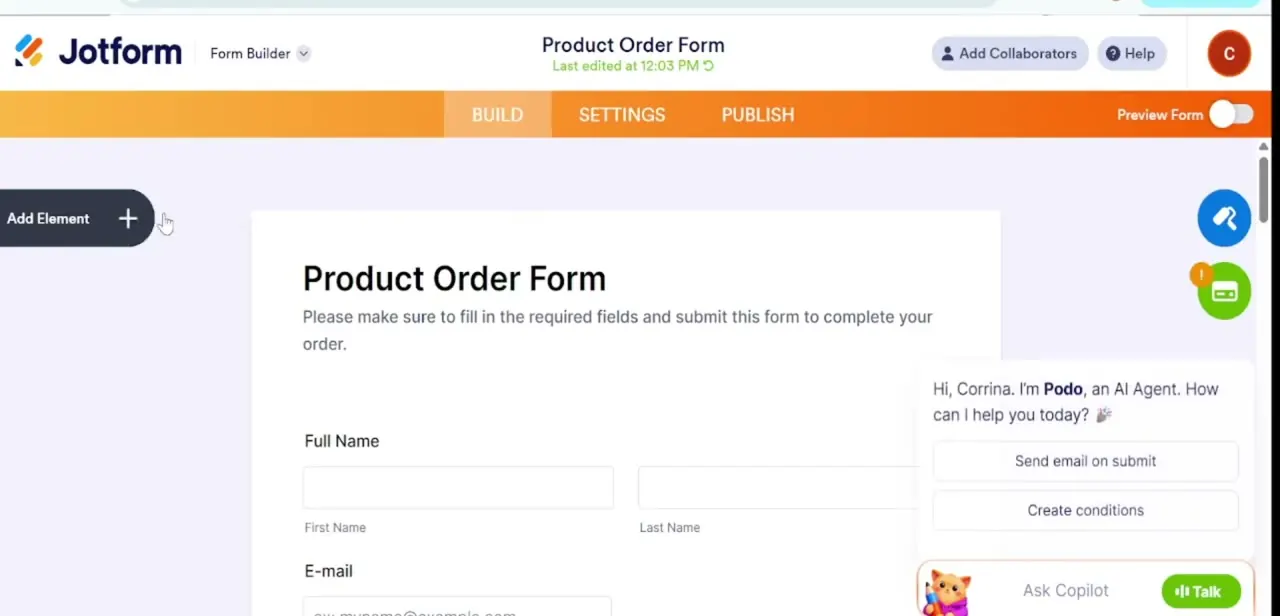
Start from an existing form — in this walkthrough, a Product Order Form with Full Name and E-mail fields already laid out — and make sure you're on the BUILD tab rather than Settings or Publish. The Add Element control sits in the top-left corner of the canvas; that's the entry point for adding any new field or widget, including the one that handles autofill.
02Search the Widgets tab for Spreadsheet to Form
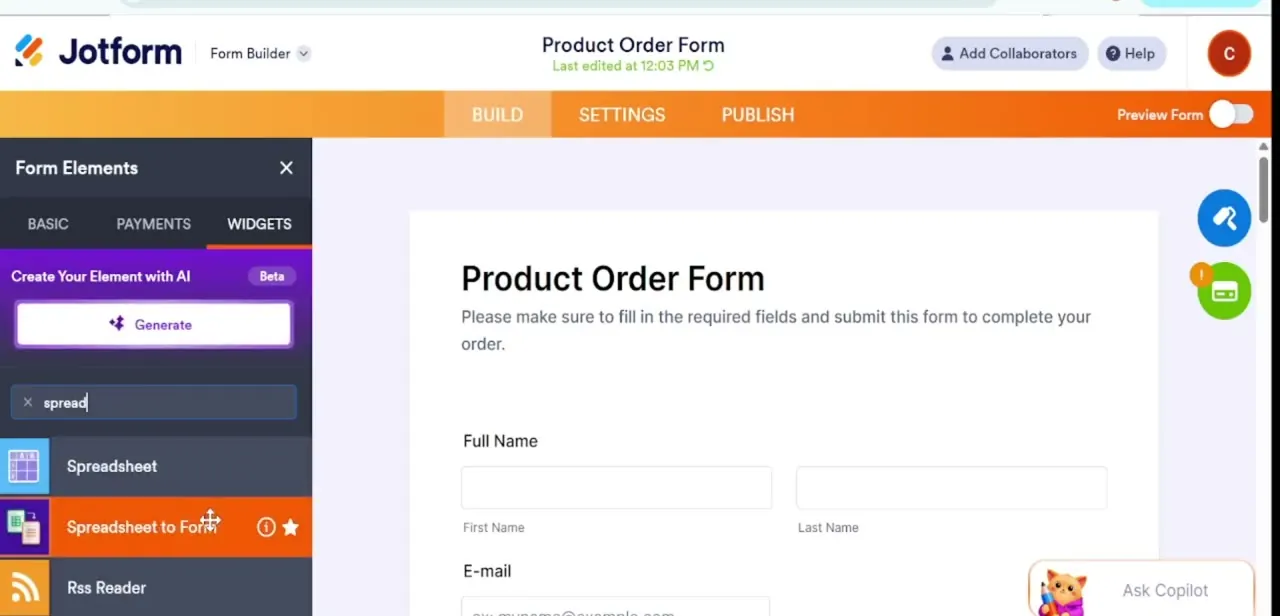
Clicking Add Element opens the Form Elements panel, split into Basic, Payments, and Widgets tabs. Switch to Widgets and type into the search box — searching "spread" surfaces Spreadsheet, Spreadsheet to Form, and Rss Reader as matches. Spreadsheet to Form is the one built specifically for this use case: it reads an uploaded file and uses it to populate other fields on the same form based on a lookup value.
03Prepare your Excel file with an access code column
Before uploading anything, structure your spreadsheet so one column holds a unique identifier per row — an order number, a customer ID, a code you've already issued — since this is what a user will type in to trigger the lookup. Every other column becomes a candidate for autofilling a form field: name, address, phone number, order details, whatever your form needs pre-populated. A spreadsheet without a clean, unique key column won't map reliably, so get this structure right before uploading.
04Add the widget and upload the spreadsheet
Clicking Spreadsheet to Form from the search results drops it onto your form canvas and opens its configuration panel. From there you upload the prepared .xlsx file directly — the widget reads the column headers from the file so you can reference them in the next step. Keep the file's header row clean and consistent, since those exact header labels are what you'll be mapping shortly.
05Set the access code column and map the rest
In the widget's settings, designate which uploaded column is the access code — the lookup key — and then map the remaining spreadsheet columns to the corresponding fields already on your form, like matching an "Email" column header to the form's E-mail field. This mapping step is what actually connects a spreadsheet row to specific inputs on the page; get a mapping wrong and that field will either populate with the wrong data or stay empty.
06Customize the access code prompt and test it live
The widget adds a front-end input box where users type their access code, along with a verification button — both are customizable, so you can adjust the label text and button styling to match your form's design rather than leaving Jotform's defaults. Once configured, preview the form and test the flow end to end: enter a code from your spreadsheet and confirm every mapped field populates correctly, then repeat the check on a mobile viewport, since form layouts often behave differently at narrow widths.
Frequently asked questions
What file formats does the Spreadsheet to Form widget accept?
The widget is built around Excel files, so preparing your data as a properly structured .xlsx file with clean column headers is the standard approach.
Can one access code fill in multiple fields at once?
Yes. Once a spreadsheet column is mapped to a form field, entering the matching access code populates every mapped field from that row in one action.
Does this widget work on mobile forms?
Yes, but test the live autofill flow on both desktop and mobile after setup, since layout and input behavior can differ at narrow widths.
What happens if a user enters an access code that isn't in the spreadsheet?
The widget won't find a matching row, so the mapped fields won't populate — the form typically remains fillable manually in that case.
Where do I add the Spreadsheet to Form widget?
Click Add Element in the Form Builder, switch to the Widgets tab, and search for "spreadsheet" — Spreadsheet to Form appears alongside related results.
About the author

Impran M N
I've been hooked on technology for as long as I can remember — especially the new tools and AI apps that seem to land every other week. Easy Tech Tuts is where I write up whatever I've just worked out: I do the task in the real product, record the screen, and turn it into the guide I wish I'd found first.