Easy Tech Tuts
How to Manually Set Existing Contacts as Marketing Contacts in HubSpot Easily 2026
By Impran M N
HubSpot bills separately for non-marketing records and marketing-eligible contacts, so if you want to email a group that's already sitting in your CRM, you need to flip their status manually first. This guide walks through the actual navigation — from the home dashboard into CRM, then into the Contacts table — filtering to the right segment, selecting records, and running the bulk update that marks them as marketing contacts. It also covers why that confirmation step and the billing usage meter matter before you commit a large batch.
01Start from your HubSpot home dashboard
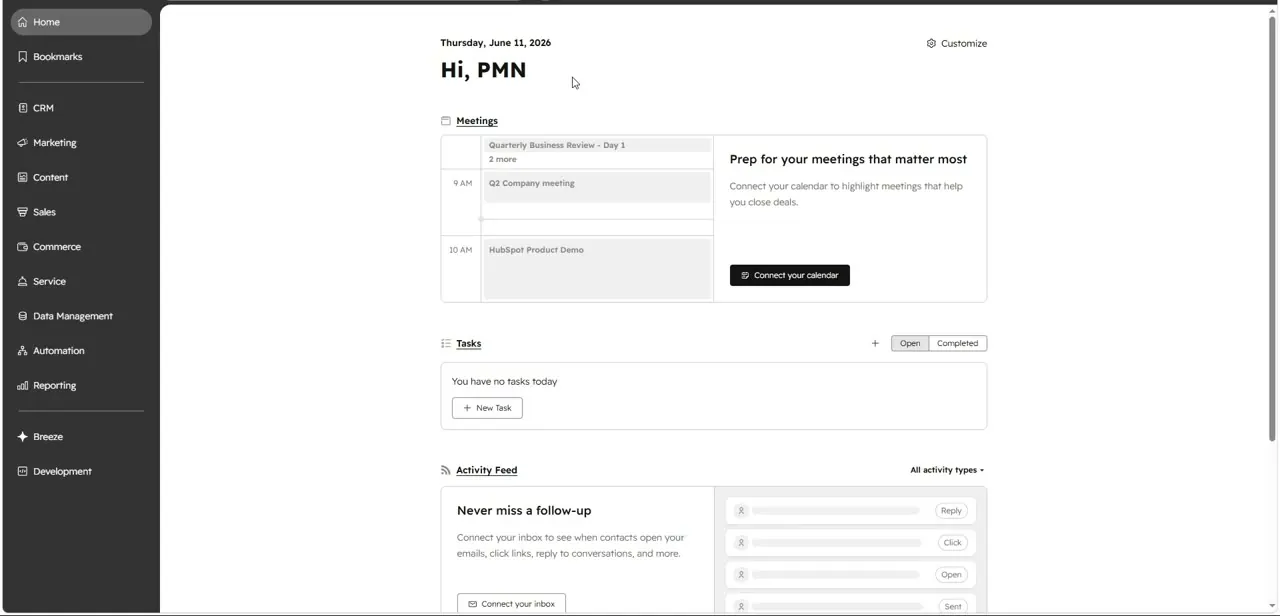
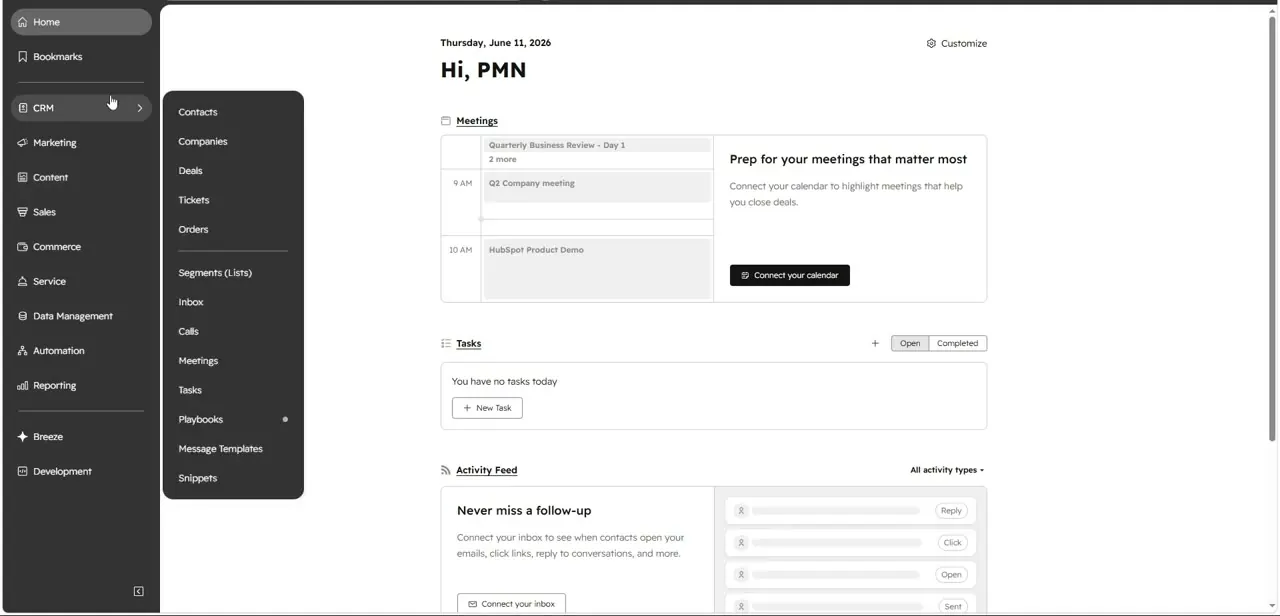
Logging into HubSpot lands you on a home screen greeting you by name, with today's meetings, an empty task list, and an activity feed prompting you to connect your calendar and inbox. The left-hand navigation here is the spine of the whole app — Home, CRM, Marketing, Content, Sales, Commerce, Service, Data Management, Automation, and Reporting all live in this same rail. Contacts isn't visible yet at this level; it's tucked one layer down inside CRM, which is worth knowing since it's easy to go hunting for it under Sales instead.
02Open CRM and go to Contacts
Hovering the CRM item in the left rail expands a flyout with Contacts, Companies, Deals, Tickets, and Orders at the top, followed by Segments (Lists), Inbox, Calls, Meetings, Tasks, Playbooks, Message Templates, and Snippets further down. Contacts is the first item in that list and takes you to your full database in table form. If you only need a specific subset of contacts, Segments (Lists) right below it is where any saved views you've already built will be waiting.
03Filter to the segment you want to update
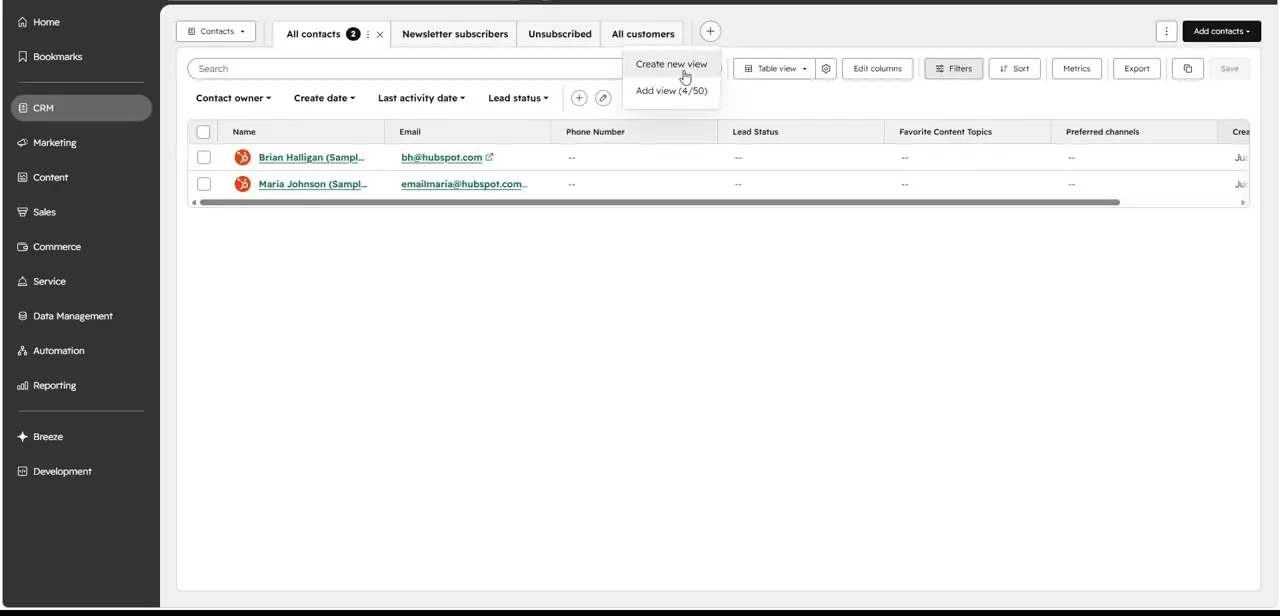
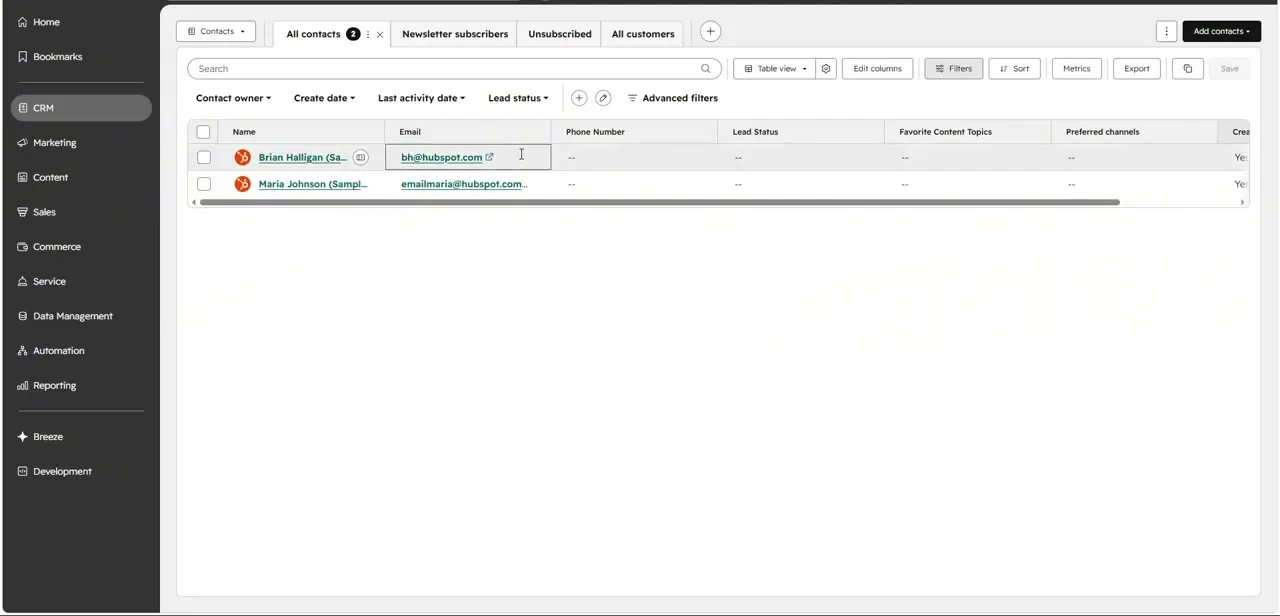
On the Contacts screen, a row of tabs across the top separates saved views like All contacts, Newsletter subscribers, Unsubscribed, and All customers, and the table itself gives you filters for Contact owner, Create date, Last activity date, and Lead status, plus an Advanced filters option for anything more specific. If you're reclassifying a group tied to a past import or campaign, building a filter here first keeps you from scrolling through unrelated records. A small sample table might show just a couple of rows, like two test contacts with placeholder emails, but the same filtering and selection mechanics apply whether you're working with two records or two thousand.
04Select the target rows
Once your view is filtered to the right group, check the box in the table header to select every visible row at once, or check individual rows if you only want a handful. HubSpot shows a running count of how many contacts are selected, which is your last chance to sanity-check the batch size before you commit — a filter that's too loose can accidentally sweep in far more contacts than you meant to reclassify.
05Run the bulk action and confirm
With rows selected, a refreshed toolbar appears above the table with a More dropdown; choosing Set as marketing contacts from that menu opens an inline modal explaining the change. Because this action directly affects your billing tier, HubSpot asks you to type a confirmation keyword into a safety field before the update button becomes active — a deliberate friction point so a bulk edit doesn't silently reclassify thousands of records and bump you into a higher pricing tier by accident. Clicking the update button flips the eligibility flag for every selected contact immediately.
06Check your billing limits afterward
After a bulk update, it's worth a quick trip to your Account & Billing settings to see the usage meter for total live marketing contacts against your plan's limit. Marketing-eligible contacts are what HubSpot actually bills against, so a large reclassification can push you close to a tier boundary even if your total database size hasn't changed. Checking this right after the update, rather than waiting for a surprise invoice, is the cheapest way to catch it.
Frequently asked questions
Does setting a contact as marketing-eligible cost extra?
It can. Marketing contacts count against your subscription tier, so it's worth checking your Account & Billing usage meter before and after a large bulk update.
Can I undo marking contacts as marketing contacts?
Yes, you can typically switch them back to non-marketing status the same way, through the More bulk action dropdown in Contacts.
Why do I need to type a confirmation keyword?
It's a safety step in the Set as marketing contacts modal to prevent accidentally reclassifying a large batch of contacts and affecting your billing tier.
Where do I check how many marketing contacts I'm using?
Your Account & Billing settings show a usage meter for total live marketing contacts against your plan's limit — worth checking right after any bulk change.
Where do I find Contacts in the HubSpot navigation?
From the home dashboard, hover CRM in the left rail — Contacts is the first item in the flyout menu, above Companies, Deals, and Segments (Lists).
About the author

Impran M N
I've been hooked on technology for as long as I can remember — especially the new tools and AI apps that seem to land every other week. Easy Tech Tuts is where I write up whatever I've just worked out: I do the task in the real product, record the screen, and turn it into the guide I wish I'd found first.