Easy Tech Tuts
How to Upload Manual Bank Transactions From CSV or Excel in QuickBooks Online Easily 2026
By Impran M N
When a bank feed isn't available, or you'd rather control exactly what gets imported, QuickBooks Online lets you bring transactions in manually from a CSV or Excel file instead of typing each one by hand. This guide covers where that upload option actually lives, how the column-mapping step works so QuickBooks reads your file correctly, and how to check the results once they land in your account. It's aimed at business owners and accountants managing books for one company or several clients without a direct bank connection.
01Format your file before you upload anything
QuickBooks Online's importer expects a simple, consistent structure: one row per transaction, with clear columns for date, description, and amount. Keep dates in a single consistent format throughout the file rather than mixing styles, and decide up front whether your amounts will sit in one column (positive for deposits, negative for withdrawals) or split across separate spend and receive columns — you'll be asked to specify this during import, so it's easier to structure the file correctly the first time than to fix it mid-upload.
02Go to Bank transactions and pick the account
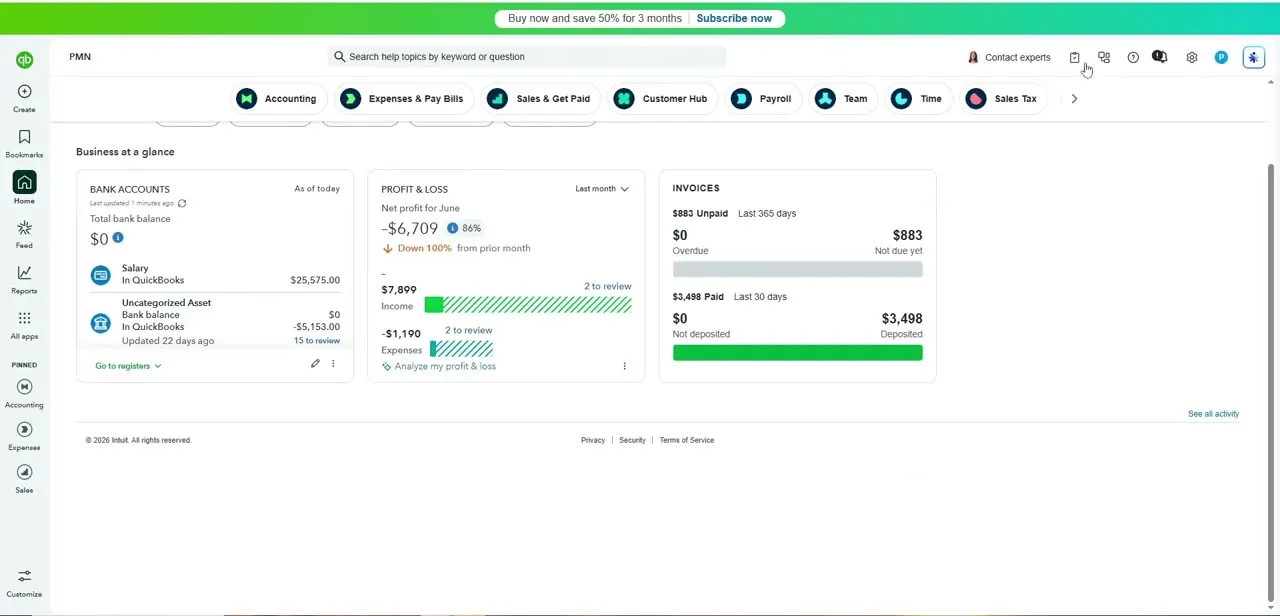
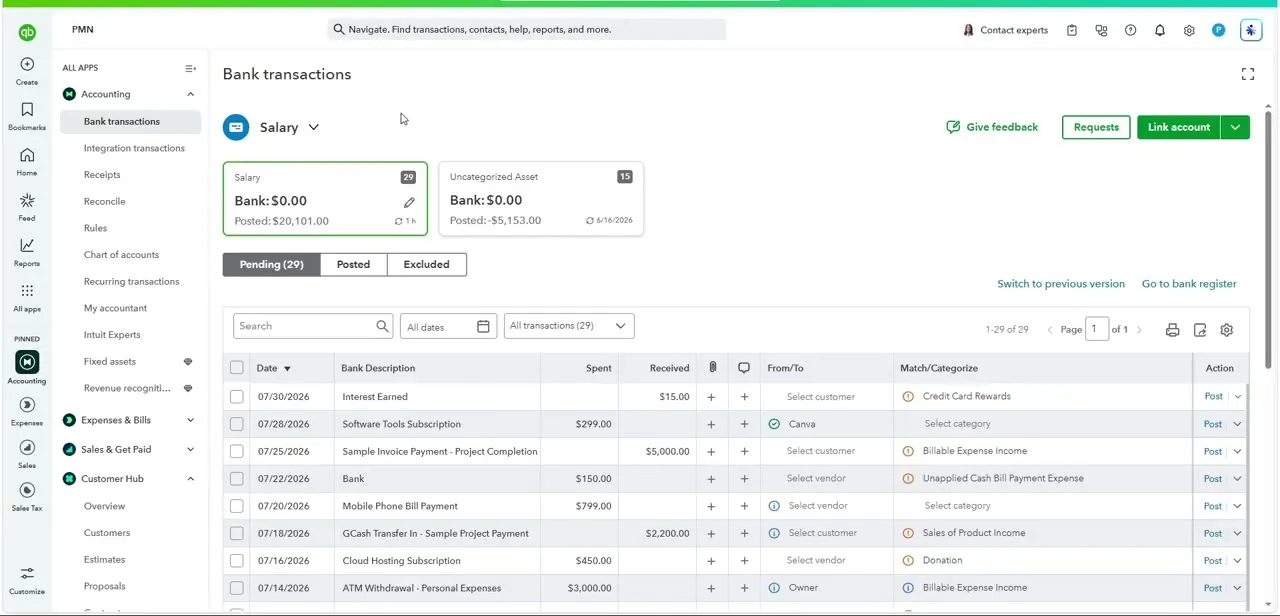
From the left-hand menu under Accounting, open Bank transactions. Each connected or manually tracked account shows as its own tile — Salary, Uncategorized Asset, and so on — with a running pending and posted transaction count. Select the account you're uploading into, then use the Link account dropdown in the top right; alongside connecting a live bank feed, it includes the option to upload transactions from a file, which is the entry point into the import wizard.
03Map your file's columns to QuickBooks fields
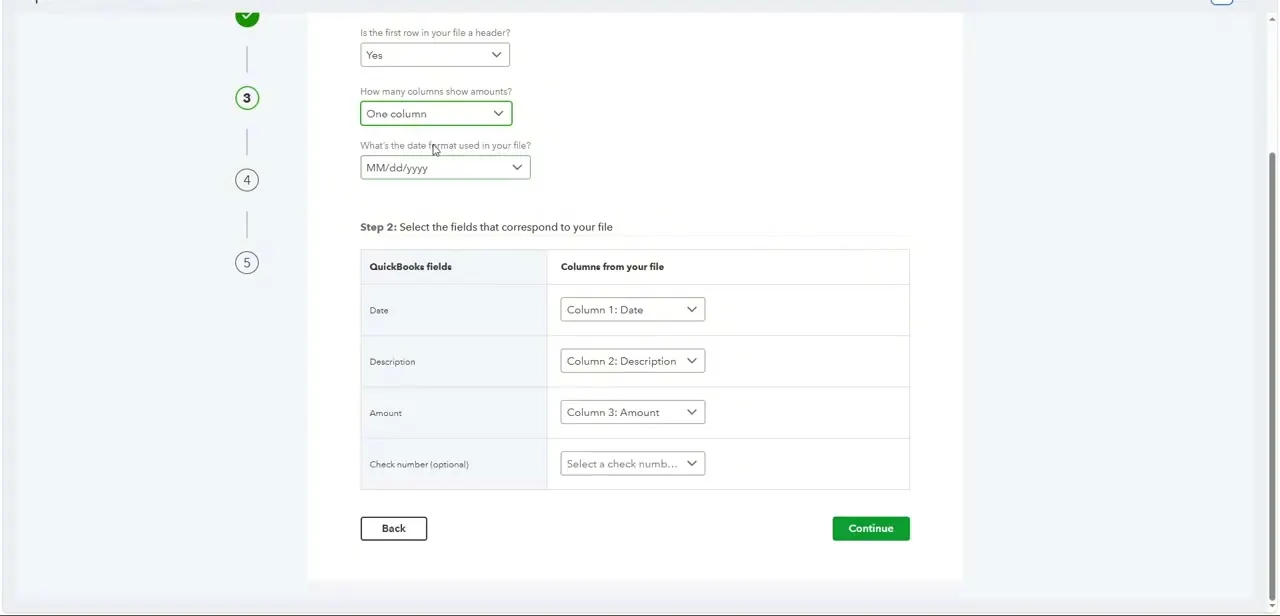
After selecting your file, the wizard first confirms basic file details — whether the first row is a header, how many columns hold amounts, and what date format the file uses. Step 2 is the important part: match each QuickBooks field (Date, Description, Amount, and an optional Check number) to the correct column from your file using the dropdowns provided. QuickBooks usually guesses correctly if your headers are named sensibly, but it's worth checking every row in this table before clicking Continue, since a swapped Date/Amount mapping is hard to spot until transactions land with nonsense values.
04Review what actually came in
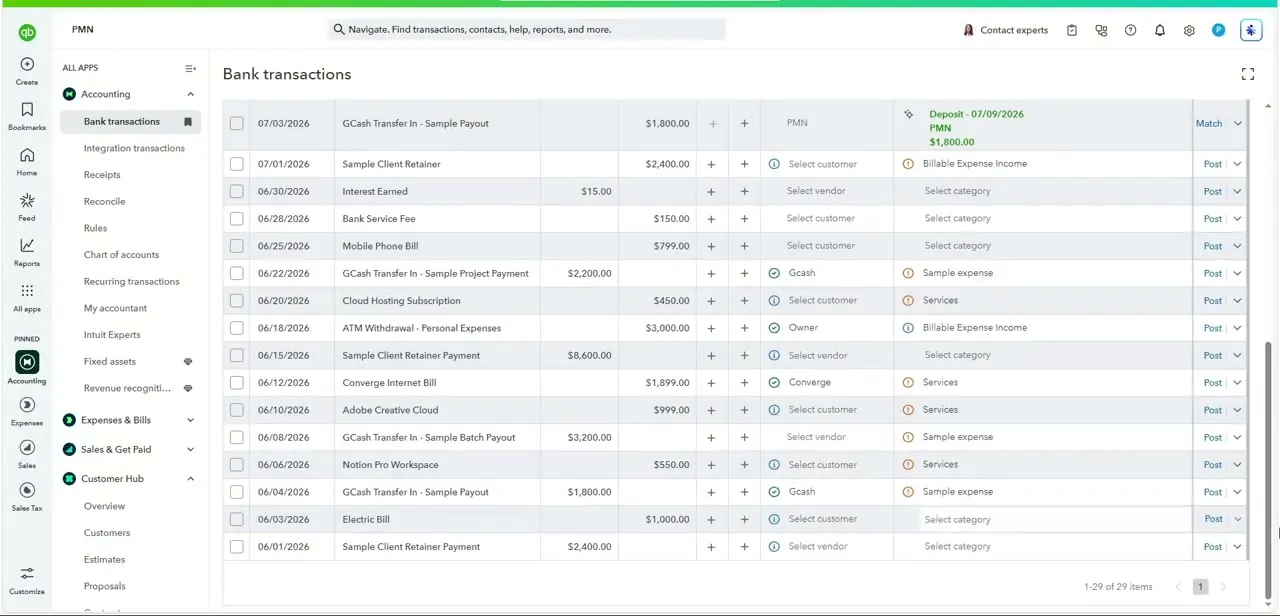
Once the import finishes, the transactions land in the Bank transactions list for that account, sitting under a Pending tab alongside anything already there from a connected feed. Each row shows the date, description, and amount as imported, with columns for assigning a customer or vendor and a category before you post it. Scroll through the full batch and compare the count against your source file — a mismatch usually means a formatting issue skipped a row rather than QuickBooks silently dropping data.
05Categorize and post each transaction
For each row, use the "Select customer" or "Select vendor" field and the category dropdown to classify the transaction, then click Post. Batch-select several rows with matching categories when you can, using the checkboxes on the left, since posting one at a time gets slow once you're working through a file with dozens of rows. Leaving transactions sitting in Pending without posting them means they won't show up correctly in reports, so don't treat the import itself as the finish line.
06Troubleshoot common import issues
If transactions come in with the wrong sign, missing amounts, or garbled dates, the fix is almost always back in the column mapping or the source file's date format rather than anything on the QuickBooks side. Duplicate transactions usually mean the same file — or an overlapping date range — got uploaded twice; check the Excluded tab, since QuickBooks sometimes flags likely duplicates there instead of adding them outright. When in doubt, delete the bad batch from Pending and re-run the import rather than trying to hand-correct dozens of rows individually.
07Reconcile once everything looks right
After posting a clean batch of imported transactions, run a reconciliation for that account against your actual statement to confirm the ending balance matches. This is the real verification step — a smooth-looking import can still hide an error that only shows up once you check the account's balance against reality, so don't skip it just because the upload itself went without errors.
Frequently asked questions
What file formats can I use to upload bank transactions to QuickBooks Online?
CSV and Excel files both work, as long as the file has clear date, description, and amount columns that you can map during the import wizard.
Why would I need to manually upload bank transactions?
This is useful when a direct bank feed isn't available, when a connection has lapsed, or when managing accounts for multiple clients and needing more control over what gets imported and when.
What should I do if the import brings in the wrong amounts or dates?
Check the field mapping and date format settings from the import wizard first — most import errors trace back to a mismatched column rather than a QuickBooks bug, and re-running the import after fixing the file is usually faster than correcting rows by hand.
Should I reconcile transactions after uploading them?
Yes. Posting the imported transactions isn't the same as verifying them — run a reconciliation against your actual statement afterward to confirm the account's ending balance is correct.
What if the same transactions get imported twice?
Check the Excluded tab in Bank transactions, since QuickBooks often flags likely duplicates there instead of posting them automatically. If a whole batch was uploaded twice, it's cleaner to delete the duplicate set from Pending than to sort it out row by row.
About the author

Impran M N
I've been hooked on technology for as long as I can remember — especially the new tools and AI apps that seem to land every other week. Easy Tech Tuts is where I write up whatever I've just worked out: I do the task in the real product, record the screen, and turn it into the guide I wish I'd found first.